
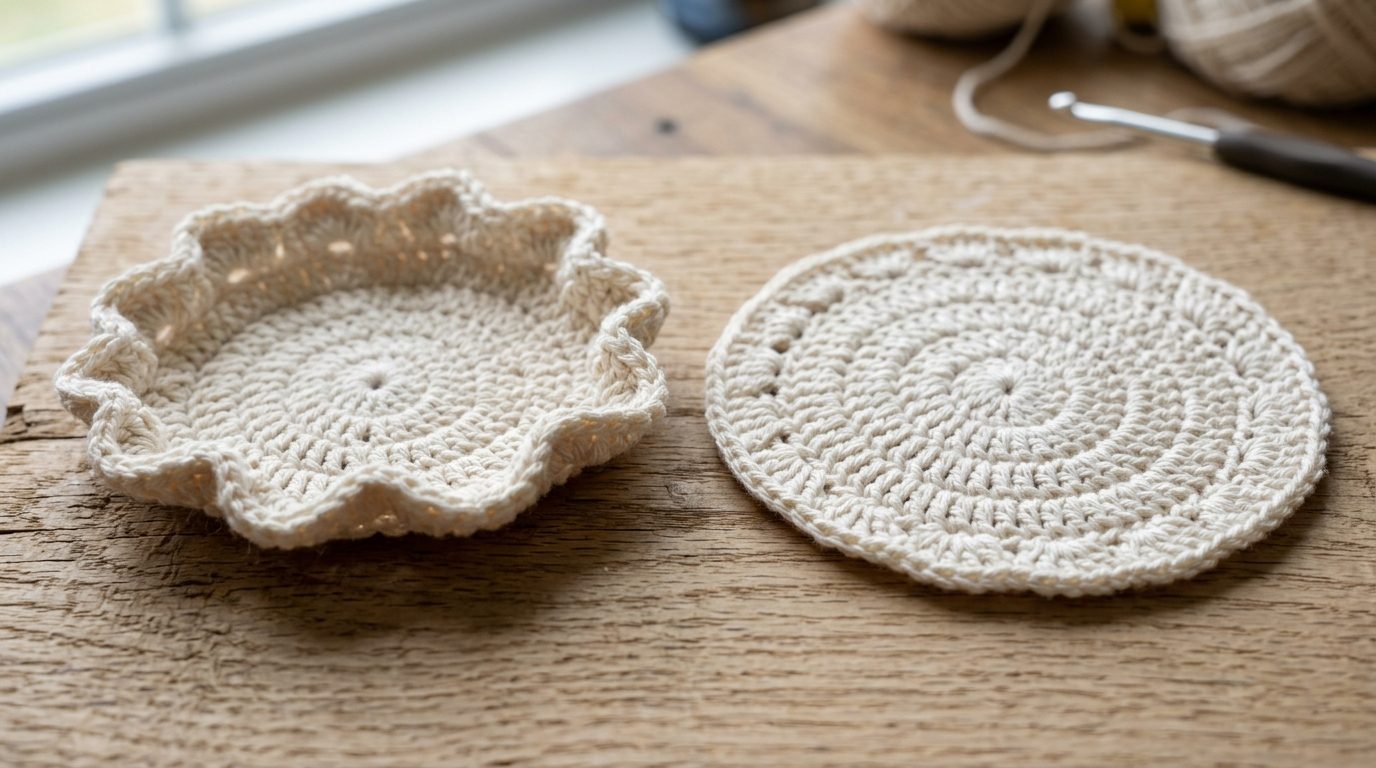
Every crochet maker remembers the sinking feeling of reaching the final round of a handmade coaster or placemat, setting it triumphantly on a flat tabletop, and watching in dismay as the outer edges either curl upward like a cereal bowl or ruffle violently like a wavy potato chip. Fabric distortion is not a sign of bad luck—it is a straightforward mathematical physics problem with an immediate, foolproof solution.
Crochet geometry obeys the laws of trigonometry. When working in the round, your circumference must expand in exact mathematical proportion to your radius. Whether you are stitching our easy crochet coasters, consulting the crochet coaster size guide, or weaving rectangular modern crochet placemats, diagnosing where stitch tension or increase ratios went astray will save you hours of unraveling frustration.
The Two Main Culprits: Bowls vs. Potato Chips
Before ripping out your stitches, diagnose which geometric imbalance has occurred:

- Issue 1: Cupping Into a Bowl (Too Few Stitches or Tight Tension): If your coaster curves upward like a bowl or dome, the outer circumference is too small to accommodate the diameter. You either missed increase stitches or pulled your working yarn with excessive tension.
- Issue 2: Ruffling Like a Potato Chip (Too Many Stitches or Loose Tension): If your edges wave, ripple, and ruffle, there is excess stitch volume around the perimeter with nowhere to go. You added too many increase stitches per round.
- Issue 3: Edges Rolling Inward on Rectangles: On flat blankets and placemats, edges curl because single crochet and slip stitches are naturally shorter in front than behind, creating directional torque.
7 Bench-Tested Fixes for Perfectly Flat Crochet
1. Memorize the Universal Flat Circle Increase Formula
Every crochet stitch height requires an exact starting stitch count and a fixed mathematical increase per round:
- Single Crochet (sc): Start with 6 to 8 stitches in Round 1. Add that exact number on every subsequent round (e.g., 8, 16, 24, 32, 40).
- Half Double Crochet (hdc): Start with 9 to 10 stitches in Round 1. Add 9 or 10 on every round (e.g., 10, 20, 30, 40).
- Double Crochet (dc): Start with 12 stitches in Round 1. Add 12 on every round (e.g., 12, 24, 36, 48).
2. Go Up One Hook Size (The 0.5mm Golden Rule)
Beginners frequently hold cotton yarn with a tight “death-grip” that strangles stitch loops. If your yarn recommends a 4.0mm hook, switch to a 4.5mm or 5.0mm hook. The larger throat naturally elongates loop height, letting stitches breathe and lie completely relaxed.
3. Choose Unmercerized Cotton for Tabletop Projects
Synthetic acrylic and polyester yarns have intense elastic memory that pulls tightly inward. Spun plant fibers—reviewed in our best cotton yarn for coasters guide—have zero synthetic snap-back, meaning they stay exactly where you block them.

4. Master the Wet-Blocking & Steam Treatment
If your coaster has minor bowl-cupping (under 1/2 inch of lift), do not unravel it! Wet-blocking will cure it completely. Submerge the piece in cool water, gently press out excess moisture inside a towel, pin it to a gridded foam mat using rustproof T-pins, and steam with an iron hovering 1 inch above. As cotton dries under tension, hydrogen bonds reset into flat alignment. (For step-by-step drying benchmarks and temperature controls, follow our dedicated test on how to block crochet coasters using steam vs wet blocking.)
5. Add a Loose Slip-Stitch or Crab Stitch Border
If your coaster perimeter curls slightly upward, work a final round of loose slip stitches or crab stitches (reverse single crochet) around the border. This binds the outer perimeter under uniform tension, acting like an architectural rim that prevents flaring.
6. Loosen Your Turning Chains on Blankets & Placemats
On rectangular projects, tight turning chains pull the side edges inward like a bowstring. Always chain 2 (instead of chain 1) when turning, or use a standing stitch to give edges the full vertical clearance needed to stay rectangular.
7. Stagger Your Increases on Larger Rounds
When circles grow beyond 4 inches, stacking increases directly on top of each other creates subtle corners, transforming your circle into an uneven hexagon. Staggering increases (*3 sc, 2 sc* on one round, then *2 sc, 2 sc, 1 sc* on the next) distributes bulk evenly.
The Maker’s Blocking Station Setup
Equipping your craft workspace with proper blocking tools helps produce neat, flat finishes.

- Interlocking Gridded Foam Mats: Built-in 1-inch and centimeter grid lines guarantee perfect circular symmetry without guessing.
- Rustproof Stainless Steel T-Pins: Never use sewing dressmaker pins, which will rust under wet steam and leave orange stains on light cotton.
- Continuous Mist Water Bottle: Delivers an ultra-fine water vapor that penetrates deep into thick cotton plies without drenching.
Frequently Asked Questions
Can I flatten curling acrylic yarn with an iron?
Be extremely careful! Acrylic is petroleum-based plastic. If a hot iron directly touches acrylic fibers, it will permanently melt and “kill” the yarn. Always use a damp pressing cloth and hover the iron without making physical contact.
Will blocked coasters curl up again after washing?
Cotton coasters may curl slightly after spinning in a washer. Simply smooth them flat with your palm while damp and let them air dry on a countertop to restore their flat memory.
Why is only the center of my magic ring bulging?
If the center hole bulges like a cone, you packed too many stitches into Round 1 or worked your initial stitches too loosely. Pull the magic ring tail firmly to cinch the center completely shut.
Pin This Troubleshooting Guide for Later
Tired of curling edges and wavy circles? Save this crochet troubleshooting guide to your Pinterest crochet hacks or craft tips board so you always have the solution ready!
For square coasters that struggle with lifting corners, see our step-by-step tutorial on how to crochet square coasters with a crab-stitch border, where the backward twist physically locks the edges down.
I was about to frog my entire project out of frustration yesterday. Read your tip about blocking and tried giving it a quick pin and steam—flattened out like a dream! Thank you Julian!
Never frog before blocking! Pure cotton has so much memory and just needs a little moisture and gentle steam to settle down. Way to save the project!
Finally someone explains why this happens without over-complicating it!! Stepping up half a millimeter on my hook size instantly solved my tight edge tension. My circles are finally laying flat on the counter instead of ruffling into bowls. Lifesaver!
Going up that half hook size is the magic wand 90% of the time! Yarn tension is so personal, and giving the foundation stitches that little extra breathing room makes all the difference. So glad your circles are laying flat now!