A dependable kitchen potholder needs to do two jobs without compromise: shield your hands and stone countertops from scorching cast iron skillets, and lie completely flat without curling into a bowl after its first cycle through the laundry. This tested textured cotton crochet pot holder pattern accomplishes both through an alternating front-and-back loop half double crochet stitch sequence, creating thick thermal ridges in 100% natural worsted cotton.
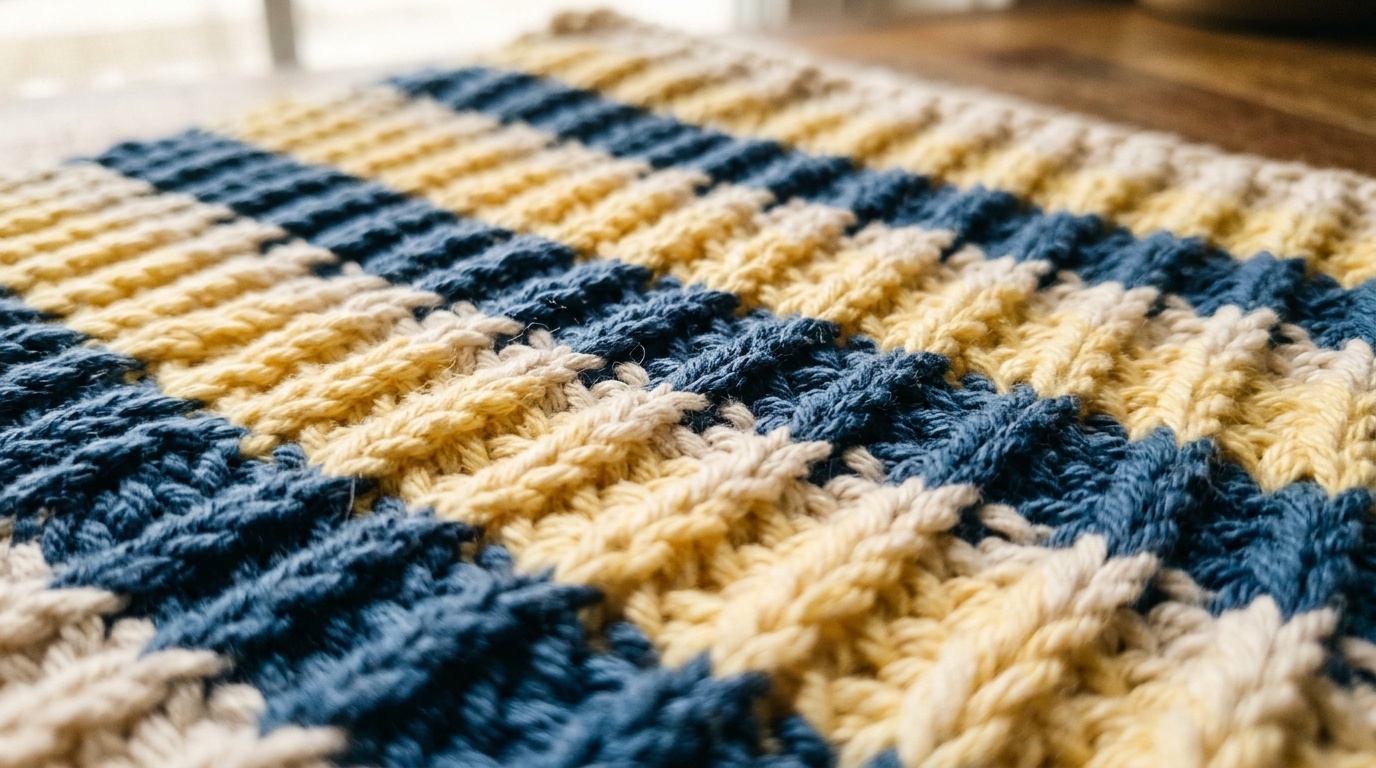
Many decorative potholders fall short in actual kitchen use because makers use synthetic acrylic yarn, which melts instantly against a 400°F Dutch oven lid. By building this piece entirely from unmercerized kitchen cotton worked on a 4.0 mm hook, the stitches interlock into a dense, non-stretch thermal barrier. The finished square measures approximately 8 by 8 inches, offering generous coverage under roasting pans while remaining flexible enough to grip hot baking dish handles securely.
Project Blueprint: Yarn Yardage, Hook Calibration & Thermal Gauge
Because safety around hot cookware is paramount, strict attention to fiber composition and stitch density is essential before pulling your starting foundation chain.

- Yarn Requirements: 1 ball (approx 70.9 g / 2.5 oz, 120 yds) Lily Sugar’n Cream 100% Worsted Cotton in Main Color (such as Country Blue or Sage), plus partial balls of Contrast A (Butter Yellow) and Contrast B (Soft Cream / White) for striping or border accents.
- Hook Size: U.S. G/6 (4.0 mm) smooth aluminum or ergonomic hook. Working with a 4.0 mm hook packs worsted cotton stitches tightly together to block heat transfer.
- Notions: Steel tapestry needle for weaving ends, sharp embroidery snips, flexible cloth measuring tape.
- Finished Dimensions: 8 inches wide by 8 inches tall (20.5 cm x 20.5 cm), excluding the 2-inch reinforced corner hanging loop.
- Thermal Gauge Standard: 14 half double crochet stitches and 10 rows = 4 inches (10 cm). Hitting gauge guarantees your fabric is compact enough to insulate without stiffening into a rigid board.
The Thermal Stitch Anatomy: Alternating Loop Ridges
Standard half double crochet stitches leave slight gaps between row posts that can let heat through. In this pattern, every row after the foundation works in an alternating rhythm: one stitch through the front loop only (FLO), followed immediately by one stitch through the back loop only (BLO).

This technique pushes the unworked loop outward on alternating faces of the work, forming corrugated textured rows. These raised ridges trap air pockets—the secret behind effective thermal insulation in textiles—while giving wet or soapy hands extra grip when lifting heavy cookware.
- Edge Tension Consistency: Always work the first and last stitch of every row under both loops. This secures clean, straight vertical borders that will not flare when you attach the contrasting border.
- Turning Chain Rule: The beginning Ch 2 does not count as a stitch. Work your first hdc directly into the very first stitch at the base of the chain for uniform width.
- Clean Color Switching: When transitioning between stripe colors, complete the final yarn over and pull-through of the row’s last stitch using the new working shade.
Step-by-Step Row Instructions & Color Stripe Sequence
The striped version balances three colors across 16 rows. If you prefer a solid minimalist look, simply maintain your Main Color across all 16 rows without cutting yarn.
Foundation Chain: With Main Color (MC), ch 29 loosely so the starting edge does not buckle.
Row 1 (Wrong Side): Work 1 hdc in the 3rd ch from hook. Work 1 hdc in each ch across to the end. Turn. (27 hdc)
Row 2 (Right Side): Ch 2 (does not count as st). Work 1 hdc in the 1st hdc under both loops. Work 1 hdc in next hdc through back loop only. *Work 1 hdc in next hdc through front loop only. Work 1 hdc in next hdc through back loop only. Repeat from * across to the last stitch. Work 1 hdc in the last hdc under both loops. Turn.
Rows 3 to 16 (Stripe Progression): Repeat Row 2 following this exact row color sequence: 3 rows MC, 2 rows Contrast A, 2 rows MC, 2 rows Contrast B, 2 rows MC, 2 rows Contrast A, and 3 rows MC. On the final stitch of Row 16, fasten off MC.
Contrasting Edging & Hanging Loop: With the right side facing, join Contrast B with a slip stitch in any corner. Work 1 sc in the same corner space. Ch 12, then slip stitch into the first chain to form the reinforced hanging loop. *Work 23 sc evenly spaced along the edge to the next corner, then work (1 sc, ch 3, 1 sc) into the corner space. Repeat from * around all 4 sides. Join with a slip stitch into the starting sc. Fasten off and weave in all tails on the reverse side.
Custom Sizing Matrix: Scaling from Mug Rug to Dutch Oven Trivet
Whether you need a small square under a hot coffee press or an expansive trivet under a wide casserole dish, use this stitch calculator:
| Size Option | Starting Chain | Stitch Count | Row Count | Approx Yarn Needed |
|---|---|---|---|---|
| Mug Rug / Small Coaster | Ch 17 | 15 hdc | 10 rows | Approx 45 yds |
| Standard Potholder (Tested) | Ch 29 | 27 hdc | 16 rows | Approx 95 yds |
| Large Dutch Oven Trivet | Ch 37 | 35 hdc | 22 rows | Approx 150 yds |
For more everyday textile projects that elevate kitchen routines, explore our guides on crocheting sturdy cord-core coasters and organizing kitchen spaces with a crocheted hanging storage basket.
Kitchen Counter Styling & Wall Peg Display
A handmade pot holder does not belong hidden inside a cluttered drawer. Hanging it by its corner loop adds warmth, texture, and organic craft detail to kitchen backsplashes and workstation rails.

Here are three practical placement ideas for your home:
- Stovetop Rail Display: Hang two matching potholders on S-hooks alongside wooden spoons and copper whisks for instant access while sautéing.
- Table Trivet for Family Dining: Lay flat in the center of a linen table runner to protect polished wood dining tables from bubbling casseroles and fondue pots.
- Thoughtful Housewarming Gift: Fold cleanly around a jar of artisan honey or a wooden baking spatula and tie with natural baker’s twine for an effortless handmade host gift.
Care, Machine Washing & Steam Reshaping
Kitchen cotton is built for heavy daily use, grease splatters, and regular laundering. Follow these simple steps to keep your potholders fresh and flat:
- Machine Washing: Wash in warm water with standard detergent. Avoid bleach or heavy optical brighteners, which degrade natural cotton fibers over time.
- Drying & Shrinkage Control: Cotton naturally contracts slightly on first wash. Tumble dry on low heat until slightly damp, then pull corners outward diagonally to square the edges.
- Steam Ironing: Pressing both sides with a hot steam iron flattens the border stitches and revitalizes the crisp raised texture of the ribbed ridges.
Common Maker Questions & Troubleshooting Q&A
Can I use acrylic yarn instead of 100% cotton?
Never use acrylic or polyester yarn for potholders or trivets. Synthetic fibers melt when exposed to high heat from oven trays or stovetop skillets, causing severe skin burns. Always use 100% unmercerized cotton.
Why is my pot holder curling into a trapezoid shape?
Curling usually happens if you accidentally skip the first stitch at the start of a row or work into the turning chain at the end. Count your stitches after every couple of rows to ensure you maintain exactly 27 half double crochets throughout.
Is one layer of this pattern thick enough for a hot roasting pan?
The alternating front-and-back loop technique creates a corrugated, double-density fabric that insulates thoroughly under normal kitchen temperatures. For extra heavy-duty cast iron straight from a 450°F oven, you can easily crochet two matching squares and single-crochet them together around the perimeter.
How do I prevent tails from unraveling during frequent washing?
Weave your tails in three distinct directions through the center ridges of the fabric, splitting the yarn strands with a sharp tapestry needle rather than simply passing beneath loops. This creates friction that locks the ends permanently against wash cycles.
Save This Pot Holder Pattern to Pinterest
Looking for a quick weekend crochet gift or kitchen refresh? Pin this textured cotton pot holder pattern to your Crochet Projects or Kitchen DIY board so you can easily reference the stitch count and stripe chart!

Leave a Comment