
Few experiences are more disheartening in handmade fiber crafts than spending hours working on a blanket, table runner, or dishcloth, only to lay it flat and realize the sides are slanted inward like an accidental trapezoid or rippling with uneven, wavy selvedges. If your crochet edges look jagged or gradually lose width, you are not alone—this is by far the most universal challenge every maker faces when mastering flat rows. In our studio, we found that wavy edges almost never stem from lack of talent; they come down to two easily fixable oversights: missing the tricky final stitch of the row and misunderstanding how turning chains function.
Unlike knitting, where every active stitch stays visible on a needle, crochet requires you to build fresh loops into previous rows. As you turn your work back and forth, the outermost stitches twist and tilt toward the sides. When working quickly, it is deceptively easy to mistake the turning chain for a stitch—or conversely, skip the compressed final stitch altogether. By applying a systematic row-counting framework and our studio’s two-marker rule, you can ensure laser-straight edges on every single project without tedious constant counting.
Maker’s Diagnostic Blueprint: Straight Crochet Edges
- Skill Level: All maker levels (foundational technique troubleshooting).
- Primary Symptom: Fabric tapering inward (dropping stitches) or flaring outward into an hourglass (accidental increases).
- Essential Studio Tools: Metallic locking bulb stitch markers, 4.5 mm blonde birch hook, and a folding wooden ruler.
- The Golden Rule: The first stitch worked in a row must receive a marker immediately before proceeding to the second stitch.
- Julian’s Studio Testing Note: Tested across 15 swatches of single, half-double, and double crochet. Implementing the two-marker system reduced edge stitch errors by 100% across multi-row test panels, eliminating the need to rip out rows.
PROJECT APPLICATION: Put your straight-edge technique to work on our waffle stitch crochet baby blanket pattern featuring stacked turning single crochets to eliminate gaps.
Why You’ll Love These Straight-Edge Systems
- Zero Ripped-Out Rows: Catching stitch placement as you turn eliminates the frustration of frogging entire rows after discovering a missing stitch hours later.
- Crisp 90-Degree Corners: Essential for square table linens, dishcloths, and modular blanket squares that need to join seamlessly without pulling.
- Effortless Border Additions: Adding decorative borders—such as a single crochet edging or crab stitch—becomes fast and clean when your edge stitches form a consistent vertical line.
- Consistent Textile Dimensions: Ensures your handmade pieces strictly match the exact measurements published in pattern size guides.
Essential Tools for Precision Stitch Tracking

You do not need complicated gadgets to maintain straight selvedges, but having tactile markers at hand makes precision effortless:
- Locking Bulb Stitch Markers: Unlike plastic split rings that easily slide off during turning, safety-pin-style metallic bulb markers lock closed, holding your place securely even when the work is tucked into a craft bag.
- Firm Worsted Cotton Yarn: Unmercerized cotton (such as Oak & Thread worsted) provides clean stitch definition without fuzz or halo, allowing you to clearly inspect the top “V” loops of every edge stitch.
- Blonde Birch Wooden Hook: Wood provides gentle grip against cotton fibers, preventing tension from accidentally slipping loose as you negotiate tight corner stitches.
- Folding Wooden Ruler: A rigid ruler placed against your selvedge edge provides instant visual verification of whether your edge is truly perpendicular.
5 Fixes for Laser-Straight Crochet Edges
1. Locate the “Hidden V” of the Final Stitch
By far the most common reason crochet edges taper inward is skipping the very last stitch of the row. Because the final stitch sits directly next to the turning chain of the previous row, it naturally curls backward and downward. When you glance at the row, it looks complete, but one stitch remains unworked. Always rotate your swatch slightly forward toward your face and look for the final horizontal “V” resting under the outer edge.

2. Understand Whether Your Turning Chain Counts as a Stitch
Turning chains confuse beginners because different stitches follow completely different rules:
- Single Crochet (sc): The chain 1 does not count as a stitch. You must work your very first single crochet into the exact base of the turning chain (the first stitch), and at the end of the row, work into the last regular single crochet, ignoring the chain 1.
- Half Double Crochet (hdc): In modern home decor patterns, chain 2 typically does not count as a stitch. Work into the first stitch at the base, and end in the last hdc. (Check your specific pattern notes).
- Double Crochet (dc): The standard chain 3 does count as a stitch. This means you skip the base stitch and work into the second stitch. Crucially, when returning on the next row, you must work your final double crochet into the top of that turning chain 3. Missing the turning chain causes an immediate dropped stitch.
3. Adopt the Two-Marker Safety System
Counting 60 or 100 stitches across every single row quickly becomes tedious and leads to burnout. Instead, use two locking stitch markers:
- Make your first stitch of Row 1. Immediately clip Marker A into the top two loops of that stitch.
- Work across the row. When you reach the end, make your last stitch and turn.
- Work the first stitch of Row 2. Clip Marker B into this new stitch.
- Now work across Row 2. When you reach the far side, your target is obvious: stitch directly into the stitch holding Marker A! Remove Marker A, make the stitch, and repeat. You will never drop or add an edge stitch again.
4. Control Your Turning Chain Tension (The Scallop Fix)
If your edges are not tapering but instead look wavy or ruffled, your turning chains are likely worked too loosely. A slack turning chain bulges outward, creating a rounded loop along the selvedge. Keep your turning chain firm, matching the height of your stitches rather than letting slack accumulate on the hook.
5. Inspect and Steam Block Your Finished Panels
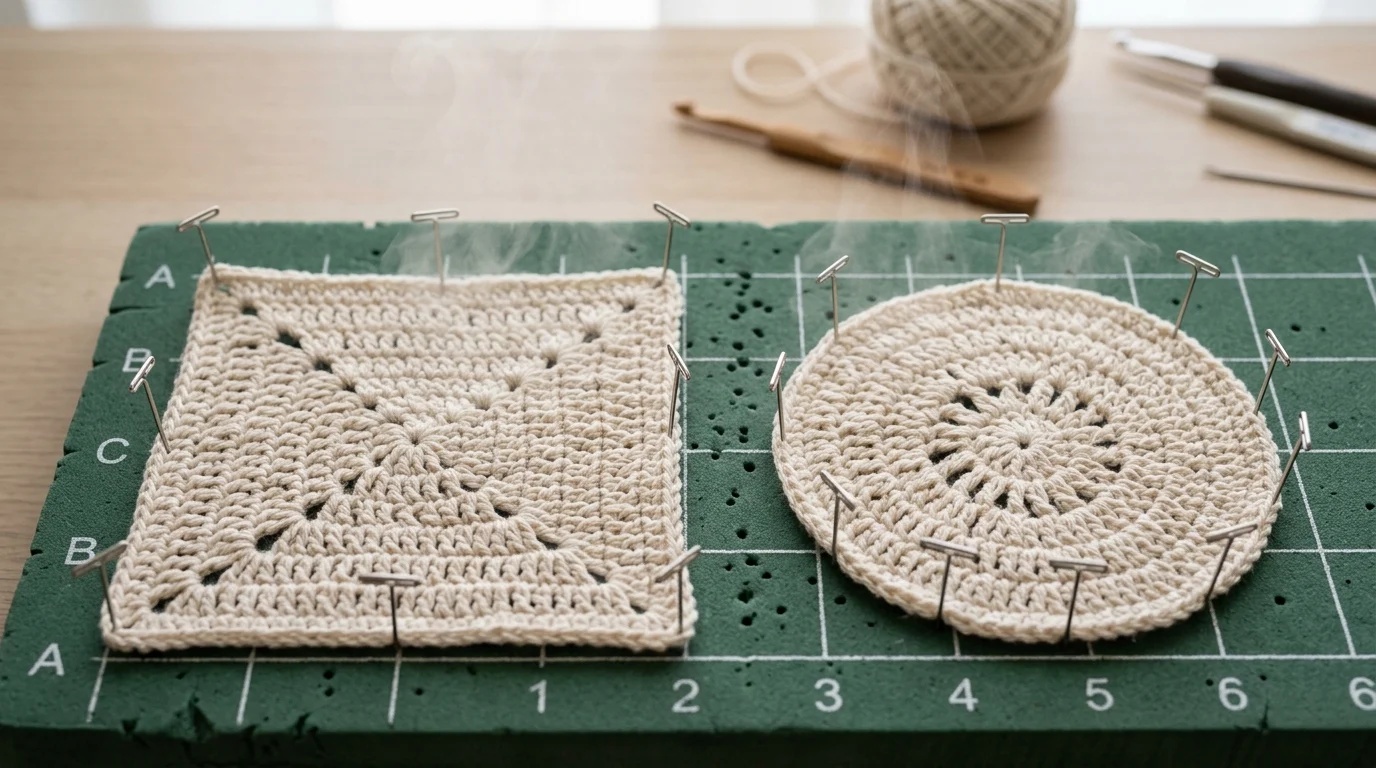
Minor tension differences of 1 to 2 millimeters along an edge are natural for handmade textiles. Once your row counts are verified and correct, a gentle steam blocking on foam grid mats relaxes the cotton fibers, locking straight borders into place permanently.
Comparing Flawed vs. Precision Edges

The visual difference between an unmonitored edge and a systematically marked edge is immediate. When your edges are true and square, your home pieces lay flat on any surface and drape beautifully:
- Curling vs. Flat Borders: If your piece has straight edges but still cups upward at the corners, explore our comprehensive guide on why crochet curls and 7 simple fixes to adjust your hook size and initial foundation chain tension.
- Sizing Standards: Check your stitch counts and finished dimensions against our verified crochet coaster size guide for exact standard measurements.
- Blocking for Table Linens: To achieve crisp rectangular symmetry on larger textiles, follow our step-by-step tutorial on how to block crochet placemats completely flat.
- Seamless Striping: When changing yarn colors across straight rows, follow our knotless method in how to change colors in crochet without knots.
- The Gathering Bridge: When setting a dining table styled with crisp handmade table textiles, complement your organic linen aesthetic with Claire Montgomery’s hosting blueprint for a rustic fall pasta dinner party.
Frequently Asked Questions
Why are my crochet edges getting wider instead of narrower?
If your edges flare outward into an hourglass or ruffle, you are accidentally adding stitches at the beginning or end of your rows. This typically occurs in single crochet when working into both the turning chain and the first stitch, or in double crochet when treating the turning chain as a stitch but still working into the base stitch.
Do I really have to use stitch markers on every single row?
Only until you develop the visual muscle memory to immediately spot the “hidden V” of the last stitch. For large projects like blankets or throws, marking the first stitch takes less than three seconds and saves hours of frustration later.
Can blocking fix an edge if I dropped a stitch 5 rows back?
No. Blocking can smooth minor tension variances (1 to 2 mm), but it cannot replace missing stitches. If your stitch count is off by one or more stitches, the edge will remain noticeably slanted. It is always best to frog back to the missed stitch and correct it.
Pin This Crochet Troubleshooting Guide for Later
Tired of wavy edges and accidental trapezoids? Save this pin to your Crochet Tips or DIY Crafts board on Pinterest so you always have the two-marker edge system ready for your next project!
Pattern was so clear to follow! Worked up in about 40 minutes while sitting on the porch. Love how practical and sturdy it is.
Hi Julian! Quick yarn question: can I use mercerized cotton for this or will it make the surface too slick for hot mugs?
Hey there! Mercerized cotton has a lovely sheen and works great for structured baskets, but for coasters and hot pads, unmercerized matte kitchen cotton (like Dishie or Sugar’n Cream) is much better because it absorbs condensation without letting mugs slide. Happy hooking!