There is a timeless satisfaction in hanging handmade holiday stockings along the fireplace mantel when the winter chill sets in. While mass-produced store options often rely on thin polyester felt that stretches out of shape, this chunky ribbed crochet stocking offers substantial body, deep knit-look ridges, and a structured heel that hangs beautifully even when filled with small treasures. Worked with bulky yarn and an intuitive cuff-down construction, this heirloom design comes together over a cozy weekend afternoon.
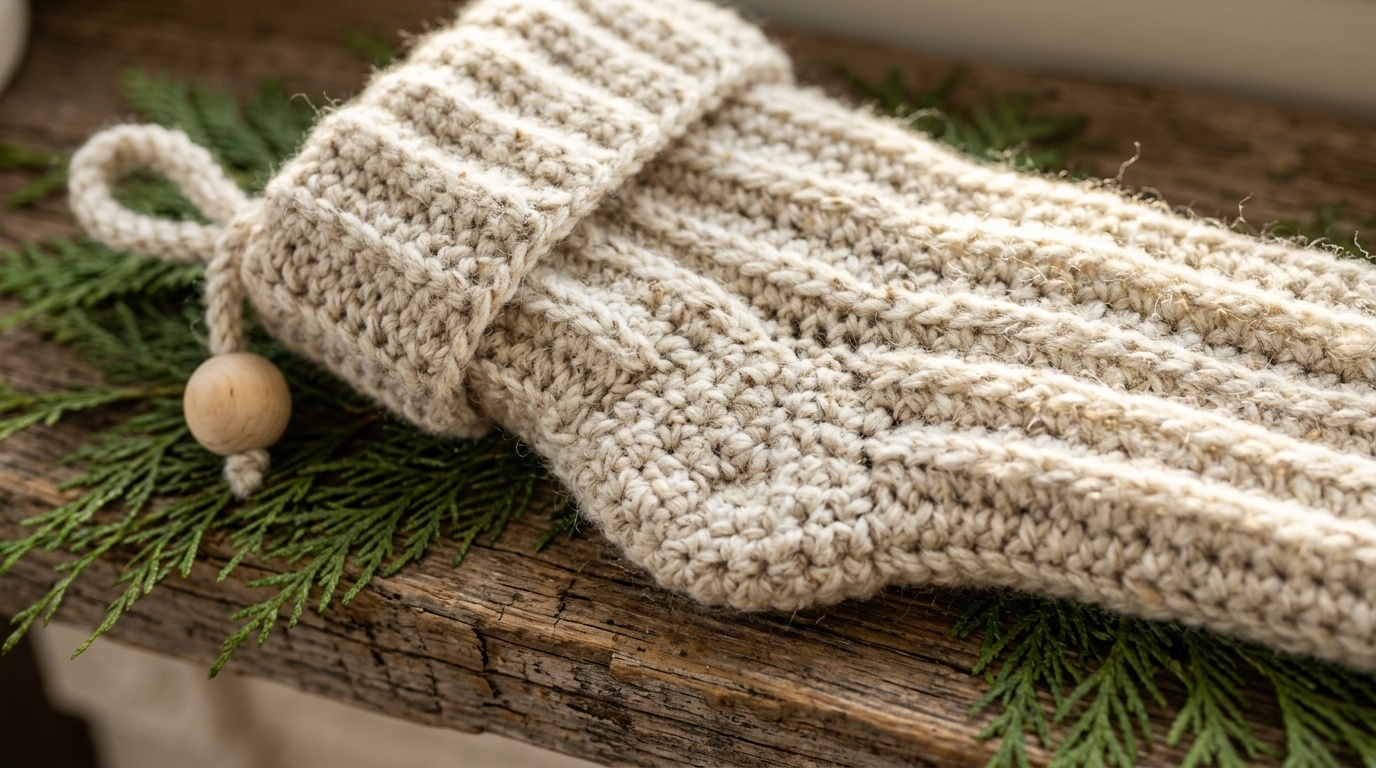
Many home crafters hesitate to tackle stockings because traditional short-row heels can feel needlessly complicated. This pattern bypasses confusing stitch counts by using an approachable Dutch heel-flap technique adapted for crochet. By working half double crochet stitches in the back loop only, you achieve the elasticity of hand-knitted 2×2 ribbing while maintaining the swift pace and structural durability of crochet. You can finish your stocking in classic monochrome oatmeal, or swap yarn colors at the toe and heel for a relaxed Scandinavian look.
Maker’s Project Blueprint: Hook Gauge, Yarn Yardage & Dimensions
To ensure your stocking maintains a structured silhouette without sagging under the weight of holiday gifts, gauge consistency is key. Here are the tested studio benchmarks for this pattern:
| Design Parameter | Studio Tested Benchmark | Structural Function |
|---|---|---|
| Crochet Hook | 6.5 mm (US Size K/10.5) | Maintains dense stitch density without creating stiff or unyielding fabric |
| Yarn Classification | Bulky Weight (Category 5) Wool-Blend | Provides loft, warmth, and natural bounce that holds the vertical boot shape |
| Yardage per Stocking | Approx. 180–210 yards (165–192 m) | Covers the full ribbed leg, folded cuff, turned heel, and toe decreases |
| Finished Length | 18 inches (46 cm) from cuff to toe | Standard generous holiday stocking size for fireplace mantels |
| Width across Leg | 6.5 inches (16.5 cm) lying flat | Roomy 13-inch opening circumference that comfortably accommodates books and treats |
| Hanging Element | 5-inch natural leather loop with brass rivet | Supports up to 4 lbs without stretching out the top rim stitches |
Yarn Fiber Comparison: Why Wool-Blend Beats Pure Acrylic for Mantels
Selecting yarn for an item that will be handled, filled, and packed away annually requires balancing softness with structural memory. Here is how common yarn fibers compare when building holiday footwear:

- 80/20 Wool-Acrylic Blend (Recommended): Offers the natural matte texture and resilience of wool while the acrylic core prevents permanent vertical stretching when items are tucked inside.
- 100% Cotton: Delivers sharp stitch definition, but the lack of natural fiber elasticity makes the leg heavy and prone to sagging downward on mantle hooks.
- 100% Economy Acrylic: Inexpensive and machine-washable, but can develop a slick shine under ambient light and pill around the heel turn after a few seasons.
- Chunky Chenille / Velvet: Ultra-soft to the touch, but lacks the stitch definition needed to showcase ribbed heel flaps, and stitches tend to “worm” loose over time.
Step-by-Step Foundation Cuff & Ribbed Leg Sequence
This stocking begins at the cuff with a sideways ribbed band that is joined into a circle, followed by working down the leg in continuous rounds. This technique creates a clean, stretchy cuff that folds over effortlessly.
1. Foundation Ribbed Cuff: Chain 16 with your 6.5 mm hook. In the second chain from your hook, work a half double crochet (hdc), and continue across all chains (15 hdc). Chain 1 and turn.
2. Working Back Loops (Rows 2–36): Work 1 hdc in the back loop only (blo) across each stitch. Working exclusively in the back loop creates the accordion-style knit ribbing. Repeat for 36 rows, or until the band comfortably wraps around your palm to measure 13 inches unstretched.
3. Joining the Cuff Ring: Fold the band with short ends together and slip stitch through both layers to form a seamless cylinder. Turn right-side out.
4. Transition to the Leg (Rounds 1–16): Chain 1. Work 36 hdc evenly spaced around the long side edge of your ribbed cylinder (placing roughly 1 stitch per row end). Join with a slip stitch, chain 1, and work continuous rounds of blo-hdc for 16 rounds (approx. 7 inches of leg length). Place a locking stitch marker at your round beginning.

Turning the Heel: The Stress-Free Gusset & Foot Sequence
Turning a crochet heel is simply a matter of working back-and-forth across half of your stitches to create depth, then rejoining in the round to continue down toward the toe:
1. The Heel Flap: Work across the first 18 stitches of your round in regular single crochet (sc). Turn your work, chain 1, and work 18 sc back across. Repeat for 8 rows total to establish a square heel flap.
2. Turning the Heel Cup: On the next row, sc 11 stitches, sc2tog (single crochet two stitches together), sc 1. Leave remaining stitches unworked and turn. Slip the first stitch, sc 5, sc2tog, sc 1, and turn. Continue this gradual reduction until all flap edge stitches are resolved and you have 10 live stitches centered across the heel bottom.
3. Gusset Pick-Up & Foot: Now pick up 6 sc along the left edge of your heel flap, work across the 18 reserved instep stitches on the front of the leg, pick up 6 sc along the right edge of the flap, and work across the 10 heel stitches. You now have a unified loop to work the foot in continuous blo-hdc rounds for 12 rounds.
4. Toe Shaping & Cinch: To taper the toe smoothly, alternate rounds of decreases (working 1 decrease on each side of the foot) for 4 rounds until 14 stitches remain. Fasten off with a 10-inch yarn tail, thread onto a tapestry needle, weave through the front loops of the remaining stitches, and pull snug like a drawstring to close.
If you enjoy crafting textured accessories for your home during the colder months, be sure to explore our tested pattern on how to crochet a modern twisted ear warmer or try making coordinating tree decor with our step-by-step crochet star ornament tutorial.
Clean Finish, Leather Hanging Strap & Mantel Styling
A sturdy hanging loop ensures your stocking hangs straight down rather than twisting sideways on mantle pegs:
- Leather Loop Attachment: Cut a 0.5-inch wide by 6-inch long strip of vegetable-tanned leather. Punch a small hole through both ends and secure through the top rear edge of the cuff using an antique brass screw-post rivet.
- Alternative Yarn Loop: If you prefer an all-yarn finish, chain 16 using a double strand of working yarn, slip stitch back into the first chain, and secure firmly inside the seam with a metal yarn needle.
- Weaving Internal Tails: Turn the stocking inside out and weave all yarn tails through the dense heel turn and toe cinch, back-tracking through three stitches to prevent unraveling during seasonal laundering.

Blocking & Care: Keeping Handcrafted Stockings Sturdy
Before hanging your finished project on display, a light steam treatment sets the ribbing and relaxes any tight tension marks:
1. Gentle Steam Shaping: Insert a rolled bath towel inside the stocking leg and foot to fill out the 3D silhouette. Hover a household steam iron 1 inch away from the surface, letting the warm vapor relax the wool fibers. Allow the stocking to cool completely before removing the towel.
2. Washing & Off-Season Storage: At the end of the holiday season, hand wash in lukewarm water with gentle wool cleanser, gently press excess moisture out in a clean towel without wringing, and lay flat to dry. Store with a cedar block inside a breathable cotton bag to protect the natural fibers from moths.
For more tested fiber arts projects that pair beautifully with natural home styling, take a look at our complete guide on how to crochet a textured cotton bath mat or discover our beginner-friendly tutorial for round cotton placemats.
Maker Q&A: Common Crochet Stocking Troubleshooting
Can I use worsted weight yarn instead of bulky yarn?
Yes, but you will need to hold two strands of worsted weight yarn together to achieve the same gauge and density. Using a single strand of worsted weight will produce a miniature stocking roughly 10 inches long unless you increase the foundation stitch count significantly.
Why is the foot of my stocking twisting around the ankle?
Twisting occurs if you accidentally work your rounds into the turning chain rather than the first true stitch of the round. Count your stitches after completing the gusset round to ensure you have exactly 36 active stitches around the foot.
How do I add a contrasting color to the heel and toe?
Simply fasten off your main body color at the end of the leg, attach your accent shade to begin the heel flap, work the heel turn, and switch back to your main color when picking up gusset stitches. Reattach the accent color for the final 4 rounds of the toe decrease.
Pin This Tested Stocking Pattern for Later
Love this cozy holiday project? Save this pin to your crochet patterns or Christmas DIY board on Pinterest so you have the measurements and heel instructions ready for your holiday crafting!

Hooked this textured mug cozy over morning coffee on Saturday! It worked up in about 35 minutes using leftover aran wool. Fits my favorite ceramic mug like a glove and keeps my tea hot without scalding my fingers.
Hi Julian! Can I add an elastic loop and button closure instead of seaming the short ends together?
Yes, absolutely! An elastic hair tie loop and a 1-inch wooden button looks so charming and lets the cozy stretch to fit mugs with different handle sizes. Happy crafting!