
Setting a warm, organic dining table often begins with texture rather than elaborate centerpieces. While rectangular placemats can feel rigid on circular tables or crowd shared serving platters, handcrafted round crochet placemats create a relaxed, circular footprint that frames stoneware dinnerware beautifully. By combining dense single crochet spiral rounds with strategically staggered increases, this pattern eliminates the unsightly ridges and curling edges common in circular crochet, delivering a flat, durable tabletop textile that protects your furniture while softening every meal.
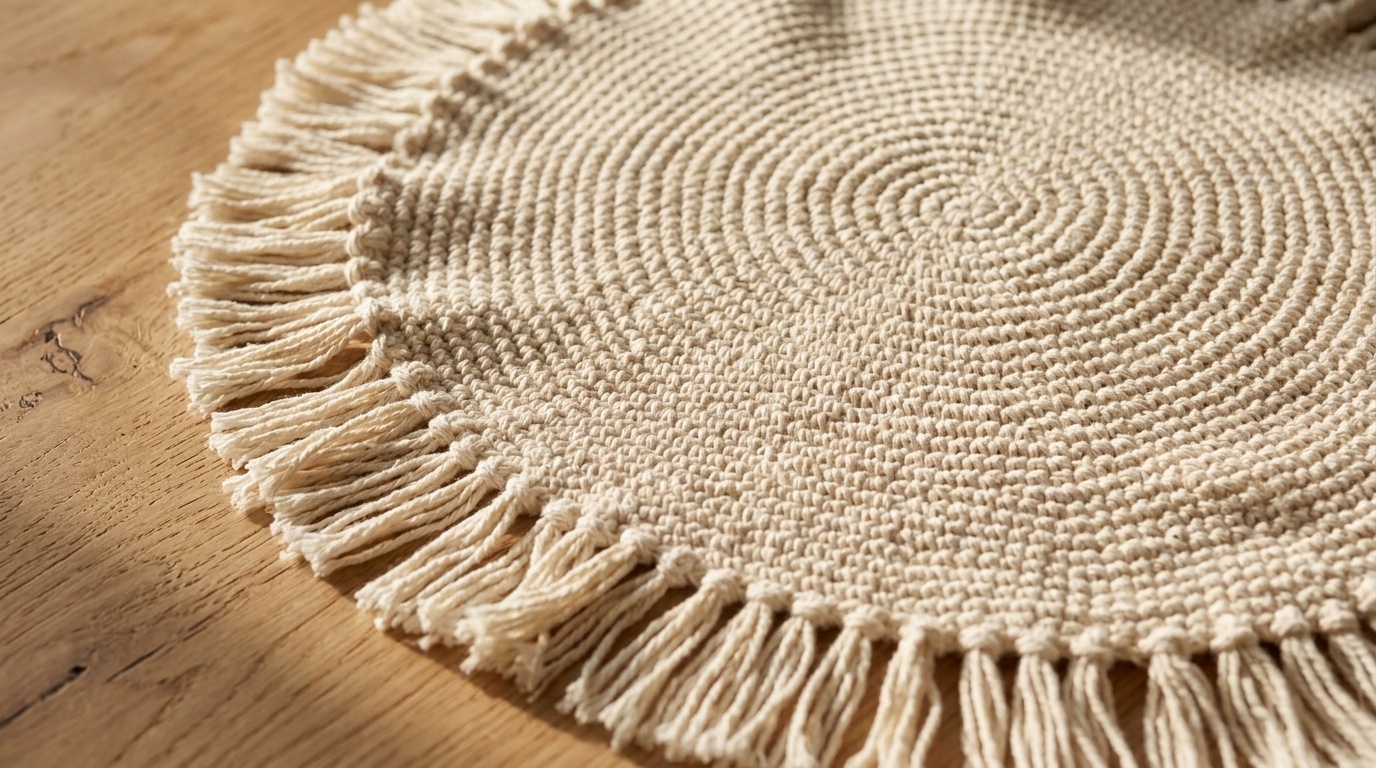
Working in the round requires a clear understanding of stitch geometry. Traditional circular patterns that join each round with a slip stitch often create an obvious diagonal seam, while stacked increases turn what should be a smooth circle into a stiff hexagon. In this workshop pattern, we use continuous spiral crocheting paired with alternating increase points and 100% unmercerized kitchen cotton. Finished with a short, combed-out fringe halo, these 13-inch round placemats bring a subtle boho-modern aesthetic to weekday family breakfasts and slow weekend dinner gatherings alike.
HOMESTYLE FLOOR COORDINATE: Bring handmade warmth to your floorboards with our tested guide on how to crochet a modern oval floor rug in chunky cotton tube yarn.
Maker’s Project Blueprint: Diameter, Gauge & Cotton Yardage
Before casting on your magic ring, having verified dimensions and yardage estimates ensures your placemat set matches uniformly across all place settings. Here are the core specifications tested and verified in our studio:
| Pattern Element | Workshop Tested Specification | Maker Notes |
|---|---|---|
| Finished Dimensions | 13 inches (33 cm) diameter excluding fringe | Approximately 15 inches (38 cm) total with 1-inch combed fringe. |
| Skill Level | Easy / Confident Beginner | Uses single crochet in continuous rounds with simple increase tracking. |
| Yarn Requirement | Lily Sugar’n Cream Super Size (100% Cotton, 190 yds / 113g) | Approximately 200 yards (182 m) needed per placemat in colorway Ecru or Jute. |
| Crochet Hook | Size U.S. G/6 (4.0 mm) ergonomic hook | We recommend an aluminum hook with a comfortable grip like Clover Amour. |
| Gauge | 15 single crochets × 16 rounds = 4 inches (10 cm) | Maintaining consistent gauge prevents the placemat from cupping or ruffling. |
| Essential Tools | Locking stitch marker, yarn needle, tape measure, sharp shears | A metal pet slicker brush or fine-tooth comb is ideal for brushing out the fringe. |
The Spiral Math: Why Staggered Increases Prevent Hexagon Edges
The most common frustration makers experience when crocheting circles is watching their piece slowly turn into a polygon or ruffle like potato chips. In circular single crochet, the circumference needs to expand by exactly 7 stitches every single round to remain flat. However, how you distribute those 7 increases determines the final shape:

- Why Hexagon Edges Occur: When you place a 2-single-crochet increase directly into the same stitch location round after round, the extra bulk creates visible geometric corners. By Round 10, your circle looks like a stop sign.
- The Staggered Solution: On even-numbered rounds, we split the initial single crochet count in half (for example, starting with 1 sc, working the increase, then continuing with the full repeat). This shifts the increase points around the perimeter, distributing tension evenly into an authentic, seamless circle.
- Continuous Spiral vs Joined Rounds: Slip stitch joins leave an unsightly diagonal ridge that disrupts the flat surface under dinner plates. Crocheting in a continuous spiral keeps the placemat completely smooth on both sides.
Working with pure unmercerized kitchen cotton is essential here. As detailed in our studio guide to cotton vs acrylic yarn for kitchen crochet, cotton naturally tolerates hot serving dishes up to 400°F and provides a gentle, non-slip grip on wood dining surfaces.
Step-by-Step Magic Ring & Early Spiral Rounds (Rounds 1–6)
To begin, we anchor the center using an adjustable magic ring to ensure zero center hole gap where crumbs could fall through:

Foundation Ring: Create an adjustable magic loop. Chain 1.
Round 1: Work 7 single crochets (sc) into the ring. Pull the tail firmly to close the center hole. Place your locking stitch marker in the first sc to mark the round beginning. (7 sts). Do not join with a slip stitch; continue working directly into the next stitch.
Round 2: Work 2 sc in each sc around. Move the stitch marker up to the new first stitch. (14 sts).
Round 3 (Odd Round — Standard Increase): *Work 2 sc in the next stitch, 1 sc in the next stitch. Repeat from * around. (21 sts).
Round 4 (Even Round — Staggered Offset): *Work 1 sc in each of the next 2 stitches, 2 sc in the next stitch. Repeat from * around. (28 sts).
Round 5: *Work 2 sc in the next stitch, 1 sc in each of the next 3 stitches. Repeat from * around. (35 sts).
Round 6 (Staggered Offset): *Work 1 sc in the next stitch, 2 sc in the next stitch, 1 sc in each of the next 3 stitches. Repeat from * around. (42 sts).
Expanding to Full 13-Inch Diameter (Rounds 7–18)
As the placemat grows, continue following the alternating rhythm of standard and staggered increase rounds. Every round adds exactly 7 stitches to keep the circle expanding flat without distortion:
- Round 7: *2 sc in next st, 1 sc in each of next 5 sts. Repeat from * around. (49 sts).
- Round 8: *1 sc in each of next 4 sts, 2 sc in next st, 1 sc in next st. Repeat from * around. (56 sts).
- Round 9: *2 sc in next st, 1 sc in each of next 7 sts. Repeat from * around. (63 sts).
- Round 10: *1 sc in each of next 3 sts, 2 sc in next st, 1 sc in each of next 5 sts. Repeat from * around. (70 sts).
- Round 11: *2 sc in next st, 1 sc in each of next 9 sts. Repeat from * around. (77 sts).
- Round 12: *1 sc in each of next 6 sts, 2 sc in next st, 1 sc in each of next 4 sts. Repeat from * around. (84 sts).
- Round 13: *2 sc in next st, 1 sc in each of next 11 sts. Repeat from * around. (91 sts).
- Round 14: *1 sc in each of next 5 sts, 2 sc in next st, 1 sc in each of next 7 sts. Repeat from * around. (98 sts).
- Round 15: *2 sc in next st, 1 sc in each of next 13 sts. Repeat from * around. (105 sts).
- Round 16: *1 sc in each of next 8 sts, 2 sc in next st, 1 sc in each of next 6 sts. Repeat from * around. (112 sts).
- Round 17: *2 sc in next st, 1 sc in each of next 15 sts. Repeat from * around. (119 sts).
- Round 18: *1 sc in each of next 7 sts, 2 sc in next st, 1 sc in each of next 9 sts. Repeat from * around. (126 sts).
Seamless Spiral Finishing: To smooth out the height difference at the end of Round 18, slip stitch into each of the next 2 stitches. Cut yarn leaving a 6-inch tail. Thread the tail onto a yarn needle and create an invisible join into the following stitch. Weave in the tail securely on the reverse side.
Crafting and Trimming the Combed-Out Boho Fringe
The short cotton fringe gives this placemat an organic, high-end studio feel while disguising the outer edge transitions:

- Cutting Fringe Strands: Cut strands of cotton yarn measuring approximately 3 inches (7.5 cm) long. Wrapping yarn around a 1.5-inch strip of stiff cardboard makes cutting hundreds of uniform strands effortless.
- Attaching Fringe: Take 2 strands together, fold them in half to create a loop, and use your crochet hook to pull the loop through the outer edge stitch from the right side. Pull the tails through the loop to create a snug lark’s head knot. Repeat into every stitch (or every other stitch for a lighter fringe) around the entire 126-stitch perimeter.
- Brushing Out Plies: Lay the placemat flat on a clean cutting mat. Using a fine-tooth metal pet slicker brush or a sturdy comb, gently comb through the fringe ends starting from the tips and working inward to separate the 4 individual cotton plies into a soft, fluffy halo.
- Trimming the Halo: Place an inverted 14-inch round cake board or plate over the center of the placemat as a circular cutting guide. Use sharp fabric shears or a rotary cutter to trim the fringe to a clean, uniform 1-inch (2.5 cm) border all the way around.
Blocking & Tabletop Care: Keeping Round Placemats Perfectly Flat
Even with balanced increase math, cotton stitches contract slightly as you handle them during construction. Proper blocking ensures your placemat sits completely flush on wooden or stone surfaces:
- Steam Blocking (Fastest & Most Effective): Pin the placemat out on foam blocking mats, inserting rust-proof T-pins every 2 inches around the perimeter. Hover a steam iron 1 inch above the surface to let the moist heat relax the cotton fibers (as shown in our comprehensive tutorial on how to block crochet placemats flat). Allow it to dry completely before unpinning.
- Washing Instructions: Place the placemats inside a zippered mesh wash bag to prevent the fringe from tangling in the machine. Wash in cold water on the delicate cycle with gentle detergent.
- Reshaping: Remove promptly from the washer, lay flat on a dry towel, pat the center smooth with your palms, and comb the fringe straight. Allow to air-dry completely.
Troubleshooting Common Circular Crochet Pitfalls
Why is my placemat curling upward into a bowl?
Curling occurs when stitches are worked too tightly or when increases are spaced too far apart. In single crochet, you must maintain a steady addition of 7 stitches per round. If your hands naturally hold tight tension, switch to a 4.5 mm (U.S. 7) hook to give the stitches more room to lay flat.
Why are the edges rippling and wavy?
Ruffling happens when there are too many stitches in a round or when yarn tension is overly loose. Double-check your stitch count at the end of each round (e.g. 70 stitches at Round 10, 84 at Round 12). If your count is correct but ripples persist, dropping down to a 3.75 mm hook will tighten the gauge.
Can I omit the fringe for a minimalist clean rim?
Yes. If you prefer a tailored rim without fringe, simply work one final round of reverse single crochet (crab stitch) or slip stitches around the perimeter after Round 18 for a clean, modern corded edge.
Save This Round Crochet Placemat Pattern to Pinterest
Ready to craft a handmade dining set for your home? Save this tested round cotton placemat pattern to your crochet or home decor Pinterest boards so you always have the spiral stitch counts and fringe tutorial on hand!
Pattern was so clear to follow! Worked up in about 40 minutes while sitting on the porch. Love how practical and sturdy it is.
My foundation chain feels a bit stiffer than the subsequent rows. Should I go up a full hook size just for the starting chain?
Spot on! Going up a half or full millimeter on just the foundation chain is a veteran maker trick. It gives the base stitches room to breathe so your bottom edge never pulls tight. Give that a try!