As autumn temperatures drop and outdoor breezes grow sharper, dry air and indoor heating combine to leave hands, knuckles, and elbows feeling tight, rough, and uncomfortable. While liquid pump lotions offer brief comfort, they often consist of up to seventy percent water held together with chemical emulsifiers and synthetic preservatives—evaporating within minutes and leaving skin needing another pump. Handcrafting your own solid DIY lotion bars provides a concentrated, water-free emollient solution that melts gently on contact with your body heat. Using an easy, fail-safe equal-parts ratio of pure yellow beeswax, raw unrefined shea butter, and nourishing sweet almond oil, you can pour a batch of portable, travel-friendly moisturizing bars in under twenty minutes.
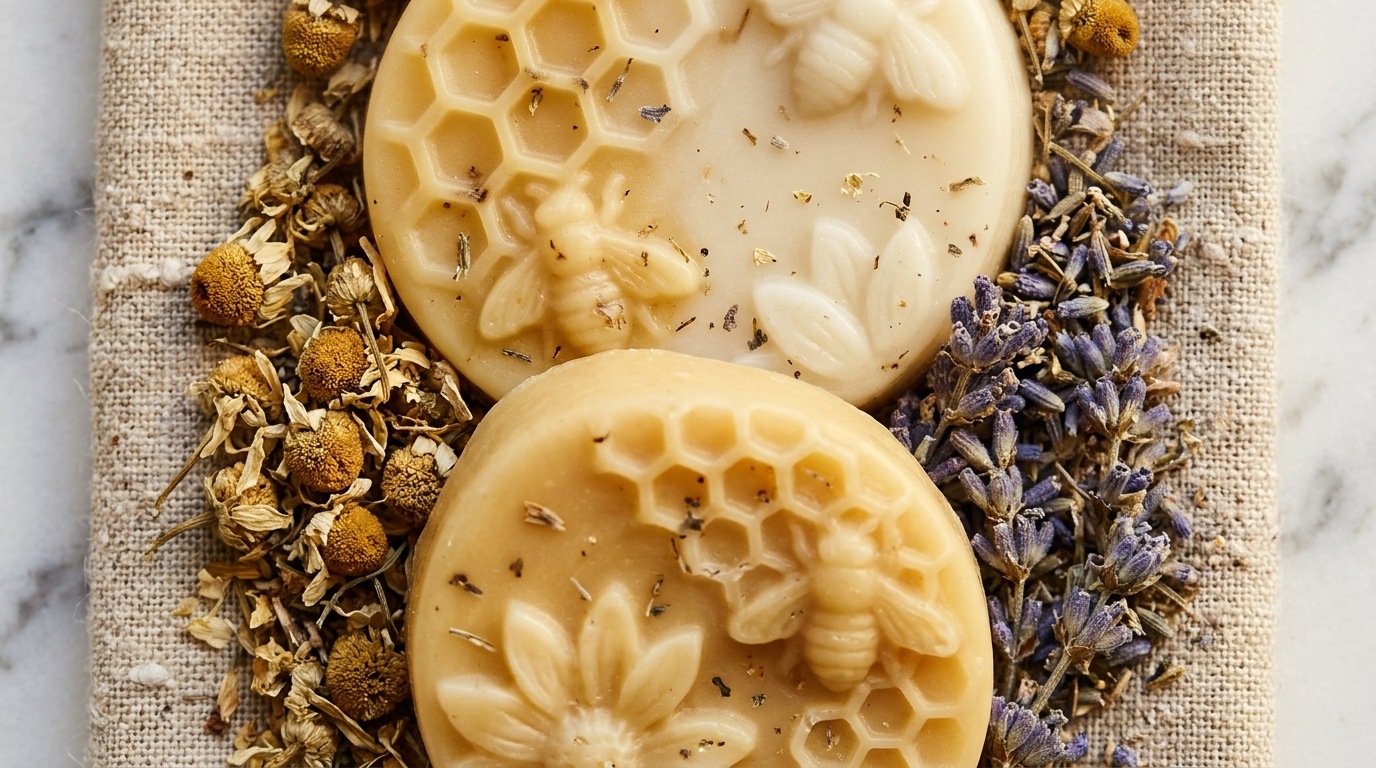
Unlike commercial creams packaged in disposable plastic pump bottles, solid lotion bars are completely spill-proof, zero-waste, and naturally shelf-stable for up to a full year without artificial chemical preservatives. Because they contain zero water, they do not harbor mold or bacteria, making them one of the cleanest, most reliable domestic wellness crafts for home makers. Whether you keep a bar inside a small aluminum tin in your handbag, set one on your nightstand for an evening wind-down ritual, or wrap a set in unbleached parchment paper as thoughtful handmade gifts, this beginner-friendly formula delivers lasting skin comfort straight from your kitchen.
The 1:1:1 Emollient Formula: Why Solid Lotion Bars Seal Dry Skin Better Than Pump Lotions
The science behind a solid lotion bar lies in its barrier-forming occlusive mechanics. Understanding how the three components work in harmony reveals why solid bars outperform standard liquid lotions in cooler weather:
- 100% Active Ingredients (Zero Water Filler): Commercial pump lotions require water to create a fluid consistency that moves through a plastic straw. That water evaporates quickly off your skin, taking ambient hydration with it. Solid lotion bars contain zero water—every milligram consists of pure plant butters, natural waxes, and carrier lipids.
- The Protective Beeswax Shield: Pure beeswax melts at around 144°F (62°C), but softens immediately at human skin temperature (around 98.6°F / 37°C). When rubbed across warm skin, it leaves a microscopic, breathable film that shields delicate barrier layers against cold wind and constant handwashing without clogging pores. Compare this pliable wax barrier to our popular diy beeswax lip balm recipe.
- Deep Lipid Nourishment from Shea Butter: Raw shea butter is packed with stearic and oleic fatty acids that sink deeply into dry epidermis, restoring suppleness to cracked knuckles and parched cuticles, similar to the results from our diy whipped shea body butter recipe.
- Silky Glide from Sweet Almond Oil: Liquid sweet almond oil tempers the hardness of the beeswax and the density of the shea butter, providing effortless slip so the bar glides across skin like silk rather than dragging.
Three Core Ingredients: Beeswax Pellets, Raw Shea Butter & Liquid Carrier Oils
The beauty of this master formula is its simplicity. You do not need confusing percentages or complicated scales—just equal parts by weight of three wholesome staples:

- 1 Part Pure Beeswax Pellets (e.g., 2 oz / 56 g): Always choose cosmetic-grade beeswax pastilles or pellets; they melt much faster and more uniformly than large solid wax blocks. Yellow beeswax imparts a warm honey aroma and amber hue, while white beeswax provides a neutral base for delicate pastel florals.
- 1 Part Raw Shea Butter or Cocoa Butter (e.g., 2 oz / 56 g): Unrefined ivory shea butter provides maximum emollient softness. If you prefer a firmer bar with a natural hint of dark chocolate aroma, raw cocoa butter makes an exceptional direct substitute.
- 1 Part Liquid Carrier Oil (e.g., 2 oz / 56 g): Sweet almond oil is the gold standard for fast absorption and balanced slip. Organic golden jojoba oil, fractionated coconut oil, or apricot kernel oil also work wonderfully, just like in our liquid diy body oil recipe and diy cuticle oil recipe.
- Optional Botanical Extracts & Essential Oils: Half a teaspoon of pure Vitamin E oil acts as an antioxidant, while 20 to 25 drops of pure essential oils (such as French lavender, sweet orange, or vanilla extract) impart a delicate natural scent.
Choosing the Right Molds: Flexible Silicone Cavities vs Travel Tins
Selecting the vessel or mold for your lotion bars influences both their visual appeal and ease of daily use:
- Flexible Silicone Baking & Soap Molds (Best for Aesthetics): Food-grade silicone molds with geometric honeycomb, floral, or simple round cavities make unmolding completely effortless. Once the bars cool to room temperature, the silicone peels away cleanly without sticking or tearing delicate edges.
- Pour-Direct Seamless Aluminum Tins (Best for Travel & Gifting): Pouring the liquid wax mixture directly into 2-ounce or 4-ounce screw-top aluminum tins eliminates unmolding altogether. You simply screw on the lid and toss it into a pocket, purse, or car console without worrying about lint or contact melting.
- Silicone Muffin Cups: If you do not own decorative soap molds, standard silicone baking cups work brilliantly and produce palm-sized circular bars that fit comfortably in the curve of your hands.
Step-by-Step Gentle Melting, Scenting & Pouring Walkthrough
Because beeswax has a higher melting point than shea butter, managing heat gently ensures that the delicate fatty acids in the unrefined butter are not overheated or damaged:

- 1. Set Up a Gentle Double Boiler: Place a heat-safe glass measuring pitcher (such as a 2-cup Pyrex with a pour spout) inside a small saucepan filled with 1 to 2 inches of simmering water over medium-low heat. Avoid boiling vigorously; steady steam provides all the gentle heat required.
- 2. Melt the Beeswax First: Add the beeswax pellets to the pitcher first, as they require the longest melting time. Allow the pellets to melt into a clear golden liquid.
- 3. Incorporate Carrier Oil & Shea Butter: Stir in the sweet almond oil, followed by the raw shea butter chunks. Shea butter melts quickly in the residual heat. Turn off the stovetop burner as soon as the last butter chunk dissolves to prevent overheating (which can cause shea butter to turn slightly grainy if cooked too long).
- 4. Add Essential Oils & Vitamin E: Remove the pitcher from the water bath and wipe the bottom of the glass with a clean towel to prevent water droplets from falling into your molds. Let the liquid cool for 60 seconds, then stir in the essential oils and Vitamin E oil.
- 5. Pour Steadily into Molds: Slowly pour the golden liquid into your silicone mold cavities, filling each one right to the top rim. If using botanical petals (such as whole chamomile heads or dried lavender buds), float a pinch on top of each cavity while the surface is still liquid.
- 6. Cool Completely Without Moving: Allow the mold to sit undisturbed on your counter for 2 to 3 hours until completely solid, opaque, and cool to the touch. If you need them quickly, you can place the mold in the refrigerator for 30 minutes after the tops have set.
3 Seasonal Botanical Blends for Mindful Evening Comfort
Here are three carefully tested aroma formulas scaled for a standard 6-ounce (170 g) batch of lotion bars (yielding three 2-ounce bars):
Formula 1: French Lavender & Golden Honey (Calming Bedside Ritual)
- 2 oz (56 g) Yellow Beeswax Pellets (natural honey scent)
- 2 oz (56 g) Raw Unrefined Shea Butter
- 2 oz (56 g) Sweet Almond Oil
- 1/2 tsp Pure Vitamin E Oil
- 16 drops French Lavender (Lavandula angustifolia) Essential Oil
- 6 drops Roman Chamomile Essential Oil
- A pinch of organic dried lavender buds floated on top.
Formula 2: Warm Vanilla, Cocoa & Sweet Orange (Cozy Autumn Confection)
- 2 oz (56 g) Yellow Beeswax Pellets
- 2 oz (56 g) Unrefined Cocoa Butter (natural dark chocolate aroma)
- 2 oz (56 g) Golden Jojoba Oil
- 1/2 tsp Pure Vitamin E Oil
- 14 drops Sweet Orange (Cold-pressed) Essential Oil
- 8 drops Pure Vanilla Oleoresin or Botanical Vanilla Extract
- 4 drops Atlas Cedarwood Essential Oil for a grounding woodsy finish.
Formula 3: Silky Calendula & Rosehip (Ultra-Dry Skin Restoration)
- 2 oz (56 g) Yellow Beeswax Pellets
- 2 oz (56 g) Raw Shea Butter
- 1.5 oz (42 g) Sweet Almond Oil + 0.5 oz (14 g) Cold-Pressed Rosehip Seed Oil
- 1/2 tsp Pure Vitamin E Oil
- 10 drops Geranium Bourbon Essential Oil
- 6 drops Frankincense Essential Oil
- A sprinkle of dried golden calendula petals embedded into each cavity.
Application Techniques, Body Heat Melting & Warm Room Storage
To enjoy the full benefits of solid lotion bars, understanding how to apply and store them ensures a non-greasy, silky finish:

- Warm Between Your Palms First: Hold the solid bar between your cupped palms for 5 to 10 seconds. Your natural body heat instantly softens the outer beeswax-shea layer, transferring a rich, velvety coating to your hands. Rub the warmed oil into your palms and massage over cuticles, hands, or dry limbs.
- Direct Application for Rough Spots: For stubbornly rough areas like heels, knees, and elbows, glide the bar directly across dry skin using gentle friction. Massage the melted butter in with circular thumb strokes until absorbed.
- Best Timing (Post-Bath or Bedtime): Apply lotion bars right after stepping out of the shower or bath while your skin is still slightly warm and damp. The beeswax locks in that surface hydration, keeping skin soft all night long. This ritual integrates effortlessly with our fall night routine habits.
- Storage Tips for Heated Homes: Solid lotion bars remain firm up to roughly 85°F (29°C). Keep them stored inside seamless aluminum tins, glass apothecary jars, or a ceramic soap dish away from direct sunny windowsills, radiators, or hot car interiors to preserve their clean molded shape.
Save This DIY Lotion Bar Recipe to Pinterest
Love this tactile domestic craft? Save this tutorial to your DIY Skincare, Natural Living, or Fall Self-Care Pinterest board so you have these exact 1:1:1 ratios and botanical formulas ready whenever your hands need rich, comforting moisture!
Implemented this seasonal reset on Saturday morning. Clearing away visual clutter while sipping hot tea made our whole home feel so much lighter and more peaceful.
Hi Maya! How do you maintain these gentle habits on hectic days when you only have 5 or 10 minutes?
I love the ‘one small anchor’ rule! On super busy days, don’t try to complete the full ritual—just light one natural candle or brew one mindful cup of tea without your phone. That tiny moment of stillness signals calm to your nervous system. Take it gently!