After hours spent savoring a rich holiday dinner, clearing the main table to make room for pie often feels rushed and chaotic. Setting up a dedicated Thanksgiving dessert table on a nearby sideboard or credenza creates a relaxed secondary gathering space, allowing guests to stretch their legs, brew warm drinks, and linger over sweet slices at their own leisurely pace.
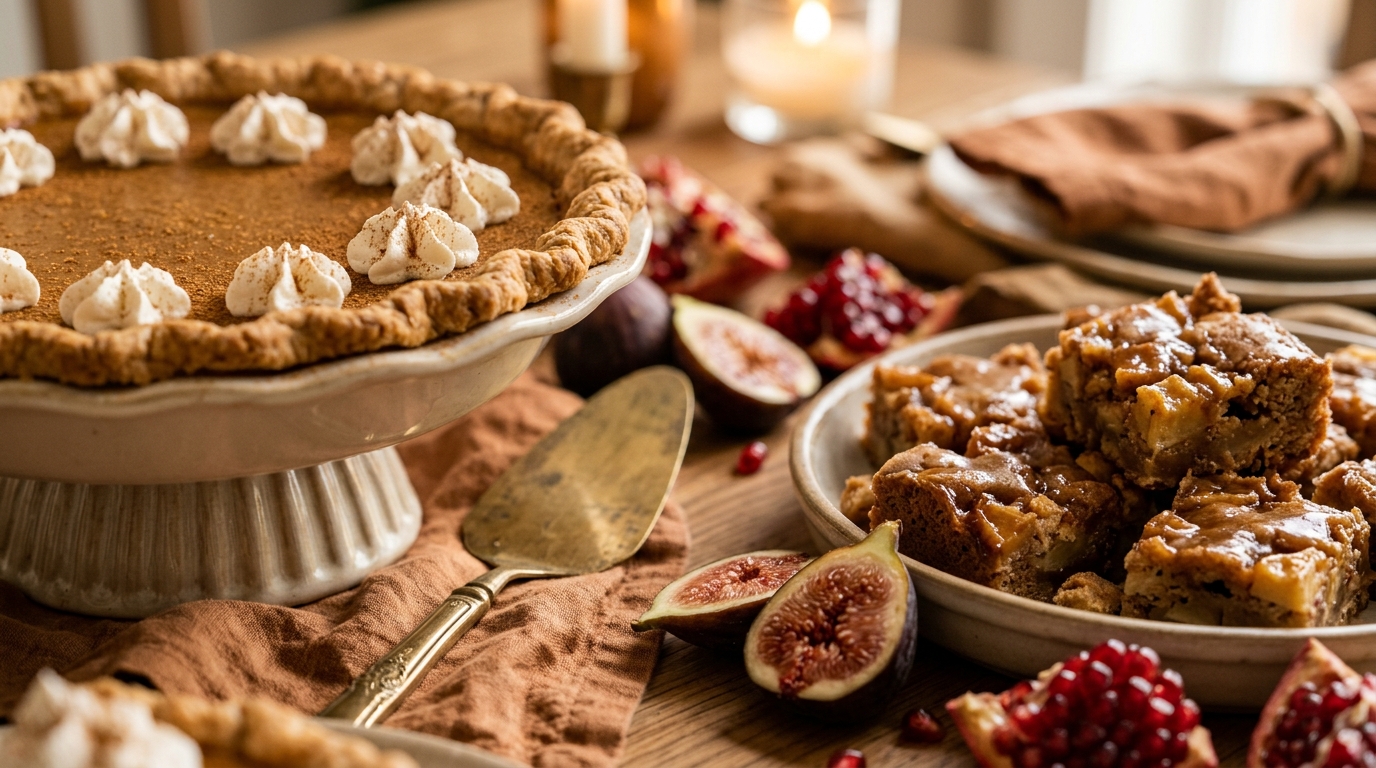
A successful dessert buffet is about much more than simply crowding five bakery boxes onto a folding table. By styling with tiered ceramic pedestals, warm candlelight safely enclosed in glass cylinders, and a thoughtful balance of whole centerpiece pies and bite-sized finger treats, you turn the final course into a cozy, memorable experience that keeps host stress to an absolute minimum.
Why Moving Desserts Off the Dinner Table Elevates Your Feast
In traditional holiday hosting, clearing dinner plates, gravy boats, and bread baskets before serving dessert creates an awkward pause where the host spends twenty minutes scraping plates in the kitchen. Creating a separate dessert station solves three key hosting challenges:
- Zero Rushed Table Clearing: You do not need to fully wash or stack dinnerware before guests can enjoy dessert. Guests can naturally migrate toward the sideboard whenever they feel ready for something sweet.
- Visual Excitement from the Moment Guests Arrive: A styled sideboard glowing with warm ambient light serves as gorgeous seasonal decor throughout the entire afternoon and evening.
- Effortless Flow & Mingling: Moving to a secondary station naturally breaks up static seating arrangements, prompting new conversations as friends gather to inspect the sweet options.
The 3-Tier Visual Formula: Heights, Pedestals & Wooden Risers
Flat tables look cluttered; tiered tables look intentional and bountiful. Professional tablescape styling relies on a straightforward vertical formula that guides the eye naturally across the spread:
Begin by anchoring your highest pieces in the center and back corners. Use tall, fluted ceramic pedestals (8 to 10 inches high) for showstopper whole pies like spiced pumpkin or brown-sugar pecan. In front of the pedestals, place medium-height wooden cutting boards or marble slabs (3 to 4 inches high) for sliced tarts and bar cookies. Finally, arrange low ceramic trays and small fruit bowls directly on the table runner in the immediate foreground.

The Balanced Sweet Lineup: Pies, Bite-Sized Treats & Fruit Accents
Offering three giant pies often leaves hosts with awkward half-eaten leftovers. A diversified sweet lineup satisfies varied appetites without overwhelming the table:
1. The Centerpiece Pies & Tarts
Feature two distinct classic whole pies: a velvety spiced pumpkin pie with decorative whipped cream piping, and an aromatic apple cranberry galette with a rustic flaky butter crust. Pre-slice at least half of each pie before guests approach the table to avoid messy, crumbling first cuts.
2. Two-Bite Finger Treats (Blondies & Mini Danishes)
Many guests feel too full after dinner to commit to a massive slice of pie. Offer two-bite baked finger sweets like Sarah’s chewy brown butter apple blondies cut into small squares, or mini bakery-style pastries like her easy flaky blueberry cream cheese danishes. These allow friends to sample multiple desserts without guilt.
3. Fresh Autumn Fruits & Tangy Balance
Heavy holiday sugars require fresh acidity to cleanse the palate. Scatter shallow ceramic bowls filled with fresh halved mission figs, clusters of red seedless grapes, and bright ruby pomegranate arils across the table to add natural color and refreshing texture.
Dessert Math & Portion Ratios for 10 to 14 Guests
Planning precise quantities prevents food waste while ensuring every guest enjoys their favorite flavors:
| Dessert Component | Formula for 10–14 Guests | Styling & Serving Tip |
|---|---|---|
| Whole 9-Inch Pies | 2 to 3 whole pies (approx. 16 to 24 slices) | Elevate on high pedestals; keep a dedicated brass server next to each pie. |
| Bite-Sized Bar Cookies | 20 to 24 mini squares (approx. 1.5 to 2 per guest) | Arrange on flat wooden boards with parchment paper liners for easy lifting. |
| Dessert Plates & Forks | 20 to 25 small plates (approx. 1.5 per guest) | Stack neatly on the left end of the credenza near cocktail napkins. |
| Fresh Whipped Cream | 3 cups homemade vanilla chantilly cream | Serve in a chilled ceramic bowl nested inside a larger bowl of crushed ice. |

Warm Drink Station Coordinates: Spiced Cider & Herbal Coffee
No holiday dessert table is complete without cozy, warm drinks. Position a mini beverage station on a small cart or side table right next to the desserts:
- Slow-Cooker Spiced Cider: Keep orchard apple cider warm on low heat infused with cinnamon sticks, orange slices, and whole star anise. Pair with our batch recipes from our Friendsgiving drink ideas guide.
- Fresh Drip Coffee & Decaf Herbal Teas: Set out thermal carafes of fresh dark roast coffee alongside caffeine-free peppermint and chamomile teas.
- Sweet Flavor Stirrers: Fill a mason jar with whole cinnamon sticks, rock sugar stirrers, and a small pitcher of warm vanilla creamer.
- Open Flame Candle Safety: If adding glowing candlelight across your credenza, always enclose pillar and taper candles in tall, heavy glass hurricane cylinders with at least 4 to 6 inches of clearance to eliminate flame risks from reaching sleeves.

Host Timeline: Staggered Baking & Afternoon Setup Steps
Baking everything on Thanksgiving morning clutters the oven and leaves the kitchen sweltering. Staggering your tasks creates a relaxed, seamless workflow:
- Two Days Before: Bake sturdy pie crusts, blind-bake shells, and bake Sarah’s moist cinnamon apple bread or blondie bars. Store wrapped tightly in foil at room temperature.
- Day Before: Bake your pumpkin and pecan pies completely. Cool to room temperature, then loosely cover and chill in the refrigerator. Set up cake pedestals, clean plates, and polished servers on the sideboard.
- Thanksgiving Morning: Bring refrigerated pies to room temperature so butter crusts regain their flaky texture. Whip fresh cream with vanilla and powdered sugar; keep refrigerated in an airtight container.
- Right Before Dinner: Light the glass-shielded hurricane candles, slice half of each pie, arrange fresh figs and berries, and turn the slow cooker cider to low warmth.
Frequently Asked Questions on Thanksgiving Dessert Styling
Should I pre-slice all the pies or let guests cut their own?
Always pre-slice at least four to six slices of each whole pie before opening the dessert table. The first cut into a whole pie is notoriously messy and can intimidate guests; once a couple of neat slices are removed, guests feel comfortable serving themselves.
How can I keep whipped cream from melting on the table?
Nest your ceramic serving bowl of whipped cream inside a slightly wider shallow bowl filled with crushed ice. This keeps the cream cold and stiff for up to two hours without returning it to the fridge.
What is the best way to handle guests who bring their own desserts?
Leave one empty pedestal or cutting board on your sideboard with a blank kraft card ready. When guests arrive with homemade tarts or cookies, you can immediately welcome their contribution directly onto the styled display without rearranging the entire table.
Save These Thanksgiving Dessert Table Ideas to Pinterest
Planning your holiday feast? Pin this guide to your Thanksgiving or Entertaining board on Pinterest so you have these pedestal formulas, dessert math, and styling tips ready whenever you host!
Setting up a separate dessert sideboard was the best decision for our Friendsgiving feast last weekend! Guests loved being able to wander over for dessert and hot coffee whenever they were ready instead of feeling rushed to clear dinner plates. The tiered stands added so much height and made our dining area look like a boutique cafe.
Hi Claire! I love the vertical tiered stand idea. If I have a very narrow credenza in an apartment dining room, what is the best way to arrange plates and coffee cups without causing a traffic jam around the treats?
Hi Chloe! In narrow spaces, a linear flow is your best friend! Place clean plates and napkins at the far left edge, keep the tiered dessert stands in the center, and place the coffee/tea mugs at the far right exit point. That way guests naturally move in one smooth direction from left to right without doubling back. Happy hosting!