
Hanging storage adds instant warmth and natural texture to blank walls while freeing up precious kitchen counter space. This modern crochet hanging basket is worked with thick, durable cotton cord in a continuous spiral, creating firm, upright sides that hold their shape under everyday kitchen produce or small potted plants without sagging.
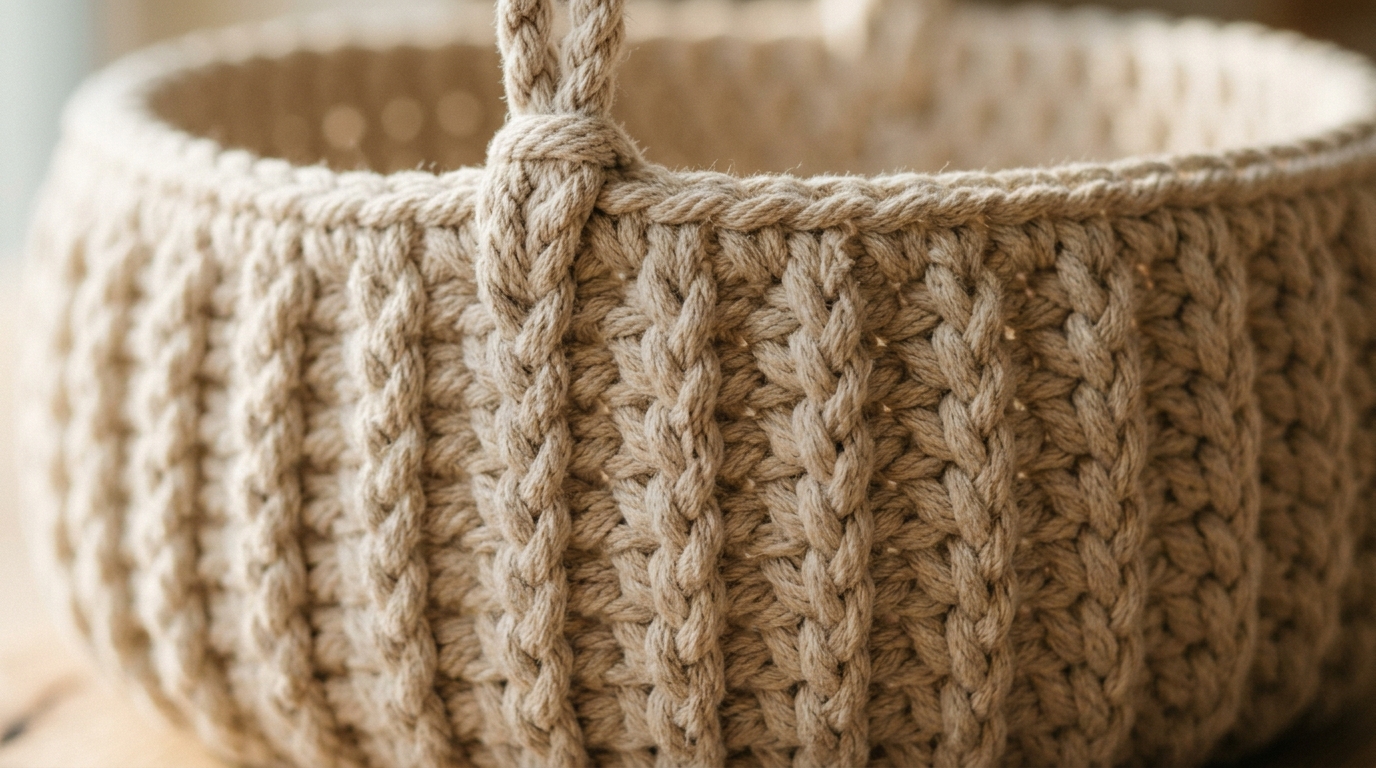
Unlike loose mesh produce bags that stretch excessively when loaded, this design relies on dense single crochet stitches worked in the round. By transitioning from the circular base to the basket walls through the back loops only, you create a built-in perpendicular ridge that keeps the bottom completely flat and the walls sturdy. You can hang it from a simple wooden wall peg, an iron S-hook on a pot rack, or a floating shelf bracket.
Maker’s Project Blueprint
- Skill Level: Easy / Advanced Beginner
- Finished Dimensions: 7 inches (18 cm) diameter base, 9 inches (23 cm) height (excluding hanging loop)
- Yarn Requirements: ~120 yards (110 m) of #5 Bulky 100% Kitchen Cotton (or two strands of worsted kitchen cotton held together)
- Hook Size: US J/10 (6.0 mm) smooth birch or ergonomic hook
- Hardware: One 2-inch (5 cm) natural solid beechwood ring (or worked as a reinforced crochet loop)
- Gauge: 11 single crochet stitches and 12 rows = 4 inches (10 cm)
- Completion Time: Approximately 45 to 60 minutes
- Studio Test Note: Pattern tested & hooked by Julian Brooks in natural ecru kitchen cotton. The continuous spiral base paired with a back-loop wall transition provides reliable upright structure that keeps kitchen produce well-ventilated and secure without tipping.
VERTICAL GREENERY PAIRING: Pair your hanging baskets with our structured crochet wall pocket plant hanger mounted on a smooth birch dowel for a balanced botanical wall display.
Why You’ll Love Hooking This Hanging Basket
- Quick Weekend Project: With bulky cotton yarn and a 6.0 mm hook, the entire basket works up in roughly an hour.
- Zero Assembly Seams: The base flows directly into the cylindrical walls and ends with an integrated loop or joined wooden ring, eliminating awkward hand-sewn joins.
- Natural Vertical Storage: Perfect for keeping garlic bulbs, shallots, lemons, or avocados off crowded countertops while allowing natural airflow.
- Versatile Home Styling: Works equally well in an entryway for keys and mail, in a bathroom for rolled washcloths, or as a cozy planter sleeve for a trailing pothos.
Materials & Tools Needed

- Bulky Cotton Yarn: 120 yards of #5 Bulky 100% kitchen cotton. Selecting a firm unmercerized cotton is crucial; synthetic fibers or soft wool stretch too easily when weighted down. If you only have worsted weight cotton on hand, read our tested guide on the best cotton yarns for crochet home goods and hold two strands together throughout the pattern.
- Crochet Hook: US J/10 (6.0 mm). Using a hook slightly smaller than standard for bulky yarn creates tighter, denser stitches that prevent gaps.
- Wooden Hanging Ring (Optional): A 2-inch untreated natural beechwood ring gives a clean Scandinavian look and hangs cleanly on wide pegs. You can also hook a continuous cotton chain loop directly into the rim if you prefer not to use hardware.
- Notions: A locking stitch marker (essential for spiral rounds), a blunt tapestry needle for weaving ends, and sharp embroidery scissors.
Step-by-Step Crochet Hanging Basket Pattern
This pattern is worked in continuous rounds (spirals) without joining at the end of each round with a slip stitch. Place a locking stitch marker in the first stitch of each round and move it up as you work.
Part 1: The Circular Flat Base
Round 1: Make a magic ring. Work 6 single crochet (sc) into the ring. Pull the tail gently to close the center hole. Do not join with a slip stitch. (6 stitches)
Round 2: Work 2 sc into each stitch around. (12 stitches)
Round 3: *1 sc in the next st, 2 sc in the following st; repeat from * around. (18 stitches)
Round 4: *1 sc in each of the next 2 sts, 2 sc in the following st; repeat from * around. (24 stitches)
Round 5: *1 sc in each of the next 3 sts, 2 sc in the following st; repeat from * around. (30 stitches)
Round 6: *1 sc in each of the next 4 sts, 2 sc in the following st; repeat from * around. (36 stitches)
Round 7: *1 sc in each of the next 5 sts, 2 sc in the following st; repeat from * around. (42 stitches)
At this stage, your circle should measure approximately 7 inches across and sit flat without waving. For more tips on maintaining even tension across circular bases, see our guide on how to fix curling in round crochet projects.

Part 2: Transitioning to the Basket Walls
Round 8 (Transition Round – Back Loops Only): Work 1 sc in the back loop only (BLO) of every stitch around. (42 stitches). This single round creates an immediate 90-degree bend, clearly defining the base from the upright walls.
Rounds 9–20: Working under both standard loops again, work 1 sc in each stitch around. Continue in continuous spirals for 12 rounds until the walls measure roughly 7.5 inches tall from the base crease. (42 stitches per round)
Part 3: The Hanging Handle & Rim
Option A: Crocheted Hanging Loop (No Hardware)
Work sc until you reach the center back of the basket. Chain 14 stitches. Skip 2 stitches on the rim and slip stitch into the next stitch to anchor the loop. Turn your work, work 16 sc directly over the chain loop to reinforce it, slip stitch back into the rim, fasten off, and weave in your tail securely.
Option B: Integrated Wooden Ring
Hold your 2-inch beechwood ring flush against the back rim of the basket. Insert your hook through the next rim stitch and under the wooden ring simultaneously. Yarn over, pull up a loop, and complete a sc around both the crochet edge and the ring. Repeat across 6 consecutive stitches to firmly lock the ring into the rim. Slip stitch into the next stitch, fasten off, and weave in ends with a blunt tapestry needle.
3 Maker Secrets for Sturdy Wall Baskets
1. Maintain Consistent Yarn Tension: Unlike garments where drape is desirable, home decor containers need structural rigidity. Keep your working yarn snug across your index finger. If your stitches feel loose or pliable, drop down a half-hook size to 5.5 mm. You can explore more firm textures in our guide to textured crochet stitches for modern home decor.
2. Reinforce the Base Ridge: The BLO transition round on Round 8 leaves an exposed front loop ridge around the circumference. This ridge naturally encourages the cotton to fold upward rather than balloon outward, helping the basket hold its cylindrical profile even when empty.
3. Steam Block for Crisp Vertical Lines: Once your basket is complete, slip a cylindrical ceramic canister or small bowl inside to maintain the form. Hover a handheld garment steamer 1 to 2 inches away from the cotton, allowing the steam to relax any uneven stitches. Let it dry completely before hanging.
How to Style & Use Your Hanging Basket

- Kitchen Allium Storage: Hang near your food prep station to hold garlic, shallots, or ginger. Cotton provides superior breathability compared to plastic or solid containers, helping dry produce stay fresh longer.
- Hanging Planter Pod: Drop a 4-inch potted trailing pothos, philodendron, or string of pearls inside (use a clear plastic saucer inside the base to catch drainage drops). If you love vertical greenery, pair it with our free modern crochet plant hanger pattern.
- Entryway Catch-All: Mount beside your front door to hold dog leashes, sunglasses, mail, or winter beanies and mittens. For floor storage options, complement it with our chunky crochet storage basket pattern.
Washing & Long-Term Care
- Spot Cleaning: For minor dust or onion skin residue, gently tap the basket outside or wipe with a damp microfiber cloth.
- Hand Washing: If the basket requires a deeper wash, submerge in lukewarm water with a drop of mild liquid laundry soap. Gently squeeze the fabric without twisting or wringing.
- Reshaping & Drying: Place an appropriately sized bowl or rolled towel inside while damp to reshape the cylinder, and allow to air dry completely on a flat surface away from direct heat.
Frequently Asked Questions
Will this hanging basket stretch out over time?
Using 100% kitchen cotton with tight single crochet stitches minimizes stretching. Unlike acrylic or wool which have significant elastic memory and sag under weight, heavy cotton maintains its shape well under regular everyday weight like onions or small houseplants.
Can I make this basket in different sizes?
Yes. To make a wider basket, add increase rounds to Part 1 (e.g., Round 8: *6 sc, 2 sc* for 48 sts). To make it taller or shallower, simply adjust the number of wall rounds in Part 2 before completing the rim.
What is the best way to hang this on drywall?
A sturdy wooden wall peg with an integrated drywall anchor offers the cleanest look and holds up to 10 lbs securely. You can also hook it onto an existing under-cabinet pot rack or floating shelf bracket with a brass S-hook.
Leave a Comment