
Fluted architectural furniture has become a hallmark of contemporary Japandi and Scandinavian interior design, infusing living spaces with rich rhythmic texture, vertical shadow lines, and structural warmth. Yet retail showroom versions of round fluted wooden coffee tables often carry staggering price tags between $800 and $1,500. By combining affordable structural heavy-duty cardboard sonotubes with natural wooden half-round dowel mouldings and a pre-cut round hardwood tabletop, you can craft a bespoke, boutique-grade centerpiece for under $75 in materials.
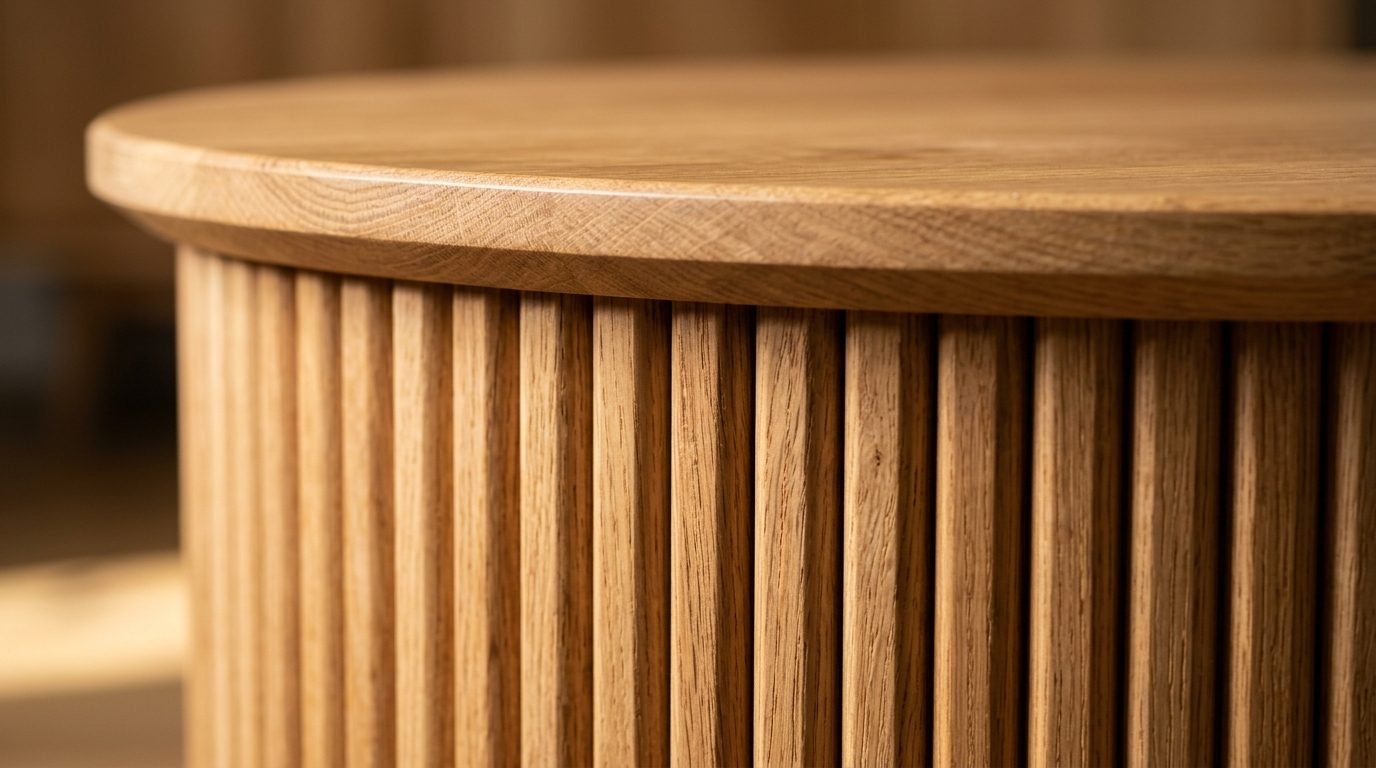
In our tutorial on small living room layout ideas, we established how circular coffee tables eliminate awkward 90-degree corners and maintain smooth 18-inch walking clearances. Building this fluted table allows you to customize the exact diameter and height to match your sofa cushions, providing custom ergonomics with high-end designer polish.
Why You’ll Love This DIY Fluted Table
- Huge Cost Savings: Replicate high-end designer showroom tables (CB2, Crate & Barrel, West Elm) at less than one-tenth of the retail price.
- Beginner-Friendly Joinery: Requires no complex pocket-hole joinery, table saws, or mortise-and-tenon cuts; assembly relies on instant-grab construction adhesives and simple miter box cuts.
- Custom Scalability: Easily adjust the base diameter (12 to 20 inches) and tabletop width (28 to 36 inches) to perfectly suit small apartments or spacious family rooms.
- Organic Textural Focal Point: The vertical fluting creates dynamic light and shadow play throughout the day, complementing our DIY textured stone vases and linen textiles.
Tools, Timber & Crafting Supplies

To ensure structural rigidity and prevent the table from feeling lightweight or hollow, select dense materials and commercial-grade adhesives:
- The Drum Base (14 to 16-inch diameter): A heavy-gauge cardboard concrete form tube (Sonotube) cut to 15 inches in height, or an upcycled wooden cheese box or round drum planter.
- Fluting Material: 25 to 30 lengths of 3/4-inch solid pine or basswood half-round dowel moulding (cut into identical 15-inch sticks). Alternatively, flexible fluted wood tambour panels can be used for faster installation.
- The Tabletop Disc: A 28 to 32-inch pre-cut round edge-glued pine or birch plywood round panel (1 inch thick) available at any local home improvement center.
- Adhesive: Loctite Power Grab Express or PL Premium Construction Adhesive in a standard caulking gun. Avoid regular PVA wood glue on cardboard, as it lacks immediate tack.
- Internal Ballast Weight: A 25 lb bag of play sand or clean gravel placed inside the base drum before attaching the top to prevent accidental tipping.
- Finishing: Watco Natural Danish Oil, white furniture wax, or clear matte water-based polyurethane.
Step-by-Step Construction Walkthrough
1. Cutting & Prepping the Base: Measure and mark a level line around your cardboard sonotube at exactly 15 inches from the base. Cut smoothly using a fine-toothed hand saw or jigsaw. Sand the cut rim flat with 120-grit sandpaper.
2. Precision Dowel Trimming: Using a hand miter box and pull saw, cut all your half-round moulding strips to identical 15-inch lengths. Sand both ends with a 180-grit sanding sponge to remove stray splinters.

3. Installing the First Flute (The Plumb Line): Use a level to draw a straight vertical pencil line down the side of your cylinder drum. Apply a generous bead of Loctite adhesive along the flat backside of your first dowel and press it firmly against the guideline. Hold for 30 seconds.
4. Wrapping the Drum: Work around the perimeter, gluing each dowel snug against the previous one with zero gaps. Wrap two large bungee cords or ratcheting strap clamps around the cylinder circumference to hold continuous pressure while the adhesive cures for 4 hours.
5. Weighting & Mounting the Top: Place your 25 lb bag of sand into the bottom cavity of the drum base. Cut four 2×2-inch wooden corner cleats, screw them into the interior rim of the tube, and secure the circular tabletop from underneath using 1.25-inch wood screws so no screw heads are visible on top.
6. Sanding & Organic Oil Finish: Sand the entire wooden surface with 220-grit sandpaper. Wipe clean, then wipe two generous coats of Natural Danish Oil or Scandinavian white oil over the wood using a lint-free cotton rag. Allow 24 hours to cure into a silky matte sheen.
3 Woodworker Secrets for Professional Polish
1. Close the Final Gap with a Custom Rip Cut: When wrapping dowels around a circle, the last remaining gap rarely equals exactly 3/4 inch. Measure the final space with calipers; sand the flat back edge of the final dowel on an angle or hand-plane it down to fit seamlessly into the final slot.
2. Always Add Base Ballast: A cylinder table made with lightweight cardboard and hollow pine can easily tip if a guest leans on the outer edge. Adding 20–30 lbs of sand in the base lowers the center of gravity, giving the piece the reassuring physical heft of solid stone furniture.
3. Bevel the Tabletop Underside: Use a hand sanding block or trim router with a 45-degree chamfer bit along the bottom edge of the top round disc. This creates an optical “floating” shadow line between the top and the fluted base, mimicking gallery-grade Italian furniture.
The Finished Fluted Table in the Living Room

Paired with organic accents like our DIY terracotta pieces and warm textiles from our warm minimalist bedroom styling, this handmade table becomes a durable, cherished design anchor in your home.
Project Cost Breakdown vs Designer Retail
| Component | Retail Designer Showroom | DIY Upcycled Build | Total Savings |
|---|---|---|---|
| Circular Tabletop | Solid White Oak ($450) | Birch Plywood Round ($28) | Save $422 |
| Fluted Base Drum | Carved Solid Timber ($600) | Sonotube + Pine Dowels ($32) | Save $568 |
| Adhesives & Finishes | Industrial Factory Finish ($150) | Loctite + Danish Oil ($14) | Save $136 |
| Total Investment | $1,200.00 | $74.00 | Save $1,126.00 (94%) |
Frequently Asked Questions
Is a cardboard sonotube sturdy enough to support heavy books and drinks?
Yes. Heavy-duty concrete form tubes are engineered to withstand thousands of pounds of wet concrete pressure. Once reinforced with vertical pine dowels and weighted with internal sand ballast, the structure is extraordinarily rigid and supports upwards of 150 lbs easily.
Can I paint the fluted table instead of staining it wood?
Absolutely. If you prefer a crisp matte black or chalky cream finish, prime the entire assembled table with a shellac-based primer (like Zinsser B-I-N) and paint with two coats of ultra-matte latex paint, following our texturing hacks from the DIY stone ceramic tutorial.
How do I prevent coffee spills from staining the wood top?
Apply three coats of water-based matte polyurethane (such as General Finishes Flat Out Matte) over your cured Danish oil. This seals the wood pores completely against liquid rings without adding synthetic plastic shine.
Pin This DIY Fluted Coffee Table Tutorial for Later
Ready to build your dream designer coffee table this weekend? Pin this step-by-step DIY fluted table guide to your woodworking or DIY furniture boards on Pinterest so you have the supply list and measurements ready for the hardware store!
Leave a Comment