
There is an unmistakable, romantic romance to antique European terracotta pots: the chalky white mineral efflorescence, soft earthen patinas, and velvety emerald moss creeping across weathered rims. Yet store-bought clay pots fresh from garden nurseries often possess a stark, jarring neon-orange sheen that screams new plastic production. While natural weathering in a garden border can take decades, you can accelerate half a century of organic antiquity in just a few short weeks using a simple, time-tested horticultural slurry of cultured buttermilk, garden moss spores, and natural mineral salts.
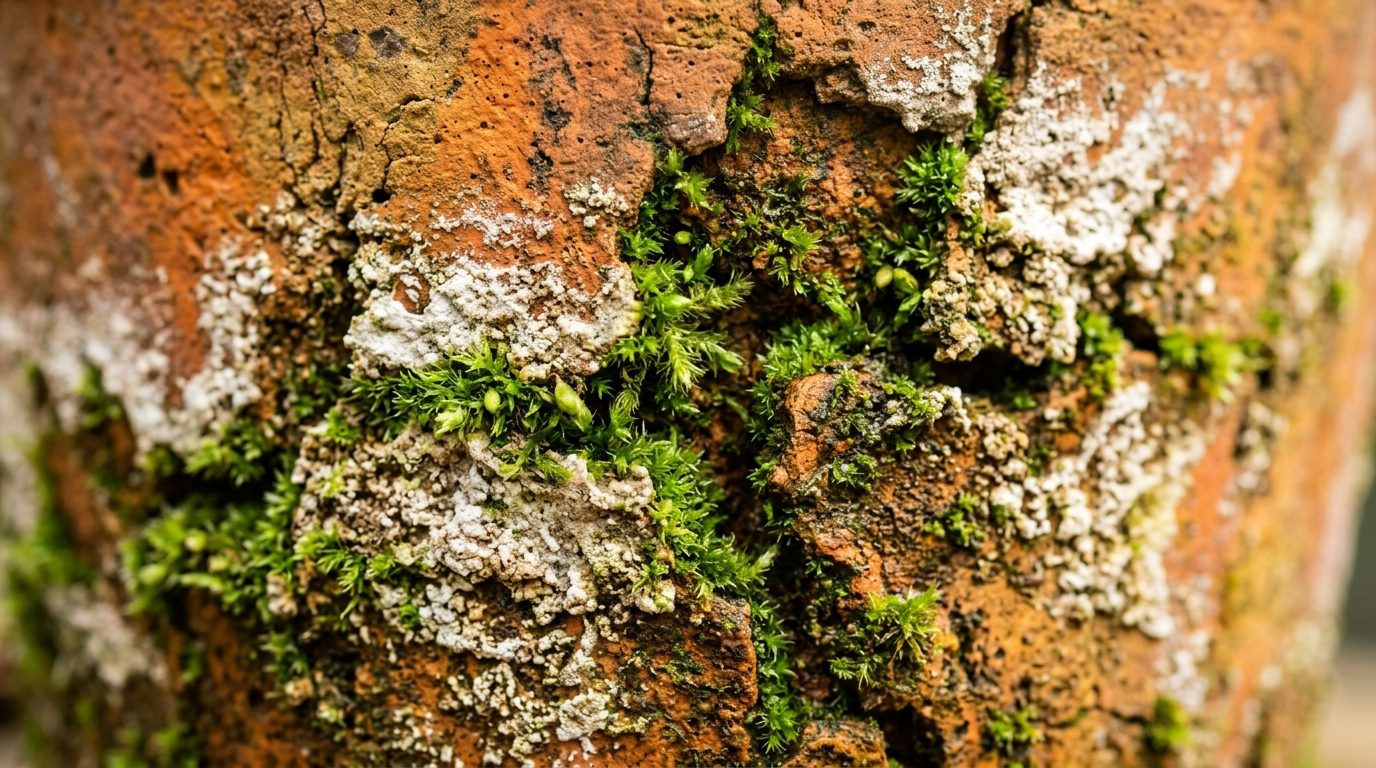
In our viral tutorial on the DIY faux terracotta pumpkin makeover, we explored how alkaline minerals eliminate unnatural synthetic shine. This live biological technique takes the concept even further: introducing real vegetative moss cultures directly into the clay’s porous microscopic capillaries, creating living antique planters that only grow more beautiful with time.
Why You’ll Love This Antique Aging Method
- Authentic Living Texture: Generates real living bryophyte moss and true mineral salt crusting, completely avoiding cheap-looking flat craft paint streaks.
- Inexpensive Nursery Upcycle: Turns ordinary $1.50 home improvement store clay pots into museum-worthy vessels that sell for $45 to $85 in boutique greenhouse nurseries.
- Safe for Sensitive Plant Roots: Unlike harsh synthetic chemical stains or spray paints, buttermilk and moss slurry is 100% organic and beneficial to potting soil health.
- Perfect for Indoor & Outdoor Displays: Enhances kitchen counters housing your windowsill culinary herbs or patio groupings paired with fall container gardens.
Supplies & The Biological Slurry Recipe

Terracotta is extraordinarily porous, acting like a rigid sponge. To establish a moss colony, you must provide the acidic, nutrient-rich microclimate moss spores crave:
- The Pots: Standard unglazed, raw Italian or standard terracotta flower pots. Avoid pots with silicone waterproofing or glazed finishes.
- Cultured Buttermilk or Plain Kefir (1 cup): The lactic acid lowers the surface pH of the clay to an acidic 5.0–5.5, creating the optimal growth medium while providing sugars and proteins to feed spores.
- Live Garden Moss (1 handful): Gather a small patch of moss growing on damp bricks, tree bark, or shaded stone paths (acrocarpous mosses that grow in tight cushions adapt best to vertical clay surfaces).
- Aged Organic Compost (2 tablespoons): Inoculates the mixture with beneficial mycorrhizal fungi and micro-nutrients.
- Application Tool: A coarse 2-inch natural bristle chip brush with stiff, worn bristles.
- Mineral Salt Solution: 2 tablespoons Epsom salt (magnesium sulfate) dissolved in 1 cup warm water to induce instant white chalky efflorescence.
Step-by-Step Aging Walkthrough
1. The Clay Hydration Soak: Brand-new dry terracotta will instantly suck moisture out of your moss slurry, killing spores before they adhere. Submerge your clean pots in a bucket of clean water for 30 minutes until bubbling ceases and the clay is fully saturated.
2. Compounding the Slurry: In an old blender or dedicated craft bowl, combine 1 cup cultured buttermilk, a small handful of shredded live moss, 2 tablespoons compost, and 1/2 teaspoon white sugar. Pulse or whisk until it forms the consistency of a thick, pourable green smoothie.

3. Painting the Surface: Using your coarse brush, paint the thick slurry generously over the exterior walls, rim, and 2 inches down into the interior rim. Concentrate extra paste into crevices, drainage hole edges, and under the top lip where natural moisture naturally settles.
4. The Salt Wash Accent: While the slurry is damp, lightly spritz random patches with your dissolved Epsom salt solution. As the water evaporates, magnesium sulfate crystals bloom to the surface, creating natural weathered lime crusting.
5. The Greenhouse Incubation Chamber: Place the painted pots inside a loose, clear plastic storage tote or loosely tied plastic bag. Position in a cool, deep shade spot (under outdoor shrubs or in a damp garden shed). Mist daily with clean water to keep the environment at 80%+ humidity. Green moss velvet will emerge within 14 to 21 days.
3 Nursery Master Secrets for Lasting Patina
1. Match Moss to Your Climate: Never buy dried craft decorative sheet moss (which is dead and dyed with green chemicals). Always forage fresh, live moss from your immediate local region. Native mosses are already genetically adapted to your regional humidity and temperature cycles.
2. Keep Out of Scorching Direct Sun: Young developing moss protonema (the delicate microscopic green filaments) will scorch and turn brown if exposed to direct midday UV sunlight. Keep your aging pots in bright, indirect open shade or north-facing window light.
3. Use Dirty Garden Water: When misting your pots during the first month, use water collected from a garden rain barrel or aquarium runoff rather than chlorinated tap water. Beneficial bacteria in untreated rainwater accelerate moss colony maturation.
The Finished Aged Pots Planted in the Conservatory

Whether planted with delicate indoor ferns or holding seasonal plantings like our container spring bulbs, these aged vessels ground your living spaces with botanical authenticity and timeless European garden heritage.
Quick Comparison: Aging Techniques
| Aging Method | Visual Characteristics | Time to Result | Durability |
|---|---|---|---|
| Buttermilk & Live Moss Slurry | Velvety live green moss + organic salt crust | 2–3 Weeks | Permanent (living colony thrives with moisture) |
| Yogurt & Compost Wash | Earthy mottled gray-green patina with mild spores | 3–4 Weeks | Long-lasting natural surface discoloration |
| Baking Soda Paint Technique | Chalky mineral limestone texture (non-living) | Instant (2 Hours) | Durable indoor art finish (no water contact) |
| Epsom Salt & Lime Wash | Heavy white lime efflorescence & chalking | 48 Hours | Washes off gradually with heavy outdoor rains |
Frequently Asked Questions
Will the buttermilk smell sour while the pots are aging?
During the first 3 to 4 days of incubation, you may notice a very faint cultured yogurt scent if you put your nose right against the pot. However, as the lactic acid bacteria colonize the clay and dry out, the odor disappears completely within 5 days, leaving only a clean, earthy forest scent.
Can I use this moss slurry technique on concrete or stone planters?
Yes! The buttermilk slurry adheres wonderfully to porous cast concrete, garden stone troughs, unsealed brick pavers, and hypertufa planters. The only prerequisite is that the substrate must be porous and unsealed.
How do I keep the moss alive once I bring the pots indoors?
Indoor air is often dry due to heating and AC. To keep the moss vibrant and green indoors, spritz the outer clay walls of the pot with room-temperature water once every 2 to 3 days using a fine hand mister, and position the plant in bright, indirect light.
Pin This Aged Moss Terracotta Tutorial for Later
Love the antique European garden look? Save this DIY aged moss terracotta tutorial to your container gardening or DIY garden crafts boards on Pinterest so you have the exact slurry formula ready when you buy your next batch of clay pots!
Leave a Comment