
There is nothing quite like tossing a textured, chunky handcrafted cushion onto a sofa or armchair to instantly warm up a living space. While flat, basic single-crochet pillows often end up feeling stiff or stretching out of square, this modern chunky ribbed crochet cushion cover uses deep front-post stitches and an 8.0 mm hook to create thick, architectural valleys that hug an 18×18-inch pillow insert snugly. Finished with an effortless three-button envelope back closure, this pattern offers rich tactile comfort and straightforward weekend assembly without needing to sew in a zipper.
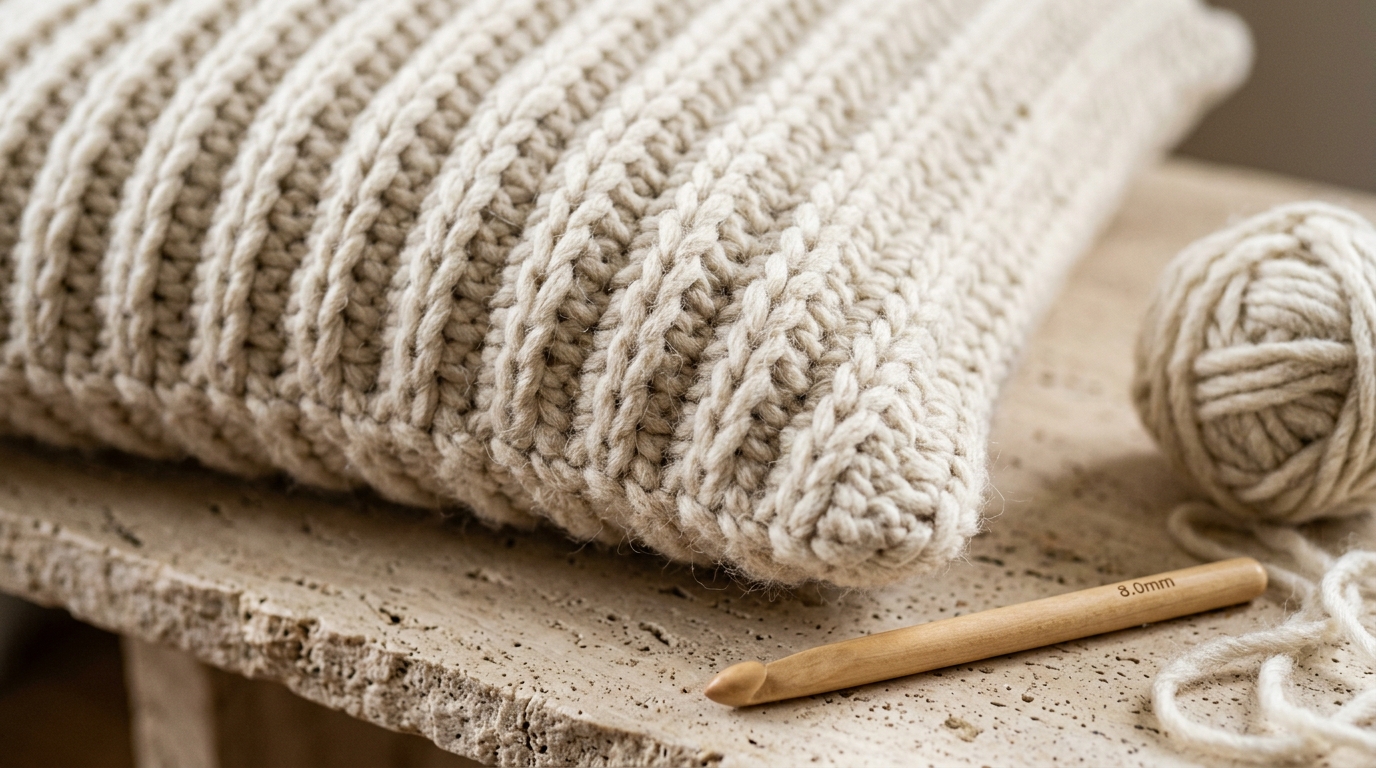
Working ribbing with bulky #5 yarn produces a cushion that feels substantial and cushioned rather than flimsy. By alternating raised front-post half-double crochet stitches with standard stitches, the fabric develops a subtle accordion-like elasticity. This built-in stretch allows you to design the cover with slight negative ease, ensuring the corners stay crisp and square rather than drooping or hollowing out around the pillow form.
Maker’s Project Blueprint: Chunky Ribbed Cushion Cover
- Skill Level: Intermediate Beginner (comfortable with basic half-double crochet and working around stitch posts).
- Finished Dimensions: 17.5 × 17.5 inches (44.5 × 44.5 cm) square unbuttoned. Specifically engineered with 1/2-inch negative ease to fit standard 18 × 18-inch cushion inserts plumply.
- Yarn Requirements: ~480 yards (550 g) of #5 Bulky weight yarn (shown in natural ecru; or two strands of #4 worsted cotton/wool blend held together).
- Hook & Hardware: 8.0 mm (US L-11) blonde birch crochet hook, three 1.25-inch (32 mm) natural olive wood buttons, large steel yarn needle, and tape measure.
- Working Gauge: 10 stitches × 8 rows = 4 inches (10 cm) in front-post half double crochet ribbing.
- Julian’s Studio Testing Note: Tested in my home studio using a plump 18×18-inch down-alternative insert. Sizing the casing exactly 1/2 inch smaller than the insert forces the pillow form into all four corners, eliminating floppy corner ears and keeping the front vertical ribs taut and beautifully defined.
Why You’ll Love This Pattern
- Zero Zipper Hassle: An overlapping three-button envelope back makes taking the cover off for laundering fast and completely zipper-free.
- Plush European Knit Aesthetic: Thick front-post ribbing mimics expensive luxury brioche knitwear while offering greater durability and structural hold.
- Fast 4-Hour Weekend Build: Thanks to chunky #5 yarn and an 8.0 mm hook, the entire cover works up in a single relaxed afternoon.
- Reversible Elegance: Looks finished from both sides—a dramatic sculptural ribbed front and a clean, tailored wooden button closure on the reverse.
Key Materials & Hardware Selection

Carefully selecting your yarn and hardware guarantees your cushion holds up to daily lounging without sagging or pilling:
- Bulky #5 Yarn: Look for a resilient cotton-acrylic or wool-blend yarn with a smooth, round ply structure. High-twist yarns produce crisp, well-defined stitch ridges that bounce back after being leaned against. If you prefer working with worsted weights, compare our earlier pattern for a modern textured crochet pillow cover.
- Natural Olive Wood Buttons (1.25-Inch): Large wooden buttons provide a secure anchor for the envelope flap without pulling through the crochet stitches. Their earthy organic grain pairs seamlessly with natural ecru textiles.
- 8.0 mm Birch Crochet Hook: A wooden hook provides smooth glide through bulky plies while maintaining the consistent tension required for straight side borders.
Step-by-Step Pattern Walkthrough
This cushion cover is constructed in three pieces: one large ribbed front panel, and two overlapping back panels that create the envelope closure.
Section 1: The Front Ribbed Panel
1. Foundation Chain: Chain 44 loosely with your 8.0 mm hook.
2. Foundation Row: Half double crochet (hdc) in the 3rd chain from your hook and in each chain across. Ch 2 (does not count as a stitch here and throughout), turn. (42 hdc).
3. Row 2 (Establishing Ribbing): *Hdc in next st, front-post half double crochet (FPhdc) around the stem of the next st; repeat from * across to last st, hdc in last st. Ch 2, turn. (42 sts).
4. Rows 3–36: Repeat Row 2 until your panel measures 17.5 inches tall, ending on an even row. Fasten off and weave in ends.

Section 2: The Back Envelope Panels
The back panels are worked in standard half double crochet for a smooth, flat surface that rests comfortably against seating cushions:
Lower Back Panel: Ch 44. Work in standard hdc for 22 rows (approximately 11 inches tall). Fasten off.
Upper Back Panel (With Button Loops): Ch 44. Work in standard hdc for 18 rows (approximately 9 inches tall). On Row 19, create 3 button loops: hdc in first 6 sts, *ch 3, skip 2 sts, hdc in next 12 sts; repeat from * twice more, hdc to end. Fasten off.
Section 3: Assembly & Border Joining
Lay your ribbed front panel right side up on your work surface. Place the lower back panel on top, right side facing down, aligning the bottom and side edges. Place the upper back panel on top, aligning the top and side edges so the two back panels overlap across the center by 3 inches.
Pin the edges securely with locking stitch markers. Join yarn with a slip stitch at any corner and single crochet through all overlapping layers around the entire perimeter, working 3 single crochets into each corner to turn smoothly. Fasten off and weave in all tails.
Section 4: Attaching the Buttons
Lay the pillow flat and mark the positions of the three button loops on the underlapping lower panel. Using doubled yarn or strong sewing thread, firmly sew the three 1.25-inch olive wood buttons in place. Slip your 18×18-inch cushion insert inside and button up the back.
3 Studio Secrets for Crisp, Sag-Free Cushions
1. Always Respect Negative Ease: Never crochet a cushion cover the exact same size as your pillow insert. A cover that matches the insert will look loose and slouchy within a week. Sizing the cover 0.5 to 1 inch smaller stretches the ribbing just enough to create a firm, taut, designer silhouette.
2. Lightly Steam-Block Panels Before Assembly: Before seaming the panels together, give the pieces a quick steam-blocking on a foam grid mat as demonstrated in our studio guide on steam vs wet blocking crochet. This sets the side edges perfectly straight, making perimeter seaming fast and effortless.
3. Use a High-Quality Down-Alternative Insert: Inexpensive foam pillows break down and lose volume quickly. A dense feather or down-alternative insert with a cotton twill casing fills out the chunky crochet stitch valleys with luxurious weight.
Living Room Styling & Texture Pairings

A chunky ribbed pillow adds rich textural contrast when styled alongside complementary fiber decor:
- Pair with Cozy Throws: Drape this cushion over a sofa paired with our beginner-friendly chunky crochet blanket throw to layer tactile warmth across your living space.
- Tabletop Harmony: Carry the natural ecru cotton aesthetic through the room with our square crochet coasters with crab-stitch borders.
- Expand Your Home Maker Skills: To explore more functional home styling tutorials and foundational stitches, consult our complete modern crochet home decor beginner’s guide.
Care & Laundering Instructions
- Pre-Wash Prep: Unbutton the three wooden buttons, remove the pillow insert, and re-button the envelope flap before laundering to protect the button loops from stretching in the wash.
- Washing: Machine wash in a mesh laundry bag on a gentle, cool water cycle using a mild plant-based detergent.
- Drying: Lay flat on a clean towel to dry. Gently smooth the front ribbing into alignment with your hands while damp to maintain the deep vertical stitch definition.
Frequently Asked Questions
Can I use a 20×20-inch pillow insert instead?
Yes! If you prefer an ultra-plump, overstuffed pillow, you can insert a 20×20-inch down-alternative form into this 17.5-inch cover. The front-post ribbing has enough natural elasticity to accommodate the larger insert for an extra-full look.
Will the button closure gape open when someone leans on it?
No. By creating a generous 3-inch overlap between the upper and lower back panels and spacing the three buttons evenly, the envelope closure remains flat and gap-free even under heavy lounging weight.
Can I make this pillow with #4 worsted yarn?
Yes. Simply hold two strands of worsted weight yarn together throughout the pattern and continue using your 8.0 mm hook. This achieves the exact same chunky gauge while letting you use stash yarns.
Pin This Chunky Cushion Pattern for Later
Love modern, cozy home decor? Save this free chunky ribbed crochet pillow pattern to your Pinterest home craft or crochet boards so you have the stitch counts, gauge notes, and envelope assembly ready for your next cozy weekend project!
Leave a Comment