
As brisk autumn winds pick up and indoor heating turns on, lips are often the very first place to feel tight, chapped, and uncomfortable. While drugstore lip balms promise instant relief, many rely heavily on petroleum jelly and synthetic mineral oils that sit loosely on the surface, requiring constant reapplication throughout the day. Crafting your own DIY beeswax lip balm takes less than fifteen minutes on the stovetop using just four wholesome ingredients: yellow beeswax pellets, raw shea butter, virgin coconut oil, and a touch of botanical essential oil.
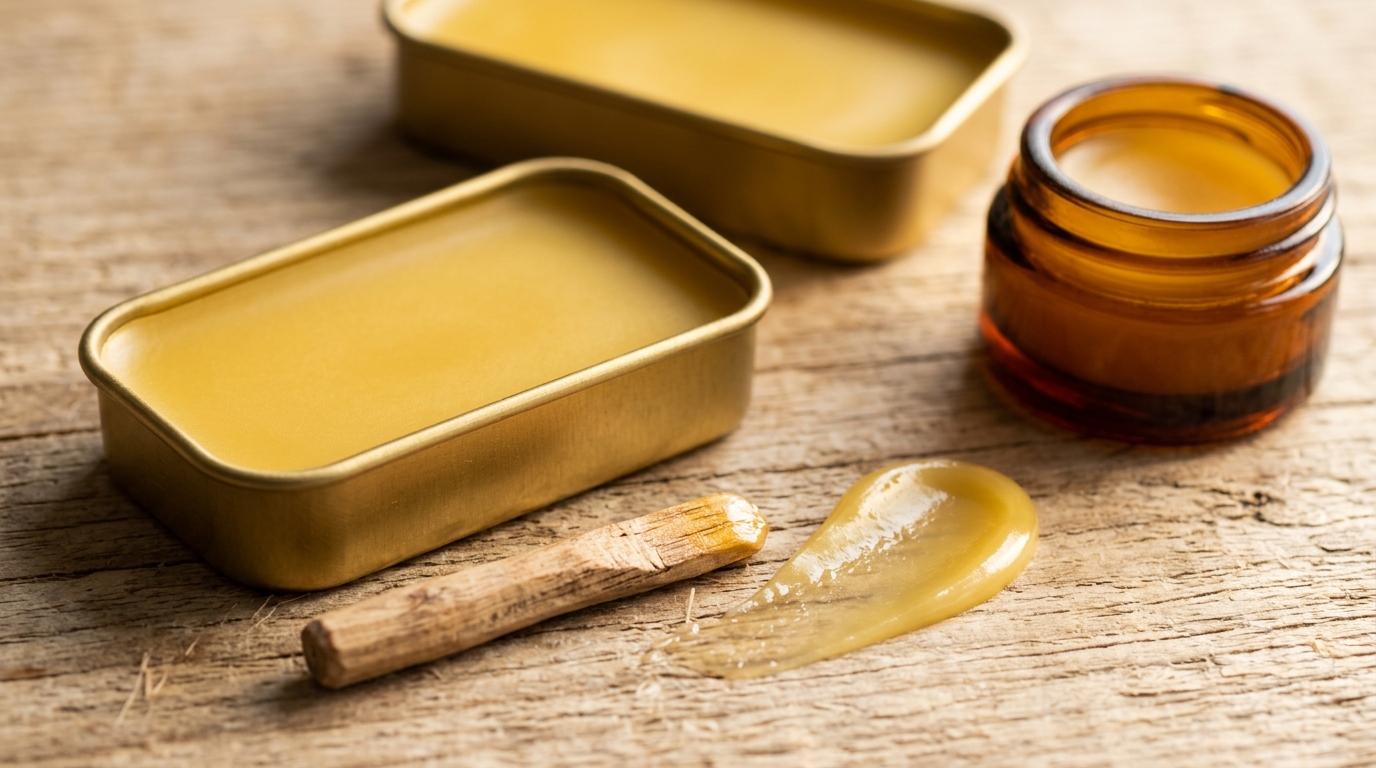
The beauty of making homemade lip balm lies in the structural strength and natural moisture retention of pure beeswax. When combined with softening plant fats and conditioning liquid oils, beeswax forms a breathable, water-resistant barrier that shields delicate lip tissue from chilly outdoor air. Whether poured into minimalist metal slider tins or eco-friendly paperboard tubes, this reliable formula glides on smoothly without feeling sticky, waxy, or heavy.
Why Natural Beeswax Protects Lips Better Than Petroleum Jelly
Understanding how natural plant and hive ingredients function compared to petroleum derivatives helps explain why homemade balm lasts longer between coats:
- Breathable Moisture Barrier: Petroleum-based jellies form an impermeable plastic-like film over lips that traps dead skin cells and prevents natural respiration. Beeswax creates a protective yet breathable barrier that seals in hydration while allowing skin to breathe naturally.
- Firm Structural Integrity: Beeswax has a relatively high melting point (around 144°F to 147°F / 62°C to 64°C). This allows your lip balm to withstand being carried in a warm coat pocket or handbag without turning into a melted mess.
- Zero Artificial Taste or Petrochemical Odor: Unbleached yellow beeswax has a subtle, warm honey aroma that pairs beautifully with gentle plant extracts. Compare this with our craft techniques in the diy beeswax wraps tutorial.
The 4-Part Balance: Wax, Hard Butter, Liquid Oil & Flavour
The key to a silky, non-waxy lip balm is balancing four components in equal harmony. We use a proven 1:1:1 ratio with a light carrier oil balance:

- Pure Beeswax Pellets (2 Tablespoons / approx. 20g): Provides structure, firmness, and water resistance. Yellow beeswax carries a gentle honey aroma, while white cosmetic-grade beeswax offers a neutral scent profile.
- Raw Shea Butter or Cocoa Butter (2 Tablespoons / approx. 20g): Adds richness and creaminess. Shea butter provides a silky glide, while cocoa butter adds a firmer texture and a delicate chocolate undertone. Similar nourishing fats are used in our diy whipped shea body butter.
- Virgin Coconut Oil (2 Tablespoons / approx. 20g): Melts at body temperature (76°F), allowing the balm to soften the instant it touches your lips.
- Liquid Carrier Oil (1 Tablespoon / approx. 10ml): Golden jojoba oil or sweet almond oil prevents the balm from becoming brittle and enhances glide.
- Food-Safe Botanical Essential Oils (10 to 12 Drops Total): Adds subtle, refreshing flavor without artificial sweeteners.
Choosing the Right Containers: Metal Slider Tins vs Kraft Tubes
How you package your balm influences both daily usability and the exact ratio you should pour:
- Aluminum Slider Tins (0.5 oz / 15ml): The classic apothecary choice. Slider tins open smoothly with one thumb, take up zero space in coat pockets, and are infinitely recyclable. Best used with a slightly softer balm ratio.
- Amber Glass Screw-Top Pots (5ml to 10ml): Perfect for bedside tables, vanity trays, or gifting. Sturdy glass protects essential oils from sunlight degradation.
- Cardboard Push-Up Tubes: An eco-friendly alternative to plastic twist tubes. When pouring into cardboard tubes, add an extra 1/2 teaspoon of beeswax to ensure the stick remains solid enough to push up without collapsing.
Step-by-Step Melting & Pouring Walkthrough (Avoiding Sinkholes)
Making a batch takes about twelve minutes from start to finish. Follow this simple sequence to ensure smooth, professional results:

1. Set Up the Double Boiler: Place a heat-resistant glass measuring pitcher (with a pouring spout) into a small saucepan filled with 1 to 2 inches of water. Keep the burner on low-medium heat so the water gently simmers without splashing into the pitcher.
2. Melt the Waxes and Hard Fats: Add the beeswax pellets, shea butter, and coconut oil into the glass pitcher. Stir slowly with a bamboo skewer or small stainless spoon until completely melted into a clear golden liquid.
3. Stir in Liquid Oil & Aromatics: Remove the pitcher from the heat and set it on a kitchen towel. Stir in the jojoba oil. Allow the liquid to cool for 60 seconds (so it remains liquid but isn’t boiling hot), then stir in your chosen essential oils.
4. Pour with Confidence: Arrange your clean tins or tubes side-by-side on a level counter. Pour the liquid balm in a slow, steady stream until each tin is filled to the brim. If pouring into tubes, fill to the top, allow the meniscus to settle slightly, and add one final drop to create a smooth rounded top.
5. Let Cool Undisturbed: Do NOT move, tilt, or touch the tins for at least 20 minutes. Moving cooling balm creates ripples and center sinkholes. Once completely firm and opaque, snap on the lids.
3 Autumn Essential Oil Flavour Blends (Sweet Orange, Vanilla & Peppermint)
Keep your lips feeling fresh with these gentle, non-irritating botanical combinations:
Blend 1: Sweet Orange & Warm Honey Balm
Uplifting, sweet, and comforting. Sweet orange oil is cold-pressed and non-phototoxic, making it safe for daily lip wear.
- 8 drops sweet orange essential oil
- 4 drops pure vanilla oleoresin
Blend 2: Crisp Peppermint & Rosemary Tingler
Refreshing and cooling. Great for brisk morning walks and keeping lips feeling energized.
- 6 drops peppermint essential oil
- 4 drops sweet almond or jojoba oil
- 2 drops rosemary essential oil
Blend 3: Calming Lavender & Chamomile Bedside Balm
A soothing herbal balm to apply right before sleep alongside our cozy fall shower routine.
- 6 drops French lavender essential oil
- 4 drops roman chamomile essential oil
- 2 drops vanilla oleoresin
Troubleshooting Texture: What to Do If Your Balm Is Too Hard or Soft
Because different batches of natural beeswax and shea butter vary slightly in firmness, you can easily re-melt and adjust your balm if the texture isn’t quite right:

- If the Balm Feels Too Hard: If you have to press hard to get product onto your finger, the beeswax ratio is too high. Simply scrape the balm back into your glass pitcher, melt it down, and stir in 1 teaspoon of liquid jojoba or almond oil before re-pouring.
- If the Balm Feels Too Soft or Greasy: If the balm turns mushy at room temperature, it needs more structure. Re-melt the batch and add 1/2 teaspoon of beeswax pellets.
- Pre-Balm Exfoliation: If your lips have flaky patches, buff them gently with our diy brown sugar scrub before applying balm to ensure smooth absorption.
- Shelf Life: Because this balm contains zero water, it does not spoil easily. Stored in a cool, dry pocket or drawer, it will stay fresh and fragrant for 9 to 12 months. Check our minimalist fall skincare routine for more gentle seasonal habits.
Save This DIY Beeswax Lip Balm Recipe to Pinterest
Looking for wholesome, budget-friendly self-care ideas for autumn? Save this DIY beeswax lip balm tutorial to your Pinterest natural beauty or handmade crafts board so you always have the recipe ready for chilly days!
Assembled two of these for our entryway and guest bath! The essential oil ratio is so gentle—fills the room with a subtle, warm fragrance without giving me headaches like store-bought plug-ins always do.
Hi Maya! How often should I flip the rattan reeds to keep the scent throwing steadily?
Hello! Flipping the reeds once a week gives a lovely, continuous scent refresh! If you ever notice the aroma fading after a couple of weeks, flipping them immediately brings the essential oil blend back to the top tips. Enjoy the calm space!