
A well-placed accent rug does more than soften a hard floor—it defines a space, adds grounding texture, and brings quiet warmth to high-traffic areas of your home. While rectangular rugs can feel rigid in compact entryways and circular mats often waste floor space beside a bed or kitchen sink, a handcrafted modern oval rug bridges the gap effortlessly. By combining chunky cotton tube cord yarn with symmetrical curve-radius increases, this pattern creates a dense, cushioned floor textile that lays completely flat without curling corners, delivering practical everyday durability that holds up to bare feet, pets, and regular machine washing.
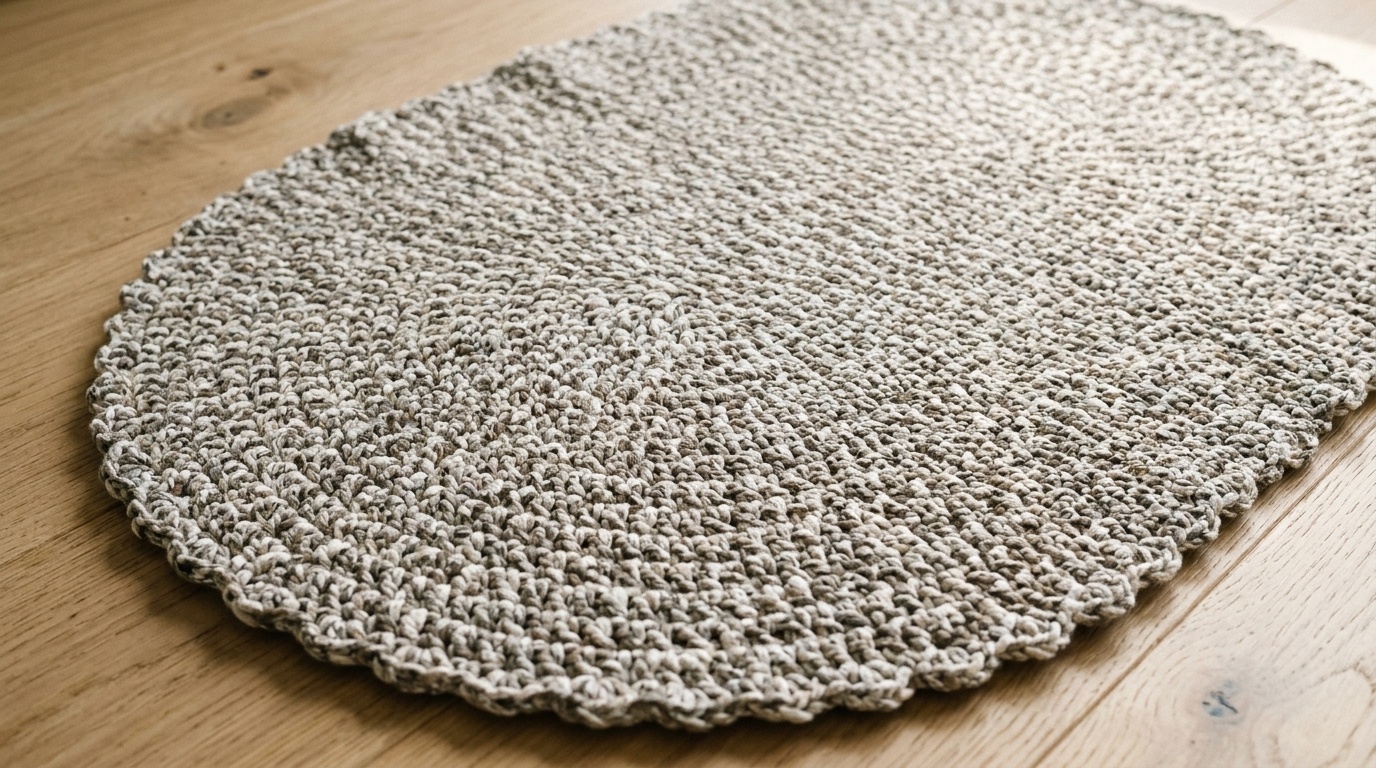
Crocheting an oval rug requires balancing two different stitch environments simultaneously: straight, unvarying side rows and expanding semicircular end curves. Traditional oval patterns often suffer from rippling outer edges or cupping ends when increase math is slightly miscalculated. In this workshop pattern, we use Bernat Maker Home Dec cotton tube yarn and a 6.0 mm hook to build a 26×36-inch oval rug worked in continuous widening rounds. Finished with a dense slip-stitch border and an invisible non-skid backing, this project delivers an understated, organic centerpiece that complements modern hardwood, sealed concrete, or neutral tile flooring.
KITCHEN WORKSTATION ACCENT: Complete your prep area with our tested guide on how to crochet a textured cotton kitchen towel in absorbent unmercerized cotton.
FLOOR SEATING COORDINATE: Pair your accent floor rug with our tested project on how to crochet a modern chunky floor pouf for comfortable low living room seating.
COZY LIVING TEXTILE: Add soft woven texture above your accent rug with our workshop guide on how to crochet a modern moss stitch blanket with artisan fringe.
Project Blueprint: Finished Dimensions, Gauge & Tube Yarn Yardage
Before chaining your foundation row, having accurate material requirements and gauge checks ensures your finished rug reaches the intended dimensions and maintains sufficient structural weight to stay grounded on the floor:
| Pattern Element | Workshop Tested Specification | Maker Notes |
|---|---|---|
| Finished Dimensions | 26 inches wide × 36 inches long (66 × 91.5 cm) | Classic accent rug proportion suitable for bedside, vanity, or kitchen island. |
| Skill Level | Easy / Confident Beginner | Requires basic double crochet, chain stitches, and simple increase tracking. |
| Yarn Requirement | Bernat Maker Home Dec (72% Cotton, 28% Nylon; 317 yds / 250g) | 3 balls (approx. 780 yards / 713 m total) in colorway Pebble Beach, Stone, or Cream. |
| Crochet Hook | Size U.S. J/10 (6.0 mm) ergonomic hook | We recommend an ergonomic hook with a sturdy aluminum shaft like Clover Amour. |
| Gauge | 12 double crochets × 7 rows = 4 inches (10 cm) | Maintaining accurate gauge ensures the rug lays flat without cupping upward. |
| Additional Tools | 4 locking stitch markers, large steel tapestry needle, tape measure, heavy shears | Locking markers are essential to clearly separate straight sides from end curves. |
Yarn Fiber Comparison: Cotton Tube Cord vs Acrylic vs T-Shirt Yarn
Choosing the correct yarn medium is the single most critical factor in rug making. A floor textile experiences friction, pressure, and dust in ways that blankets or pillows never encounter. In our hands-on workshop tests, cotton tube yarn consistently outperforms traditional fibers for three primary reasons:

- Zero Shedding & Clean Stitch Definition: Cotton tube cord (such as Bernat Maker Home Dec) features a smooth knitted cotton exterior over an airy nylon core. Unlike standard plied wool or acrylic yarns that pill and shed fiber balls across your floorboards, tube yarn produces crisp, lint-free stitches that hold their shape indefinitely.
- Washability & Drying Speed: While repurposed t-shirt yarn is popular for rustic projects, fabric weights vary wildly between skeins and thick cotton strips can take days to air-dry after washing, risking mildew. Cotton tube yarn retains consistent thickness across all 780 yards and air-dries rapidly on a flat rack.
- Cushioned Underfoot Density: Acrylic yarns flatten under foot traffic and generate irritating static electricity on wood or tile. Chunky cotton cord offers pleasant springy resilience that cushions bare steps comfortably.
When selecting your hook, an ergonomic tool with a deep throat—such as the Clover Amour 6.0mm hook—ensures the chunky tube cord pulls through smoothly without hand fatigue during longer stitching sessions.
Step-by-Step Foundation Chain & Setup Rounds (Rounds 1–3)
An oval is constructed by working along both the top loops and bottom unworked loops of a central foundation chain. This creates a solid spine with two straight side sections and two semicircular ends:

Foundation Chain: Chain 35 loosely using your 6.0 mm hook. Place a stitch marker in the 4th chain from your hook and in the 34th chain to clearly identify your straight side boundaries.
Round 1 (The Oval Spine): Work 1 double crochet (dc) in the 4th chain from your hook (the starting chain-3 counts as your first dc). Work 1 dc in each of the next 30 chains across. In the final chain stitch, work 5 dc all into the same chain to form the first curved turning fan. Now pivot your work 180 degrees to work along the opposite, unworked side of the foundation chain: work 1 dc in each of the next 30 chains. In the very last space (the base of your starting chain-3), work 3 dc (these 3 dc plus the starting chain-3 and first dc equal 5 dc on this turning curve). Join with a slip stitch to the top of your starting chain-3. (70 dc total: 30 dc on each straight side + 5 dc on each curved end).
Round 2 (Doubling the End Fans): Chain 3 (counts as dc). Work 1 dc in the same space at the base of chain-3. Work 1 dc in each of the next 30 straight side stitches. Now work the curved end: work 2 dc in each of the next 5 end stitches (10 dc on this curve). Work 1 dc in each of the next 30 straight side stitches. On the opposite curve: work 2 dc in each of the next 4 stitches, then work 1 dc into the base of the starting chain-3. Join with a slip stitch to the top of the chain-3. (80 dc total: 30 dc per side + 10 dc per curved end).
Round 3 (Alternating Curve Increases): Chain 3. Work 1 dc in the next stitch. Work 1 dc in each of the next 30 straight side stitches. Curved end increase sequence: *(2 dc in next stitch, 1 dc in next stitch) 5 times* (15 dc on this curve). Work 1 dc in each of the next 30 straight side stitches. Opposite curved end: *(2 dc in next stitch, 1 dc in next stitch) 5 times*, completing the final repeat into the base of your starting stitches. Join with a slip stitch. (90 dc total: 30 dc per side + 15 dc per curved end).
Working the Concentric Oval Expansion (Rounds 4–9)
The mathematical law of the crochet oval is straightforward: your straight side sections always remain exactly 30 stitches on each side, while each round adds exactly 10 stitches distributed evenly across the two curved ends (5 increases per end). Here is the row-by-row expansion formula tested in our workshop:
- Round 4: Chain 3. 1 dc in each of next 30 straight side stitches. Curve: *(2 dc in next st, 1 dc in each of next 2 sts) 5 times* (20 dc on curve). 1 dc in each of next 30 side stitches. Opposite curve: *(2 dc in next st, 1 dc in each of next 2 sts) 5 times*. Join with sl st. (100 dc total).
- Round 5: Chain 3. 1 dc in each of next 30 straight side stitches. Curve: *(2 dc in next st, 1 dc in each of next 3 sts) 5 times* (25 dc on curve). 1 dc in each of next 30 side stitches. Opposite curve: *(2 dc in next st, 1 dc in each of next 3 sts) 5 times*. Join with sl st. (110 dc total).
- Round 6: Chain 3. 1 dc in each of next 30 straight side stitches. Curve: *(2 dc in next st, 1 dc in each of next 4 sts) 5 times* (30 dc on curve). 1 dc in each of next 30 side stitches. Opposite curve: *(2 dc in next st, 1 dc in each of next 4 sts) 5 times*. Join with sl st. (120 dc total).
- Round 7: Chain 3. 1 dc in each of next 30 straight side stitches. Curve: *(2 dc in next st, 1 dc in each of next 5 sts) 5 times* (35 dc on curve). 1 dc in each of next 30 side stitches. Opposite curve: *(2 dc in next st, 1 dc in each of next 5 sts) 5 times*. Join with sl st. (130 dc total).
- Round 8: Chain 3. 1 dc in each of next 30 straight side stitches. Curve: *(2 dc in next st, 1 dc in each of next 6 sts) 5 times* (40 dc on curve). 1 dc in each of next 30 side stitches. Opposite curve: *(2 dc in next st, 1 dc in each of next 6 sts) 5 times*. Join with sl st. (140 dc total).
- Round 9: Chain 3. 1 dc in each of next 30 straight side stitches. Curve: *(2 dc in next st, 1 dc in each of next 7 sts) 5 times* (45 dc on curve). 1 dc in each of next 30 side stitches. Opposite curve: *(2 dc in next st, 1 dc in each of next 7 sts) 5 times*. Join with sl st. (150 dc total).
The Workshop Floor Check: Lay your rug flat on a hard studio floor every two rounds. If the ends begin to curl upward into a bowl, your curve stitches are too tight; if the edges ripple like waves, your tension is overly loose or an accidental increase was added.
The Heavy-Duty Framing Border & Clean Invisible Join
A standard double crochet raw edge can feel slightly stretchy on a floor rug. Working a firm framing border adds structural weight, locks the perimeter, and prevents edges from kicking up when walked on:

Round 10 (Framing Slip Stitch Rim): Chain 1. Loosely work 1 slip stitch into the back loop of each double crochet stitch around the entire 150-stitch perimeter. Note: Keep your slip stitches relaxed; pulling slip stitches tightly will cause the final round to cinch inward like a drawstring bag.
Invisible Finish: Fasten off leaving an 8-inch working tail. Thread onto a steel tapestry needle, guide the needle under both loops of the first slip stitch from back to front, and return through the center of the final slip stitch. Weave the tail through the dense backside stitches in alternating directions to lock it permanently.
Non-Skid Safety: Applying Natural Latex & Silicone Grips
Safety is essential for any handmade floor textile. Smooth cotton stitches glide easily across polished hardwood, laminate, and sealed stone tile. Applying a non-skid backing treatment keeps your rug anchored firmly in place:
- Silicone Caulk Grid (Most Cost-Effective): Turn the finished rug upside down on a protected workspace. Apply small pea-sized dots or a diagonal lattice grid of clear 100% silicone caulk across the backside using a caulking gun. Allow the silicone to cure for 24 hours until completely dry to the touch before placing on your floor.
- Liquid Natural Latex: Paint a thin, even coat of liquid latex rug backing across the reverse side using a disposable foam brush. It dries into a transparent, rubbery layer that remains flexible through machine washes.
- Cut-to-Fit Felt Rug Pad: If you prefer not to apply adhesives directly to your yarn, cut a quality non-slip dual-surface felt rug pad 1 inch smaller than the rug perimeter and place it directly beneath.
Washing, Machine Drying & Long-Term Floor Maintenance
Cotton tube cord is engineered for everyday home living. When muddy paws or daily foot traffic require laundering, caring for your handmade rug is refreshingly simple:
- Machine Washing: Wash in cold water on the gentle or delicate cycle with mild liquid laundry detergent. Avoid bleach or heavy fabric softeners, which can weaken cotton fibers over time.
- Drying & Reshaping: Tumble dry on low heat for 15 minutes to remove excess moisture, then lay the rug flat on clean dry towels to finish air-drying. Gently pull the curved ends into symmetrical alignment while still damp.
- Spot Cleaning: For minor spills, blot immediately with a damp cotton cloth and a drop of dish soap; do not scrub aggressively, which can fuzz the exterior cotton knit.
Maker Troubleshooting & Oval Shaping Questions
Why is my oval rug curling up at the ends like a bowl?
Cupping at the ends indicates that the curved radius is not expanding fast enough for the height of your stitches. This happens if an increase was accidentally missed or if your yarn tension tightened on the turns. Check your stitch count at the end of each round to ensure you added exactly 10 stitches per round (5 on each curve).
Why are the straight sides wavy while the ends lay flat?
Side ruffling occurs when stitches along the 30-stitch side runs are worked with significantly looser tension than the curved ends. Focus on maintaining a uniform stitch height along the straight stretches.
Can I make this rug longer for a hallway runner?
Yes. To extend the length without changing the width, simply increase your starting foundation chain. Every additional 6 chains adds approximately 2 inches of straight length to the finished rug, while the end curve increase math remains completely unchanged.
Save This Modern Oval Crochet Rug to Pinterest
Planning your next weekend home project? Save this tested modern oval floor rug pattern to your crochet or home decor Pinterest boards so you have the foundation math and non-skid backing guide ready whenever you need them!
Pattern was so clear to follow! Worked up in about 40 minutes while sitting on the porch. Love how practical and sturdy it is.
Do you recommend wet blocking or steam blocking for kitchen cotton projects?
For 100% cotton, a quick pin and gentle steam with an iron (held 2 inches away, never touching the yarn!) works wonders in 5 minutes flat. It relaxes the fibers and locks the edges completely square!