
A well-made table runner anchors a dining room in a way that feels intentional without overwhelming the surface. While delicate vintage lace runners often feel too fragile for everyday family dinners and bulky ribbed textiles can feel heavy in warmer seasons, geometric filet crochet strikes the ideal middle ground. By combining solid double crochet blocks with open chain-1 mesh windows, this pattern creates a clean, architectural diamond motif that lets the warm grain of your dining table peek through while remaining sturdy enough to handle warm casserole dishes, stoneware bowls, and daily living.
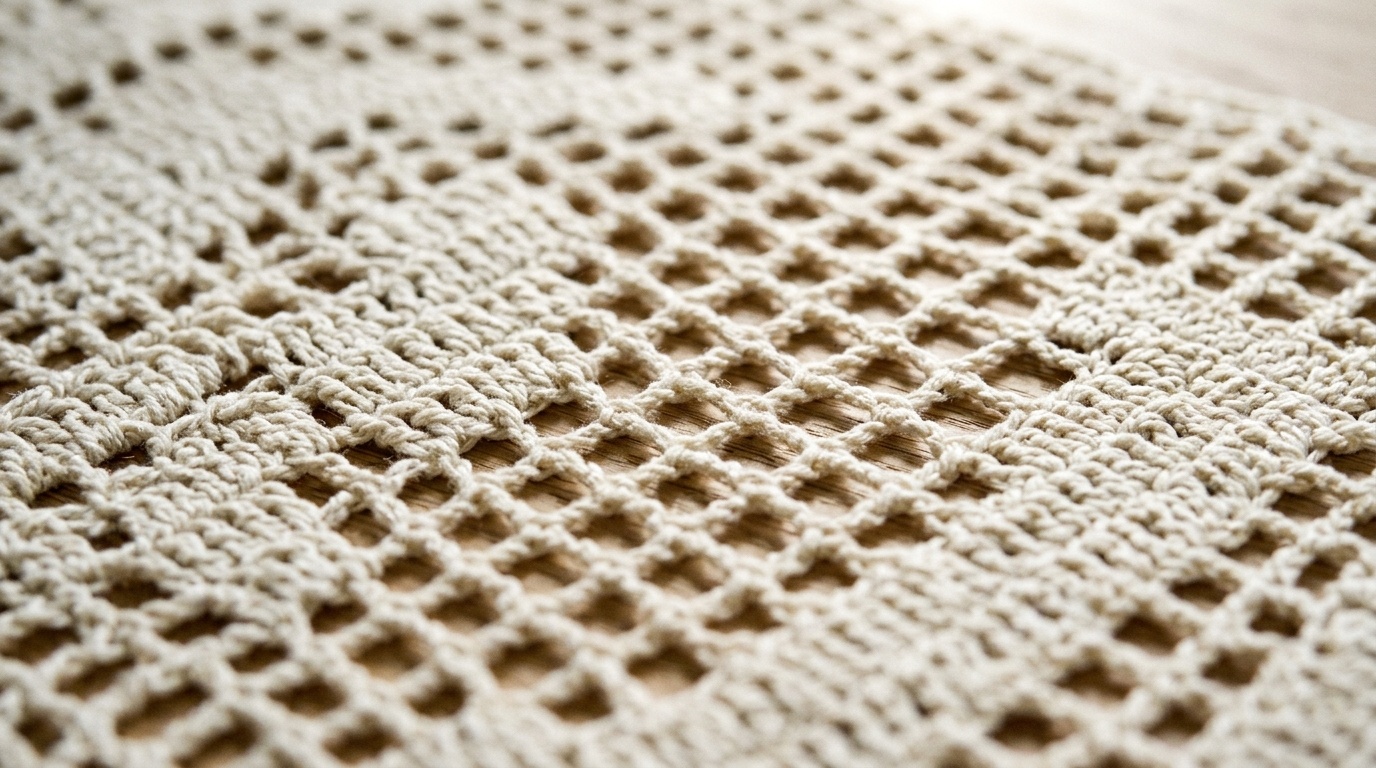
Filet crochet is historically one of the most accessible decorative needlework techniques because it relies on just two fundamental stitches: double crochets and chains. In this modern workshop pattern, we have adapted traditional filet lace into an organic, structural table runner using worsted weight kitchen cotton and a 5.0 mm hook. Finished with a clean single crochet perimeter edge and a two-tier knotted macramé fringe, this project delivers a relaxed, boutique-worthy centerpiece that drapes beautifully across long dining tables, low console sideboards, or kitchen islands.
MATCHING PLACE SETTINGS: Frame your runner with our tested pattern on how to crochet round cotton placemats featuring spiral increases and soft fringe.
Project Blueprint: Finished Dimensions, Gauge & Cotton Yardage
Before casting on your foundation chain, it helps to understand the physical dimensions and structural yardage needed for an authentic dining room drape. A standard dining runner should typically measure between 60 and 72 inches long, allowing approximately 6 inches of drop on each end of a 5-to-6 foot dining table. Here is the verified pattern blueprint tested in our workshop:
| Pattern Element | Workshop Tested Specification | Home Maker Notes |
|---|---|---|
| Finished Dimensions | 12.5 inches wide × 72 inches long (32 × 183 cm) | Measured flat, excluding the 4-inch knotted fringe on each end. |
| Skill Level | Easy / Confident Beginner | Requires basic double crochet, chain stitches, and simple row counting. |
| Yarn Requirement | 5 skeins of Lily Sugar’n Cream (120 yds / 70.9g per ball) | Total yardage: approx. 510 yards (466.5 m) in colorway Jute or Ecru. |
| Crochet Hook | Size U.S. H/8 (5.0 mm) ergonomic hook | We recommend an aluminum hook with a comfortable silicone grip like Clover Amour. |
| Gauge | 12 single crochets × 14 rows = 4 inches (10 cm) | Accurate row gauge ensures your finished runner reaches the full 72-inch length. |
| Additional Tools | Yarn needle, measuring tape, sharp scissors, blocking pins | A piece of 6-inch cardboard helps cut consistent lengths for the knotted fringe. |
Yarn Fiber Assessment: Mercerized vs Unmercerized Kitchen Cotton
Choosing the right yarn fiber is the single most critical factor in determining whether your table runner lays completely flat or ripples awkwardly under dinner plates. In our hands-on tests, 100% unmercerized kitchen cotton consistently outperforms synthetics and blended yarns for tabletop textiles for three distinct reasons:

- Heat Resistance: Unlike acrylic or polyester blends which can soften or scorch under hot serving dishes (as documented in our cotton vs acrylic kitchen yarn comparison), 100% pure cotton comfortably tolerates hot casserole pans and warm stoneware platters without melting or releasing fumes.
- Natural Surface Grip: Unmercerized cotton features a soft, matte textured tooth that gently grips polished wood, quartz, and sealed stone tabletops. Slippery mercerized threads or synthetic fibers slide easily whenever guests pass serving bowls.
- Geometric Structural Drape: Worsted weight cotton offers sufficient stitch density to hold openwork filet squares rigid and square. Softer blends like bamboo or acrylic tend to stretch out of square over time under their own weight.
When selecting your hook, a smooth aluminum shaft with consistent throat depth—such as the Clover Amour 5.0mm hook—ensures that unmercerized cotton glides without splitting the four individual plies during rapid stitch repeats.
Step-by-Step Foundation Chain & Setup Rows
The beauty of this geometric filet pattern is its clean symmetry. The runner is worked across a foundation of 39 working stitches, framed on both outer edges by solid double crochet anchor panels that keep the margins straight and flat:

Foundation Chain: Chain 41 loosely. Note: The starting chain 2 does not count as a stitch throughout this pattern.
Row 1 (Solid Foundation Anchor): Work 1 double crochet (dc) in the 4th chain from your hook (this starting chain counts as 2 dc). Work 1 dc in each remaining chain across to the end. Turn. (39 stitches total).
Row 2 (Initiating the Filet Mesh Grid): Chain 2. Work 1 dc in each of the next 7 stitches (solid border). Chain 1, skip the next stitch, work 1 dc in each of the next 7 stitches. Now initiate the central open mesh: (Chain 1, skip 1 stitch, 1 dc in next stitch) 5 times. Work 1 dc in each of the next 6 stitches. Chain 1, skip 1 stitch, work 1 dc in each of the last 7 stitches. Turn.
Working the 6-Row Geometric Diamond Pattern Repeat
The geometric diamond Motif is created across a 6-row sequence (Rows 2 through 7). Each row strategically opens or closes chain-1 spaces, causing the negative-space diamond to expand outward, reach its apex, and then cleanly close back into solid cotton fabric:
- Row 3 (Expanding Diamond Wings): Chain 2. 1 dc in each of first 6 stitches. Chain 1, skip 1 stitch, 1 dc in next ch-1 space. Chain 1, skip 1 stitch, 1 dc in each of next 6 stitches. Work (1 dc in next ch-1 space, chain 1, skip 1 stitch) 4 times. 1 dc in next ch-1 space, 1 dc in each of next 6 stitches. Chain 1, skip 1 stitch, 1 dc in next ch-1 space. Chain 1, skip 1 stitch, 1 dc in each of last 6 stitches. Turn.
- Row 4 (Widest Diamond Apex): Chain 2. 1 dc in each of first 5 stitches. Work (chain 1, skip 1 stitch, 1 dc in next ch-1 space) twice. Chain 1, skip 1 stitch, 1 dc in each of next 6 stitches. 1 dc in next ch-1 space. Work (chain 1, skip 1 stitch, 1 dc in next ch-1 space) 3 times. 1 dc in each of next 6 stitches. Work (chain 1, skip 1 stitch, 1 dc in next ch-1 space) twice. Chain 1, skip 1 stitch, 1 dc in each of last 5 stitches. Turn.
- Row 5 (Contracting Inner Mesh): Chain 2. 1 dc in each of first 4 stitches. Work (chain 1, skip 1 stitch, 1 dc in next ch-1 space) 3 times. Chain 1, skip 1 stitch, 1 dc in each of next 6 stitches. 1 dc in next ch-1 space. Work (chain 1, skip 1 stitch, 1 dc in next ch-1 space) twice. 1 dc in each of next 6 stitches. Work (chain 1, skip 1 stitch, 1 dc in next ch-1 space) 3 times. Chain 1, skip 1 stitch, 1 dc in each of last 4 stitches. Turn.
- Row 6 (Closing the Diamond Center): Chain 2. 1 dc in each of first 3 stitches. Work (chain 1, skip 1 stitch, 1 dc in next ch-1 space) 4 times. Chain 1, skip 1 stitch, 1 dc in each of next 6 stitches. 1 dc in next ch-1 space, chain 1, skip 1 stitch, 1 dc in next ch-1 space. 1 dc in each of next 6 stitches. Work (chain 1, skip 1 stitch, 1 dc in next ch-1 space) 4 times. Chain 1, skip 1 stitch, 1 dc in each of last 3 stitches. Turn.
- Row 7 (Solid Dividing Bridge): Chain 2. Work 1 dc in each double crochet stitch and each chain-1 space across the entire row. Turn. (39 stitches).
Continuing the Pattern: Repeat Rows 2 through 7 continuously until your runner measures approximately 72 inches (183 cm) from the foundation edge, ensuring you finish on a complete Row 7 solid bridge. Do not turn and do not fasten off your working yarn yet.
The All-Around Clean Single Crochet Framing Edge
Row edges in double crochet can sometimes appear slightly loose or wavy due to the natural turning height of the stitch. Working a structured single crochet perimeter locks every row end in place, prevents edge curling, and creates a tailored foundation for attaching the fringe:
Edging Round (Right Side): With your working yarn still attached at the final corner, work 3 single crochets (sc) into the corner space to turn smoothly. Working down the long raw row edges of the runner, place 2 sc around the post of each double crochet row end evenly down the entire 72-inch length. At the next corner, work 3 sc into the corner stitch. Work 1 sc into each stitch across the bottom foundation width. Work 3 sc into the next corner, then repeat evenly up the remaining long edge. Finish with 1 sc in each stitch across the final short width, joining with a slip stitch to the first single crochet. Fasten off and weave in your working tail securely.
Crafting the Two-Tier Macramé Knotted Fringe
Rather than leaving plain cut strands that fray unevenly, adding a diagonal macramé lattice knot gives this runner a bespoke, artisan touch that looks stunning draped off either end of your dining table:

- Cutting Strands: Cut strands of matching cotton yarn measuring exactly 24 inches (61 cm) long. Wrap yarn around a 12-inch piece of rigid cardboard and cut along one edge to produce uniform lengths rapidly.
- Attaching Fringe Bundles: With the right side of the runner facing up, take 6 strands together, fold them in half to form a loop, and use your crochet hook to pull the loop through the single crochet edge. Pull the working tails through the loop to create a snug lark’s head knot. Space fringe bundles approximately 2.5 inches (6.5 cm) apart evenly across each short edge, including one bundle at each outer corner (12 strands hanging per bundle).
- Tier 1 Knotted Lattice: Divide each knotted bundle into 2 equal groups of 6 strands. Working from left to right, skip the first 6-strand group. Take the left-most group from the second bundle and the right-most group from the first bundle. Take 1 strand from this combined 12-strand group and wrap it cleanly around the remaining 11 strands 6 times, exactly 1.5 inches (4 cm) down from the top knots. Tie and knot securely. Continue across all bundles.
- Tier 2 Knotted Lattice: Divide each section again into groups of 6 strands. Pair adjacent groups together, including the initially skipped outer group, and wrap 1 strand around the remaining 11 strands 6 times, exactly 3 inches (7.5 cm) down from the top edge. Knot securely to lock the diamond lattice.
- Final Trim: Lay the fringe flat against a self-healing cutting mat and use a rotary cutter or sharp dressmaking shears with an acrylic quilting ruler to trim the lower fringe ends evenly across. Repeat for the opposite short end.
Blocking, Washing & Dining Table Care Guidelines
Because filet crochet relies on crisp geometric lines, blocking is not an optional extra—it is what elevates the piece from a handmade craft to a high-end designer textile. As covered in our guide on how to block tabletop crochet flat, wet blocking or gentle steam blocking relaxes the cotton twist and locks the diamond windows into perfect squares:
- Steam Blocking (Recommended): Pin the runner out onto interlocking foam blocking mats, inserting rust-proof T-pins every 3 inches along both long edges and into each corner. Hover a garment steamer or household steam iron 1 to 2 inches above the cotton fabric, allowing the steam to saturate the fibers without pressing the hot iron plate directly onto the yarn. Allow it to cool and dry completely before unpinning.
- Laundering: When washing is required after meals, place the runner inside a large zippered mesh laundry bag to prevent the macramé fringe from tangling in the washing machine agitator. Wash in cool water on the gentle or delicate cycle with mild liquid detergent.
- Drying: Never tumble dry on high heat, which causes kitchen cotton to shrink and wrinkle. Lay the runner flat on clean dry bath towels, gently smooth the filet mesh with your palms, and comb the fringe straight with your fingers to dry.
Maker Troubleshooting & Filet Mesh Questions
Why do my filet mesh squares look slanted or distorted?
Slanted mesh windows are almost always caused by uneven turning chain tension or inserting the hook into the chain stitch rather than under the chain-1 space. Working around the whole chain space allows the double crochet to center itself naturally. If your stitches lean excessively, verify that your hook stays perpendicular to the working row during loop yarn-overs.
Can I adjust this runner to fit a shorter coffee table or wide dining table?
Yes. The length is completely customizable: simply add or remove 6-row diamond pattern repeats before working the single crochet border. To adjust width, modify the starting chain in multiples of 12 stitches while maintaining the 7-stitch solid outer framing borders on each side.
Will the unmercerized cotton shrink after its first wash?
100% kitchen cotton can experience minor shrinkage (approx. 3% to 5%) if washed in hot water or machine dried. Using cold water and wet blocking while damp restores the runner to its full 72-inch finished length effortlessly.
Save This Filet Crochet Table Runner to Pinterest
Planning your next dining room refresh or weekend craft project? Save this tested geometric filet table runner pattern to your crochet or home decor Pinterest boards so you have the stitch counts and fringe tutorial ready whenever you need them!
Pattern was so clear to follow! Worked up in about 40 minutes while sitting on the porch. Love how practical and sturdy it is.
My foundation chain feels a bit stiffer than the subsequent rows. Should I go up a full hook size just for the starting chain?
Spot on! Going up a half or full millimeter on just the foundation chain is a veteran maker trick. It gives the base stitches room to breathe so your bottom edge never pulls tight. Give that a try!