
Round crochet baskets are ubiquitous, but square storage baskets offer clean architectural lines that fit flush against bookshelves, nightstands, and entryway consoles. When hooked with thick 5 mm cotton cord and dense columnar stitches, a handmade square basket provides rigid structural storage that keeps everyday clutter neatly organized without slumping or bowing outward.
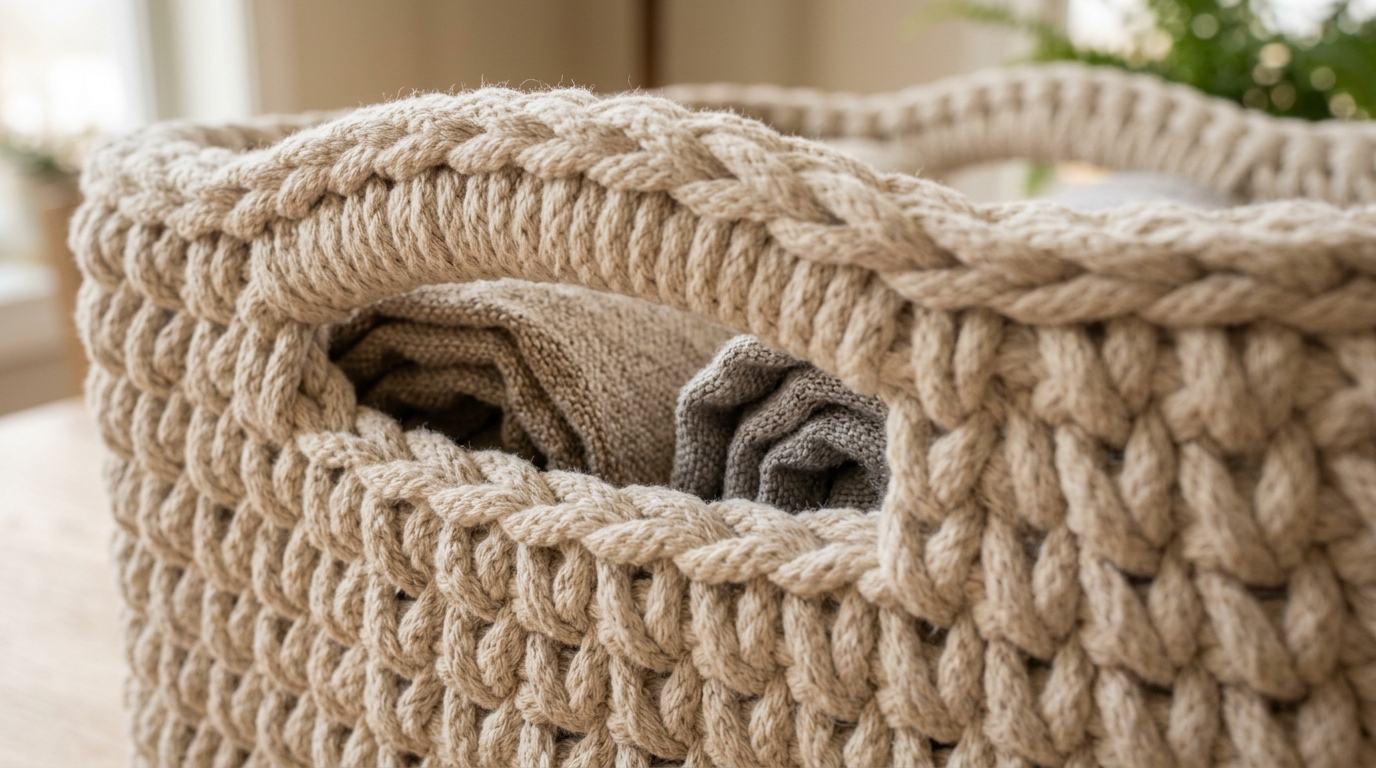
Unlike circular baskets that distribute outward pressure evenly across a continuous curve, square baskets face unique mechanical tension. Without proper corner engineering, square side walls tend to round out into an awkward oval or flare open like a bowl. By pairing a flat mitered square base with a back-loop transitional round and dense waistcoat stitches, this pattern creates a firm vertical frame that holds its shape under regular everyday weight.
Maker’s Project Blueprint: Chunky Square Storage Basket
- Skill Level: Intermediate Beginner (familiar with single crochet and working in rounds)
- Finished Dimensions: 6 inches wide × 6 inches long × 5 inches tall (15 × 15 cm base × 12.5 cm height)
- Yarn Requirements: ~130 yards (120 meters) of 5 mm Braided Cotton Cord (or two strands of #4 worsted kitchen cotton held together) in Natural Ecru
- Hook Size: US K/10.5 (6.5 mm) smooth birch wood or ergonomic hook
- Gauge: 9 single crochet stitches and 10 rows = 4 inches (10 cm) in dense waistcoat stitch
- Completion Time: 1.5 to 2 hours
- Julian’s Studio Testing Note: “To guarantee this square basket maintains rigid vertical side walls without slumping, we transition from the flat base to the sides using a single round of back-loop-only (BLO) single crochet, followed by dense waistcoat stitches. This creates an internal 90-degree corner shelf that prevents the bottom from sagging under everyday household weight.”
Why Square Basters Collapse (And How We Fix It)
Most commercial crochet basket patterns treat squares the same as circles: they crochet a base and immediately start working standard single crochet in continuous rounds. This almost always leads to three common structural failures:
- Corner Flaring: Standard stitches pull diagonally toward the direction of work, twisting the four sharp corners into soft rounded bulges.
- Side-Wall Bowing: Without vertical column support, flexible cotton yarn bows outward under the weight of items stored inside.
- Base Sagging: When lifted, the flat bottom drops down like a hammock because there is no defined horizontal ridge separating the floor from the walls.
In this pattern, we resolve these issues through mechanical design. As explained in our modern home crochet beginner’s roadmap, we work a mitered corner base, anchor the perimeter with a defined back-loop turning ridge, and build the side walls using the waistcoat stitch (center single crochet), which stacks yarn posts directly on top of each other like miniature brick pillars.
Key Materials & Yarn Selection
Choosing the right cord thickness is vital for structural home decor. Flimsy acrylic yarn or soft roving will collapse immediately; you need firm, high-density cotton fibers.

- 5 mm Braided Cotton Cord (Recommended): Braided cotton macramé cord with a polyester core provides optimal stiffness. It yields crisp stitch definition, holds vertical height without starch, and washes cleanly. Alternatively, you can hold two strands of #4 worsted cotton together, as tested in our review of the best cotton yarns for home projects.
- 6.5 mm (US K/10.5) Birch Crochet Hook: A wooden hook provides just enough natural surface grip to control stiff cord without tiring your wrists. Downsizing to 6.5 mm compresses the bulky cord tightly, closing all gaps between stitches.
- 4 Locking Stitch Markers: Essential for marking the four corner chain-2 spaces during the base construction so your square increases remain mathematically balanced.
- Blunt Tapestry Needle & Scissors: A sturdy steel tapestry needle is required to weave thick cord ends securely inside the dense wall fabric.
Step-by-Step Square Basket Pattern
This pattern is worked in three progressive stages: the flat square base, the 90-degree turning round, and the upright side walls with integrated cutout handles.
Part 1: The Flat Square Base
Round 1 (Foundation): Make a magic ring. Chain 1 (does not count as a stitch). Work [1 sc, ch 2] 4 times into the ring. Pull the yarn tail firmly to close the center hole. Join with a slip stitch to the first sc. You now have 4 single crochet stitches and 4 corner chain-2 spaces. Place a stitch marker in each corner space.
Round 2: Chain 1. Work 1 sc into the first st. In the corner chain-2 space, work [1 sc, ch 2, 1 sc]. *Work 1 sc in each st along the side until the next corner. In the corner space, work [1 sc, ch 2, 1 sc]. Repeat from * around to the end. Join with a slip stitch to the first sc. (3 sc per side, 12 sc total + 4 corner ch-2 spaces).
Rounds 3 – 6: Repeat Round 2. Each round adds 2 stitches per side (8 stitches total per round). In each corner chain-2 space, consistently work [1 sc, ch 2, 1 sc]. At the end of Round 6, you will have 11 sc per side (44 sc total). The base should measure exactly 6 × 6 inches flat. Do not fasten off.
Part 2: The Structural 90-Degree Turning Round
This critical transition round forms an exterior horizontal ledge that establishes the perimeter of the basket bottom and forces all subsequent stitches to climb vertically.

Round 7 (Turning Round): Chain 1. Do not work any more corner increases. Working strictly in the back loop only (BLO) of every stitch, work 1 sc into each single crochet and 1 sc into each individual chain of the four corner chain-2 spaces around. Join with a slip stitch to the first sc. (52 sc total). You will clearly see the unworked front loops form a clean picture-frame border along the bottom edge.
Part 3: Building Rigid Waistcoat Side Walls
To eliminate flimsy fabric, we now switch to the waistcoat stitch (also called knit stitch or center single crochet). Instead of inserting your hook under the top two loops of the stitch, insert the hook directly into the center of the vertical “V” post on the front of the stitch and push through the back, beneath the horizontal bar.
Rounds 8 – 14: Chain 1. Work 1 center single crochet (waistcoat st) into the center “V” of each stitch around. Keep your tension moderate—pulling too tightly makes inserting the hook into the V post difficult. Join with a seamless slip stitch to the first stitch. (52 stitches per round). The walls will climb straight and rigid.
Part 4: Adding Seamless Cutout Handles & Rim Finish
Round 15 (Handle Round): Chain 1. Work center single crochet in the first 4 stitches. Chain 6, skip 5 stitches (first handle opening created). Work center single crochet across the next 21 stitches. Chain 6, skip 5 stitches (second handle opening created). Work center single crochet in the remaining 17 stitches. Join with a slip stitch.
Round 16 (Handle Reinforcement): Chain 1. Work center single crochet in each stitch until the handle chain. Work 7 single crochet directly over the chain-6 loop, encasing the cord completely. Continue in center single crochet to the second handle, work 7 sc over the loop, and finish the round. Join with a slip stitch.
Round 17 (Cording Rim): Work a firm slip stitch into each stitch around the top perimeter. This final slip stitch round acts as a tension band, locking the top rim so it never sags when carrying loaded weight. Cut cord leaving a 6-inch tail, weave in firmly through the inner wall posts, and trim cleanly.
3 Maker Secrets for Perfectly Square, Upright Walls
Through extensive studio testing across multiple cord gauges, we identified three technical nuances that make the difference between a floppy bin and an architectural basket:
- 1. Untwist the Braided Cord Regularly: As you work in rounds, bulky cord naturally builds torque and twists. Every 3 to 4 rounds, drop your working hook and allow the cord to dangle freely to unspin. Working with twisted cord causes the vertical corner columns to skew clockwise.
- 2. Tighten Corner Foundation Stitches: While your side wall tension should remain comfortable, pull your working yarn slightly firmer when executing the stitches directly on the four corner turns. This concentrates fabric density at the corners, preventing them from softening into curves.
- 3. Steam Block the Interior Corners: Once finished, place an empty square cardboard box or firm wooden block (measuring 6 × 6 inches) inside the basket. Hover a garment steamer 2 inches away from the cotton cord for 30 seconds, then press the fabric gently against the block with your hands. Allow to cool completely to lock the sharp geometric corners.
Functional Styling: Organizing with Handmade Texture
Square storage baskets bring organic warmth to utilitarian storage areas. Their clean footprint makes them far more space-efficient on shelves than circular baskets:

- Entryway Drop Zone: Position on a console table beside a ceramic tray to corral car keys, mail, sunglasses, and wallets. For larger entryway storage, pair with our modern crochet hanging basket pattern.
- Bathroom Vanity Organization: Roll 3 to 4 linen washcloths and stand them vertically inside the basket alongside amber dropper bottles and handcrafted soaps.
- Coffee Table Coaster Station: Use the basket as a dedicated home for your drinkware accessories. It comfortably holds our square crochet coasters with crab-stitch borders alongside a candle.
- Entertaining & Bread Serving: Line the basket with a clean linen napkin and use it as a warm artisan bread basket for dinner parties. When planning your gathering menu, check out Claire Montgomery’s casual weeknight dinner party blueprint for stress-free hosting ideas.
Washing & Long-Term Care
Unlike woven wicker or straw baskets that splinter and trap dust, 100% cotton cord baskets are durable and easy to refresh:
- Spot Cleaning: For minor dust or spills, wipe down with a damp microfiber cloth and mild dish soap.
- Deep Washing: Hand wash in a basin of lukewarm water with gentle plant-based detergent. Submerge the basket, press gently with your palms to flush water through the cord, and rinse thoroughly. Do not wring or twist.
- Reshaping & Drying: Press out excess moisture between two thick bath towels. Insert an inverted 6 × 6 inch glass baking dish or square container inside the basket while damp to hold the precise 90-degree corners, and allow to air dry completely in a ventilated room.
Frequently Asked Questions
Can I make this basket larger or smaller?
Yes, easily. To adjust the base size, simply work more or fewer rounds of Part 1. Each additional round increases the base diameter by roughly 1 inch. When you reach your desired base dimensions, execute Round 7 (the BLO turning round) and proceed with the side walls. To make the basket taller, simply add more rounds of waistcoat stitch before working the handles.
Why are my waistcoat stitches too tight to insert the hook?
Waistcoat stitches require inserting the hook directly into the dense center V of the post. If your loops are pulled too tight, this becomes physically exhausting. Relax your working yarn tension and lift your hook slightly upward on each yarn-over to draw taller, looser loops.
Can I use acrylic super bulky yarn instead of cotton cord?
Acrylic is not recommended for freestanding storage baskets. Acrylic fibers have immense elasticity and lack the dense capillary weight of cotton cord, meaning the side walls will bow and sag as soon as heavy items are placed inside.
Do I need to line this basket with fabric?
No. The combination of 5 mm braided cord and dense waistcoat stitches creates an opaque, rigid fabric with zero holes. Keys, pens, and small cosmetics will not poke through the weave.
Pin This Chunky Square Basket Pattern for Later
Love functional home organization? Save this chunky square crochet basket tutorial to your DIY home decor or crochet board on Pinterest so you have the dimensions, corner instructions, and handle blueprint ready whenever you need it!
Leave a Comment