
Square crochet coasters bring a clean, architectural look to modern coffee tables, but anyone who has hooked a basic square knows the common frustration: the corners stubbornly curl upward, and the edges rarely stay straight under a damp mug. Adding a reverse single crochet border—widely known as the crab stitch—creates a dense, corded perimeter that locks the square flat while adding satisfying tactile texture.
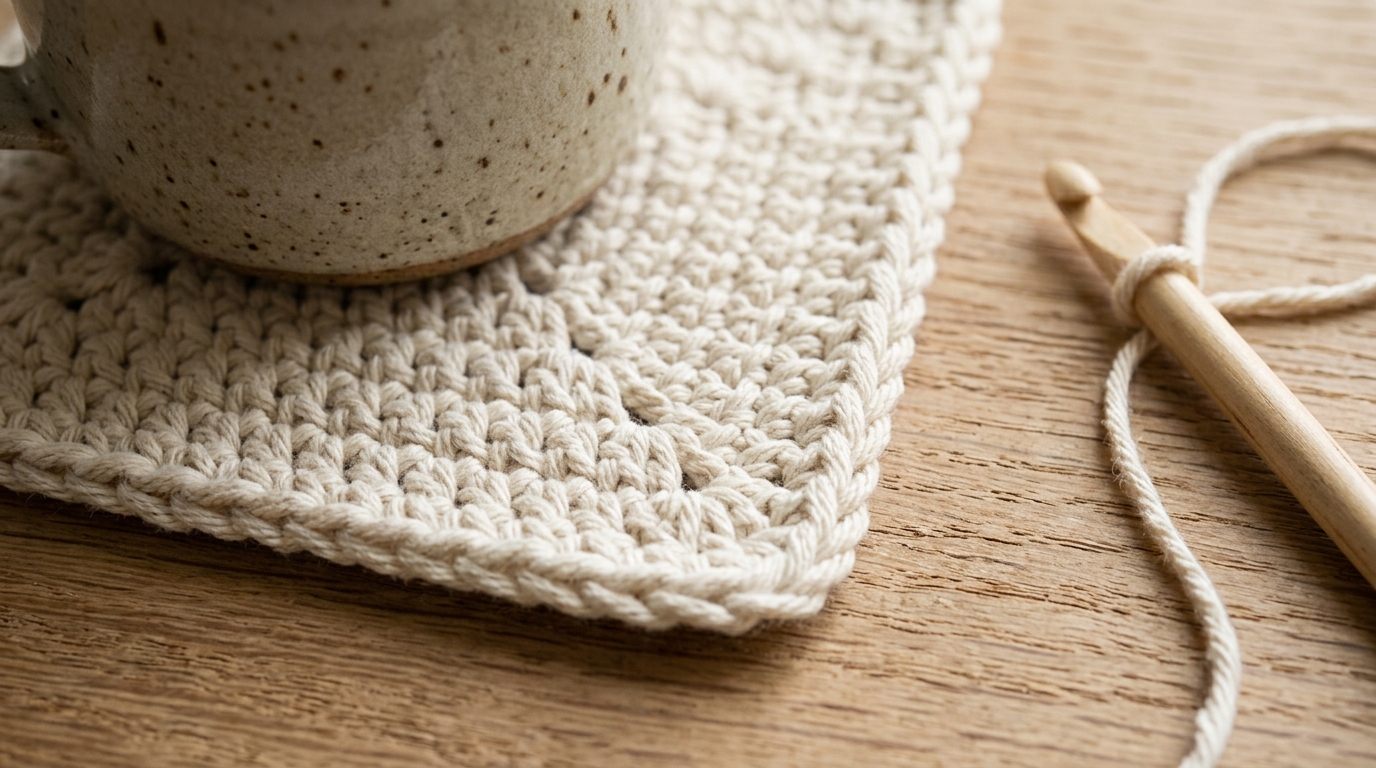
As outlined in our foundational modern home crochet beginner’s roadmap, unlike circular coasters that expand from a center ring, square coasters are hooked in back-and-forth rows. This construction naturally creates slight tension differences between row ends and foundation chains. By framing the finished square with a single foundation round of standard single crochet followed immediately by reverse single crochet, you establish an integrated structural frame that counteracts corner tension and provides full 4.25-inch coverage for wide ceramic mugs.
Maker’s Project Blueprint
- Skill Level: Easy / Advanced Beginner
- Finished Dimensions: 4.25 x 4.25 inches (10.8 x 10.8 cm) square (measured flat across border)
- Yarn Requirements: ~35 to 40 yards (32–37 m) of #4 Worsted Weight 100% Kitchen Cotton per coaster
- Hook Size: US G/6 (4.0 mm) smooth birch or ergonomic hook
- Gauge: 16 single crochet stitches and 16 rows = 4 inches (10 cm) in standard single crochet
- Completion Time: 20 to 25 minutes per coaster (roughly 90 minutes for a complete set of 4)
- Studio Test Note: Pattern tested & hooked by Julian Brooks in natural ecru kitchen cotton. The reverse single crochet border acts as an integrated stabilizing cord around the perimeter, preventing square corners from curling upward even after repeated cold-water wash cycles.
Why Square Coasters Need a Stabilizing Border
When you crochet a basic square using standard single or half-double crochet rows, the vertical sides consist of row edges (the turning chains and raw side loops), while the top and bottom consist of standard horizontal stitch ‘V’s. These edges behave differently under tension and moisture:
- Differential Edge Shrinkage: Row ends have less vertical give than horizontal stitches. Without a stabilizing frame, the coaster tends to skew into a slight parallelogram after washing.
- Corner Torque: The 90-degree outer corners naturally lift when condensation from cold drinks saturates the fiber.
- The Crab Stitch Solution: Working backward (from left to right) forces the yarn to wrap around itself into a tight, cord-like roll. This roll creates uniform lateral stiffness along all four sides, physically preventing the corners from lifting off your tabletop.
Supplies & Yarn Selection

- 100% Kitchen Cotton (#4 Worsted): Approximately 35 to 40 yards per coaster. Unmercerized cotton is essential because its open, matte fiber structure rapidly absorbs drink drips rather than allowing liquid to pool. For a detailed breakdown of reliable cotton brands, check our tested guide on the best cotton yarns for crochet coasters.
- Crochet Hook: US G/6 (4.0 mm). While yarn labels often recommend a 5.0 mm hook for worsted cotton, sizing down to 4.0 mm produces a dense, tight fabric that prevents mug heat or moisture from penetrating through to delicate wood surfaces.
- Measuring Tape: A brass or flexible fabric tape measure to check gauge and verify exact 4.25-inch dimensions.
- Tapestry Needle & Scissors: A blunt yarn needle for weaving in tails securely into the thick border cord.
Step-by-Step Square Coaster Pattern
This coaster is worked in two distinct stages: a solid single-crochet square center, followed by a two-round perimeter border.
Part 1: The Solid Center Square
Foundation Chain: Chain 18 loosely. (If your foundation chains tend to be tight, work this chain using a 4.5 mm hook, then switch to your 4.0 mm hook for Row 1).
Row 1: Insert hook into the second chain from the hook. Work 1 single crochet (sc) in that chain and in each remaining chain across. Turn. (17 stitches)
Rows 2–17: Chain 1 (does not count as a stitch here or throughout). Work 1 sc in the first stitch and in each stitch across. Turn. (17 stitches)
At the end of Row 17, your piece should form an exact square measuring roughly 3.75 x 3.75 inches before the border is added. Do not fasten off.
Part 2: Border Round 1 (Foundation Framing Round)
This preliminary round provides a clean row of standard stitch ‘V’s around all four sides, which is essential for hooking an even crab stitch border.
First Side (Left Edge): Chain 1. Do not turn; rotate your work 90 degrees clockwise to work down the raw row ends. Work 16 sc evenly spaced along the side edge (roughly 1 sc per row end). At the corner, work 3 sc into the very corner stitch to turn smoothly.
Second Side (Bottom / Foundation Chain): Work 15 sc across the bottom foundation chain. Work 3 sc in the corner stitch.
Third Side (Right Edge): Work 15 sc evenly up the opposite raw edge. Work 3 sc in the corner stitch.
Fourth Side (Top Edge): Work 15 sc across the top edge. In the final corner, work 2 sc (combined with the starting chain-1, this completes the 3-sc corner). Join with a slip stitch to the first single crochet.

Part 3: Border Round 2 (The Crab Stitch / Reverse Single Crochet)
Step 1 (The Backward Motion): Do not turn your work. Chain 1. Instead of working to the left as usual, you will work into the stitch immediately to the right. Insert your hook from front to back into the stitch to the right of your hook.
Step 2 (The Twist): Yarn over and draw up a loop. You will have two loops on your hook, slightly twisted around each other. Pull your hook up slightly to lengthen the loops so they stay relaxed.
Step 3 (The Finish): Yarn over and pull through both loops on your hook. You have completed one crab stitch! It will form a distinctive spiral cord texture.
Working the Edges and Corners: Continue working 1 crab stitch into each single crochet around the perimeter. When you reach the 3-sc corners, simply work 1 crab stitch into each of the 3 corner stitches—do not add extra increase stitches, but pull your working loop slightly taller around the corner curve so the border wraps cleanly without pinching. Join with a slip stitch to the starting chain, cut yarn leaving a 4-inch tail, and weave ends through the back ridge with your tapestry needle.
Why the Crab Stitch Prevents Corner Curling
Crochet fabric naturally curls toward the side where the stitches are executed because the top loops exert inward torque. In our in-depth troubleshooting guide on how to fix curling in crochet coasters and borders, we tested several edge treatments on square swatches.
Standard slip stitch borders often worsen curling by tightening the edge too much, while double crochet borders tend to ripple. The crab stitch works as a structural counter-twist: because the hook enters backwards, the resulting cord lays perpendicular across both front and back loops simultaneously. This creates lateral rigidity that holds the coaster flat against coffee tables without the need for constant re-blocking (read our full laboratory comparison on steam vs wet blocking crochet coasters).
Sizing & Drinkware Compatibility
Standard commercial coasters often measure 3.5 to 3.75 inches, which can feel cramped under modern oversized drinkware. As detailed in our crochet coaster size guide and stitch counts, a 4.25-inch finished square provides optimal surface area:
- Standard Ceramic Mugs (3.25″ Base): Leaves a comfortable 1/2-inch border of exposed textured cord around the base.
- Large Bistro & Soup Mugs (3.75″ Base): Fits securely with no overhang onto table surfaces.
- Insulated Tumblers & Pint Glasses: Provides ample room to catch condensation without water dripping off the perimeter.
- Comparison with Circular Coasters: While our easy modern circular crochet coasters look lovely on round tables, square coasters align cleanly with rectangular coffee tables, nightstands, and computer desks.
Styling Your Finished Coaster Set

A set of four square coasters in a neutral palette—such as unbleached ecru, soft sage, or warm oatmeal—pairs seamlessly with modern farmhouse and organic minimalist living rooms. Stack the four coasters neatly and tie them with a piece of natural jute twine or washed linen ribbon for an easy, thoughtful handmade gift.
Washing & Long-Term Care
- Machine Washing: Place coasters in a mesh lingerie bag and wash on a cold, gentle cycle with mild detergent. Cotton fibers bloom and soften slightly after the first wash, enhancing their absorbency.
- Drying & Reshaping: Never machine dry on high heat, which can shrink cotton unevenly. Instead, remove the damp coasters from the wash, smooth them flat with your fingers, gently pull the four corners into square 90-degree points, and allow them to air dry on a flat towel.
- Spot Treatment: For coffee or tea spills, rinse immediately under cold running water with a dab of mild dish soap before the tannin sets into the unmercerized cotton fibers.
Frequently Asked Questions
Why is my crab stitch border pulling my coaster into a bowl?
This happens when the working loop tension is pulled too tight. When inserting your hook backwards, lift the hook slightly upward to elongate the loops before yarning over and completing the stitch. The stitches should rest loosely across the edge without cinching the base fabric.
Can I use acrylic yarn for these square coasters?
Acrylic is not recommended for coasters because synthetic fibers repel water rather than absorbing condensation, causing cold drink puddles to slide off onto your furniture. Additionally, hot mugs can soften or melt synthetic yarn. Stick with 100% kitchen cotton for maximum absorbency and heat resistance.
How do I make the corners sharper?
In Border Round 1, ensure you place exactly 3 single crochets in each corner stitch. Then, during the damp reshaping step after washing, pinch each corner between your thumb and index finger to set a crisp right angle.
Attempted this as my first ever home decor crochet project! My tension was a little tight at the beginning, but your photos made following along so straightforward. Already picking yarn colors for a full set!
Do you recommend wet blocking or steam blocking for kitchen cotton projects?
For 100% cotton, a quick pin and gentle steam with an iron (held 2 inches away, never touching the yarn!) works wonders in 5 minutes flat. It relaxes the fibers and locks the edges completely square!