
There is something deeply satisfying about watching a bath bomb drop into warm water, hissing with dense, creamy effervescence while unfurling botanical petals and delicate essential oils across the tub. Yet for many home crafters, attempting to make bath bombs ends in frustration: spheres crack in half when unmolded, crumble into powdery sand, or expand prematurely on the kitchen counter like baking bread. Mastering homemade bath bombs comes down to understanding one fundamental chemical reaction and controlling moisture with surgical precision. Using an exact two-to-one ratio of baking soda to citric acid, a touch of moisturizing carrier oil, and a fine mist of witch hazel, you can craft solid, boutique-grade bath bombs that unmold cleanly and fizz vigorously every single time.
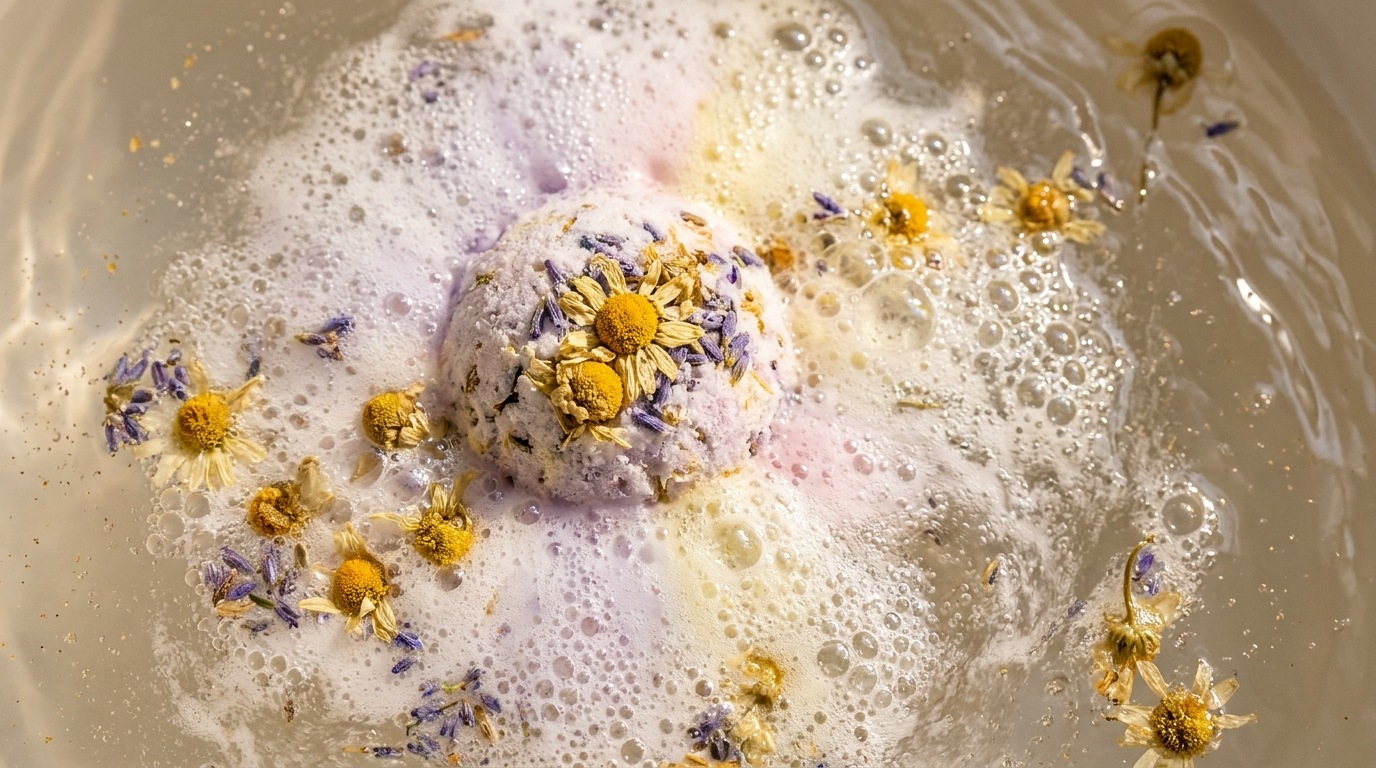
Unlike commercial bath bombs loaded with synthetic dyes that stain porcelain, artificial fragrance oils that cause skin irritation, and chemical bubbling agents like sodium lauryl sulfate, homemade bath bombs rely on pure, skin-softening pantry minerals and clean plant oils. They turn an everyday evening bath into a mindful domestic retreat that softens autumn skin without leaving a greasy ring in the tub. Whether you want to stock your bathroom shelves with soothing bedtime soaks or package handmade gift sets for the holiday season, this reliable beginner-tested formula guarantees complete success without guesswork.
Moisture & Binder Balance: Why Bath Bombs Crumble or Fizz Prematurely
To prevent the most common bath bomb failures, it helps to understand the mechanism behind the fizz. The effervescence occurs when dry sodium bicarbonate (an alkaline base) and citric acid react together in the presence of water to release carbon dioxide gas. Understanding how to manage this reaction during prep solves 95% of maker errors:
- The Premature Activation Trap: Adding liquid water directly to your dry powder triggers the chemical reaction immediately in your mixing bowl. By the time you pack the mold, the fizzing potential is already spent, resulting in a flat, dense lump. We use witch hazel or 91% isopropyl alcohol instead of water because they evaporate rapidly and contain minimal moisture.
- The “Wet Sand” Benchmark: If the mixture is too dry, the two halves of the sphere will fall apart as soon as you open the mold. If it is too wet, the bath bomb will swell, crack, and develop a bumpy, wart-like surface overnight. The mixture should feel exactly like wet beach sand that holds its shape when squeezed firmly in your fist.
- The Role of Carrier Oils: Adding 2 tablespoons of melted sweet almond oil or melted coconut oil per batch serves a dual purpose: it acts as a permanent lipid binder that cements the powders together and leaves skin feeling moisturized after your soak. Compare this moisturizing base to our liquid diy bath oil recipe and our calming diy bath salts recipe.
- Kaolin Clay as a Structural Anchor: Adding 1 tablespoon of white cosmetic kaolin clay adds firmness, slows the rate of dissolution in the tub, and helps the sphere hold its shape during the crucial unmolding stage.
The Tested 2:1 Foundation: Baking Soda, Citric Acid, Kaolin Clay & Carrier Oils
This master formula produces approximately four standard 2.5-inch bath bombs or eight mini spheres:

- 8 oz (1 cup / 225 g) Baking Soda (Sodium Bicarbonate): The primary alkaline bulk of your bath bomb. It softens water, balances acidity, and creates silky bath water.
- 4 oz (1/2 cup / 115 g) Fine Citric Acid Powder: The acidic activating agent. Ensure you buy fine-milled food-grade citric acid; coarse granular citric acid produces weak fizz and rough surfaces.
- 2 oz (1/4 cup / 55 g) Epsom Salt (Magnesium Sulfate): Adds mineral weight and soothing tub comfort, similar to our grounding diy epsom salt foot soak.
- 2 oz (1/4 cup / 30 g) Arrowroot Powder or Organic Cornstarch: Acts as a buffer that tempers the fizzing speed so your bath bomb lasts 4 to 6 minutes in the water rather than dissolving in 30 seconds.
- 1 tbsp White Kaolin Clay: Improves hardness and structural integrity, preventing crumbling during dry autumn humidity drops.
- 2 tbsp (30 ml) Sweet Almond Oil or Melted Coconut Oil: Nourishing botanical lipid that moisturizes skin and binds dry powders.
- 1 tsp (5 ml) Pure Witch Hazel in a Fine-Mist Spray Bottle: The safe moisture activator.
- 25 to 30 drops Pure Essential Oils: Gentle aromatics for mindful evening wind-downs, such as French lavender, Roman chamomile, or sweet orange.
Essential Equipment & Mold Selection: Stainless Steel Spheres vs Silicone
Having the right tools on hand makes the molding process effortless and mess-free:
- Stainless Steel Two-Piece Spherical Molds: Metal molds are vastly superior to cheap plastic clamshells. They do not bend under pressure, allow for maximum compression, and tap cleanly to release the compacted sphere without suction drag.
- Flexible Silicone Molds (Best Alternative): If you find spherical metal molds intimidating for your first attempt, use silicone baking molds with flat bottoms (such as hearts, stars, or muffin cavities). They require zero balancing and unmold with a simple push from behind. Compare this technique to our hands-on aromatherapy in the diy shower steamers recipe.
- Fine-Mesh Kitchen Sifter: Baking soda absorbs atmospheric moisture and clumps easily. Passing all dry ingredients through a sifter ensures a smooth, porcelain-like bath bomb surface.
- Large Glass or Ceramic Mixing Bowl: Metal bowls can conduct static and cause powders to stick; glass or ceramic allows you to work comfortably with your hands.
Step-by-Step Hands-On Packing, Pressing & Unmolding Walkthrough
Follow this precise sequence to ensure rock-solid bath bombs that hold together seamlessly:

- 1. Sift & Whisk Dry Ingredients: Sift the baking soda, citric acid, Epsom salt, arrowroot powder, and kaolin clay into your large bowl. Whisk vigorously for 60 seconds until completely uniform.
- 2. Blend Carrier & Essential Oils: In a small glass beaker, combine the sweet almond oil and your chosen essential oils. Drizzle the oil mixture very slowly into the dry powders while whisking continuously to distribute the fat evenly.
- 3. Spritz with Witch Hazel to Achieve “Wet Sand”: Hold your witch hazel spray bottle about 10 inches above the bowl. Give two quick spritzes, immediately digging in with your hands to blend the moisture throughout the powder. Continue spritzing 1 to 2 sprays at a time, rubbing the powder between your palms. Test frequently: take a handful and squeeze firmly. When it clumps into a solid ball without crumbling when poked, stop spritzing immediately.
- 4. Pack the Molds with Heaping Mounds: If using botanical accents, place a pinch of dried lavender buds or chamomile flowers into the bottom of one mold half. Loosely spoon the mixture into both halves, creating a tall, heaping mountain of powder on each side. Do not pack the center of the mounds down with your fingers.
- 5. The Straight-On Compression Press: Bring the two mold halves together and press them directly into each other with maximum palm force for 10 seconds. You want the loose mounds in the center to compact against each other. Crucial rule: Never twist the molds! Twisting cuts the center seam and causes the two hemispheres to split apart.
- 6. The Tap & Release: Gently tap the top metal dome with the back of a metal spoon to break the surface tension. Carefully lift off the top mold half. Invert the sphere onto a folded linen towel or parchment sheet, tap the remaining half, and lift it away cleanly.
3 Seasonal Botanical Formulations for Restful Evenings
Here are three carefully tested, balanced botanical formulations tailored to autumn and winter evenings:
Formula 1: Lavender & Golden Chamomile Wind-Down (Evening Calm)
- Master dry base (8 oz baking soda, 4 oz citric acid, 2 oz Epsom salt, 2 oz arrowroot, 1 tbsp kaolin clay)
- 2 tbsp Sweet Almond Oil
- 16 drops French Lavender (Lavandula angustifolia) Essential Oil
- 10 drops Roman Chamomile Essential Oil
- 1 tbsp whole dried chamomile blossoms and organic lavender buds placed in mold tops.
- Pairs effortlessly with our calming diy bath tea bags recipe.
Formula 2: Sweet Orange, Clove & Warm Calendula (Autumn Radiance)
- Master dry base
- 2 tbsp Jojoba Oil or Sweet Almond Oil
- 18 drops Sweet Orange (Cold-pressed or steam distilled) Essential Oil
- 4 drops Clove Bud Essential Oil
- 6 drops Atlas Cedarwood Essential Oil
- 1 tbsp dried golden calendula petals blended directly into the dry mix for sunny autumn specks.
Formula 3: Eucalyptus, Peppermint & Colloidal Oat (Steaming Tub Refresh)
- Master dry base (replace arrowroot with 2 oz finely ground colloidal oatmeal for extra skin softness)
- 2 tbsp Melted Virgin Coconut Oil
- 14 drops Eucalyptus Globulus Essential Oil
- 8 drops Peppermint Essential Oil
- 4 drops Tea Tree Essential Oil
- A pinch of crushed dried mint leaves pressed onto the surface.
Curing Environment, Humidity Control & Airtight Glass Storage
Once your bath bombs are unmolded, handling them during the first 24 hours determines their final hardness and shelf life:

- Drying Surface: Place newly molded bath bombs on a soft folded cotton towel, a silicone muffin tray, or a bed of dry bubble wrap. Hard, flat surfaces can cause the bottom of the fresh sphere to flatten under its own weight before curing.
- Avoid Bathrooms During Curing: Bathrooms are the worst place to dry bath bombs because steamy showers introduce ambient moisture into the air. Cure your bath bombs in a dry room (such as a bedroom, dining room, or pantry) for 24 to 48 hours until they feel as hard as ceramic stone.
- Airtight Storage: As soon as the spheres are fully cured, transfer them into airtight glass apothecary jars with rubber gaskets, or wrap each sphere in compostable wax paper or shrink wrap. Keeping them sealed prevents humidity in the air from slowly dulling their fizz.
- Tub Cleanup Note: Because these formulas use natural carrier oils and real dried petals, keep a small mesh drain catch over your bathtub drain to gather floating flower blossoms before draining. A quick rinse with warm soapy water removes any delicate oil residue in seconds. This fits seamlessly into our calming fall night routine habits.
Save This DIY Bath Bomb Recipe to Pinterest
Love this soothing bath craft? Save this tutorial to your DIY Bath & Beauty, Natural Skincare, or Cozy Fall Living Pinterest board so you have these exact measurements and pressing tips ready whenever cool autumn evenings call for a restorative soak!
Made a batch of this on Sunday evening after being on my feet all day. The epsom salt and botanical aroma melted away so much tension in 20 minutes flat. Kept a jar on my bathroom counter for quick weeknight resets!
Hi Maya! What size glass jar do you recommend for storing or gifting these herbal bath salts or soaks?
An 8-ounce or 12-ounce wide-mouth mason jar is perfect! It holds about 2 to 3 generous soaks and looks gorgeous tied with a piece of natural jute twine and a sprig of dried lavender or rosemary. Such a thoughtful gift!