
Instead of stressing over three different homemade pies that leave you stuck in the kitchen while everyone else is laughing by the fire, a Friendsgiving dessert board is the most relaxed way to celebrate together. Arranged with bite-sized brownies, bakery-style cookies, crisp orchard fruit, and warm caramel dip, this grazing spread lets guests nibble at their own pace while keeping your post-dinner cleanup down to a single wooden board.
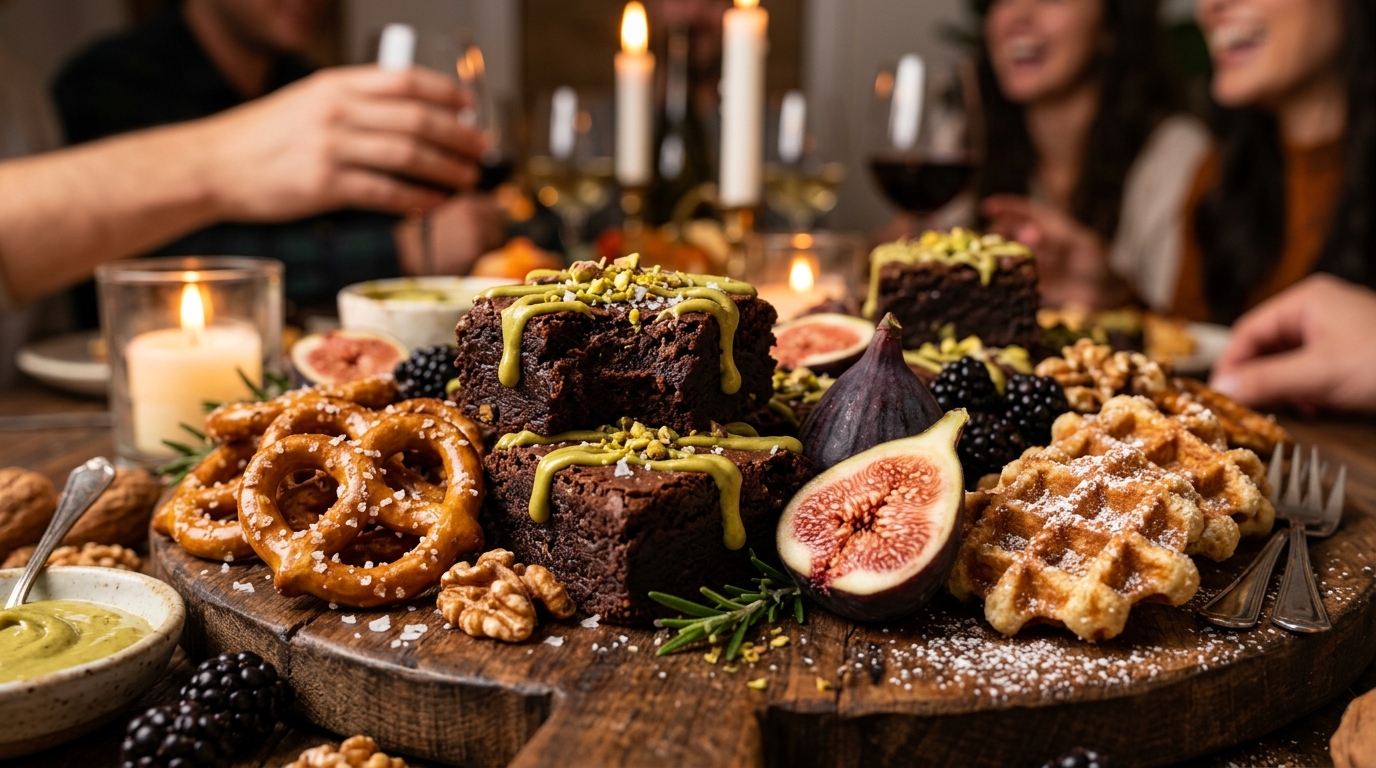
The beauty of a dessert grazing table is that it completely removes the pressure of formal plated dessert service. Much like building a budget-friendly fall charcuterie board or an easy fall brunch charcuterie board, assembling sweets on a rustic board turns dessert into a casual, communal conversation hub where guests naturally gather, linger, and sample a little bit of everything.
Why You’ll Love a Friendsgiving Dessert Board
- Zero Baking Burnout: You do not need to bake for hours before your party. Pair simple bakery staples with fresh fruit and one homemade showstopper.
- Budget-Friendly Under $38: Feeds 8 to 10 guests comfortably using affordable grocery staples, crisp seasonal apples, and store-bought dippers.
- Completely Customizable: Easy to separate gluten-free or nut-free treats onto small accent plates without compromising the visual layout.
- Stress-Free Cleanup: No pie plates, cake stands, or dessert forks to scrub. Guests graze with cocktail napkins and small tongs.
The Friendsgiving Dessert Board Shopping List & Budget
Here is our tested shopping list to feed 8 to 10 friends for roughly $36 to $38. Keeping a mix of rich chocolate, crisp fruit, and salty crunch ensures every guest finds their favorite combination:

| Category | Selected Item | Quantity / Portion | Approx. Cost |
|---|---|---|---|
| Bakery Centerpiece | Fudge brownie bites & chocolate chip cookies | 12 brownie squares + 8 cookies (halved) | $8.50 |
| Crunchy Dippers | Salted pretzel twists & cinnamon graham crackers | 1/2 box each | $5.00 |
| Fresh Orchard Fruit | Honeycrisp apples, dark figs & blackberries | 2 apples, 6 figs, 1 pint berries | $9.00 |
| Dipping Sauces | Warm salted caramel & hazelnut cocoa spread | Two 4-oz ramekins | $5.50 |
| Garnish & Nuts | Candied pecans & fresh rosemary sprigs | 1 cup pecans + 4 rosemary sprigs | $4.50 |
| Estimated Total (Feeds 8–10 Guests) | $32.50 – $37.50 | ||
Step-by-Step Board Assembly (Dry-to-Wet Mapping)
Building a gorgeous grazing board is all about following a logical layering sequence. Use this simple 5-step blueprint to ensure your board looks full, balanced, and appetizing:
1. Anchor the Dipping Bowls First: Place two small ceramic ramekins slightly off-center on your wooden board. Fill one with warm salted caramel and the other with rich hazelnut spread. These serve as your visual anchors and prevent sauces from leaking onto crisp cookies.
2. Stage the Bakery Anchors: Arrange your primary baked treats in loose, flowing ribbons around the ramekins. Cut rich brownies into bite-sized 1.5-inch squares so guests can easily pick them up with small tongs. If you want an unforgettable homemade centerpiece, Sarah Jenkins’s viral Dubai chocolate pistachio brownies or her bakery-tested chewy brown butter chocolate chip cookies add incredible artisan flair to this spread.

3. Fan the Crunchy Dippers: Tuck clusters of salted mini pretzels, graham cracker sticks, and ginger snaps along the outer edges. The salty crunch cuts through the sweet chocolate and gives guests sturdy vehicles for scooping warm caramel.
4. Layer Fresh Seasonal Produce: Fill in any bare wooden spots with thinly sliced Honeycrisp apples, halved fresh figs, and plump blackberries. Fruit brings vibrant natural color, balances rich baked treats, and keeps the board feeling fresh rather than overly heavy.
5. Add Autumn Botanical Accents: Tuck a few sprigs of fresh rosemary, whole star anise, or cinnamon sticks into the corners. These botanical touches provide a delicate autumn aroma and give the grazing table a polished, welcoming finish.
3 Practical Hosting Secrets for Dessert Boards
1. Plan for 3 to 4 Sweet Bites per Guest: After a hearty holiday meal, guests rarely want full slices of heavy pie. Calculating three to four bite-sized sweets per person ensures plenty of variety without leaving you with mounds of uneaten leftovers.
2. Prevent Fruit Browning with a Quick Citrus Splash: Slice your apples and pears up to two hours ahead of time, then briefly toss them in a bowl of cold water with one tablespoon of fresh lemon juice or club soda. Pat dry with paper towels before placing on the board so they stay crisp and bright all evening.
3. Pair with an Interactive Beverage Station: Set your dessert board near a designated drink area where friends can help themselves to warm spiced cider or coffee. Check out our guide to 7 chic Friendsgiving drink station ideas to create an easy self-serve setup that keeps guests refreshed without extra host duties.
Setting the Dessert Table: Linens & Serving Details

If you are hosting a full evening gathering, coordinating this dessert board with your main course creates a smooth transition from dinner to dessert. For an easy weeknight menu, consider our blueprint for a casual weeknight dinner party or an intimate rustic fall pasta dinner party. When dinner finishes, simply clear the plates, set down this dessert board on a neutral linen runner, and light a few low pillar candles to create an inviting, relaxed autumn atmosphere.
Make-Ahead Hosting Timeline
- The Day Before: Purchase all dry goods, cookies, and dippers. Wash and dry fruit thoroughly. If baking brownies from scratch, bake them ahead, let cool completely, slice into clean squares, and store in an airtight container at room temperature.
- 2 Hours Before Guests Arrive: Slice apples and toss in lemon water. Arrange dry cookies, pretzels, and crackers onto the wooden board. Cover lightly with plastic wrap to preserve freshness.
- 15 Minutes Before Dessert Time: Uncover the board. Warm the salted caramel in the microwave for 15 seconds so it is smooth and pourable, then place the filled ramekins onto the board alongside fresh fruit and rosemary sprigs.
- Leftover Storage: Store remaining brownies and cookies in an airtight container for up to 4 days. Keep leftover fruit refrigerated separately in glass containers.
Frequently Asked Questions
How much dessert should I prepare per guest?
Plan for 3 to 4 bite-sized sweet pieces per person. Because guests enjoy sampling several flavors, small portions allow everyone to taste cookies, brownies, and fruit without overwhelming their appetite.
Can I assemble a dessert charcuterie board in advance?
Yes, you can assemble the dry items (pretzels, cookies, brownies) up to 2 hours ahead of time and cover loosely with plastic wrap. Add sliced fruit and warm dips right before serving so crackers stay crisp and fruit stays fresh.
How do I keep sliced fruit from turning brown?
Soak sliced apples and pears in a quick bath of cold water mixed with 1 tablespoon of lemon juice or plain club soda for 3 minutes. Pat them completely dry before arranging on the board.
What is the best wooden board to use for grazing?
A 16-to-20-inch round or rectangular acacia or maple cutting board works perfectly for 8 to 10 guests. Ensure the wood is food-safe and lightly oiled before arranging unwrapped treats directly on its surface.
Pin This Friendsgiving Grazing Guide for Later
Planning your upcoming Friendsgiving or holiday gathering? Save this dessert grazing board guide to your holiday entertaining Pinterest board so you have the shopping list and styling steps ready whenever you host!
Leave a Comment