
Few textures in home crochet rival the bold, tactile presence of a giant basketweave throw blanket. By scaling traditional alternating post stitches up to twelve-stitch blocks worked with super bulky chenille yarn and a 10.0mm hook, this tested pattern produces a plush, dimensional blanket that drapes with satisfying weight and brings architectural warmth to any living room armchair or reading nook.
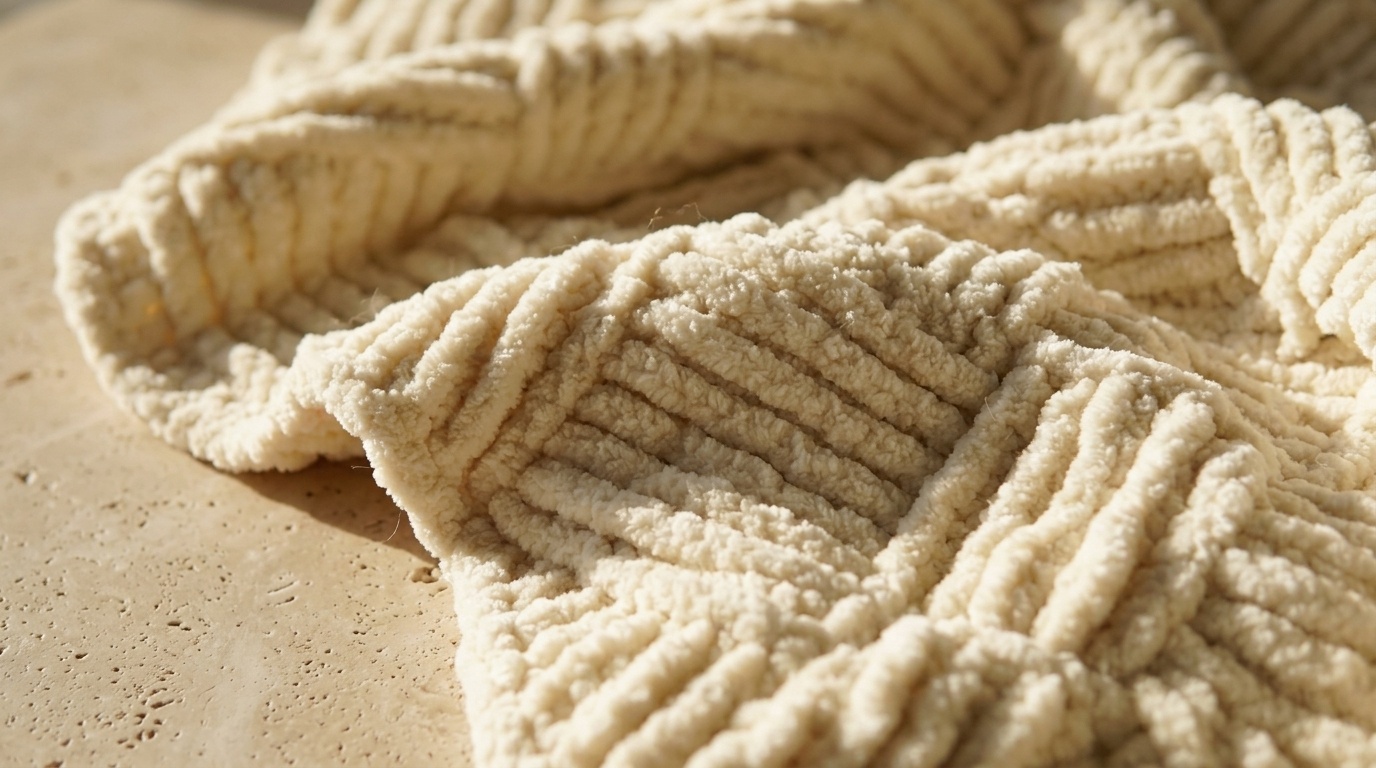
Originally conceptualized by designer Tiffany Brown of Daisy Farm Crafts and refined through multiple test swatches on our studio workbench, the beauty of this oversized weave lies in its structural balance. While small basketweave patterns can feel stiff and dense, expanding the repeat to twelve stitches across ten rows preserves a relaxed, fluid drape that molds comfortably around your shoulders without feeling rigid.
Anatomy of the Giant Basketweave: Front-Post vs Back-Post Blocks
The three-dimensional illusion of woven cloth is created entirely by manipulating where your hook enters the previous row. Rather than inserting the hook through the top V of a double crochet stitch, post stitches are worked around the vertical stem of the stitch below.
- Front Post Double Crochet (dcfp): Yarn over, insert your hook from front to back to front around the vertical post of the indicated stitch, yarn over, pull up a loop, and complete a standard double crochet. This pulls the post forward toward you, creating a raised, embossed rib.
- Back Post Double Crochet (dcbp): Yarn over, insert your hook from back to front to back around the vertical post, yarn over, pull up a loop, and complete the stitch. This pushes the post backward away from you, creating a recessed channel.
By grouping twelve front-post stitches next to twelve back-post stitches, you construct distinct raised and recessed tiles across your blanket. After working ten rows in that configuration, flipping the order shifts the pattern, producing the classic interlocking basketweave grid.
COORDINATING FIBER CRAFTS: Pair this plush throw with our tested guide on how to crochet a buttoned ribbed pillow cover with wooden buttons, or explore our companion pattern for sturdy round storage baskets with handles.
Yarn Selection & Gauge Calibration: Working with Super Bulky Chenille

Working post stitches with super bulky yarn requires attention to hook size and fiber tension. Chenille and velvet yarns have a central braided thread that holds soft pile tufts; pulling your stitches too tight can squeeze out loops (known as “worming”), while crocheting too loosely will cause the woven blocks to lose their crisp geometric edges.
| Project Specification | Standard Throw Dimensions | Maker Notes & Custom Swaps |
|---|---|---|
| Finished Size | Approx. 40.5 inches x 52 inches (103 x 132 cm) | Including the double crochet border |
| Yarn Weight & Yardage | Category 6 Super Bulky (approx. 702 yds / 639 m) | Bernat Velvet Plus (9 balls, 10.5 oz / 300 g each) or Bernat Blanket |
| Crochet Hook | Size U.S. N/15 (10.0 mm) | Ergonomic wide-grip hook to minimize wrist fatigue |
| Gauge | 6 stitches and 5 rows = 4 inches (10 cm) | Measured in established Basketweave pattern unblocked |
- Notions: A large blunt-tip yarn needle for weaving super bulky tails, a retractable tape measure, and locking stitch markers to mark row repeats.
- Critical Turning Chain Rule: The beginning chain 2 of every row counts as your turning chain. The first dcfp or dcbp of each row is worked around the second post in the row below, never the post directly beneath the turning chain.
The Foundation Chain & Row 1 Base Alignment
To avoid a tight foundation that pulls the bottom corners inward into an hourglass shape, work your foundation chain with relaxed hand tension or use a 11.5mm hook for the chain only before switching back to your 10.0mm hook for Row 1.
Foundation Chain: Chain 64 loosely.
Row 1 (Foundation Row): Work 1 dc into the 4th chain from your hook (the 3 skipped chains count as 1 dc and turning chain). Work 1 dc into each remaining chain across to the end of the chain. Turn. (61 double crochet stitches plus turning chain; 62 posts total).
Take a moment to count your posts. Because this pattern relies on twelve-stitch blocks, an exact count of 62 post anchors is essential for keeping the edges square and symmetric.
Executing the 12-Stitch Block Repeat (Rows 2 Through 11)

Rows 2 through 11 establish the first tier of the basketweave grid. Notice that when working back on wrong-side rows, you must reverse your post stitches (working back-post over front-post and vice versa) to keep the texture aligned on the same side of the fabric.
- Row 2 (Right Side): Ch 2. Skip the first stitch. *Work 1 dcfp around each of the next 12 stitches. Work 1 dcbp around each of the next 12 stitches. Repeat from * across to the last 12 stitches. Work 1 dcfp around each of the last 12 stitches. Work 1 standard dc into the top of the turning chain-2. Turn.
- Row 3 (Wrong Side): Ch 2. Skip the first stitch. *Work 1 dcbp around each of the next 12 stitches. Work 1 dcfp around each of the next 12 stitches. Repeat from * across to the last 12 stitches. Work 1 dcbp around each of the last 12 stitches. Work 1 standard dc into the top of the turning chain-2. Turn.
- Rows 4 to 11: Repeat Rows 2 and 3 four times. This completes the first full tier of three raised blocks and two recessed blocks spanning ten vertical rows.
Shifting the Pattern: The Block Swap Sequence (Rows 12 Through 21)
To create the alternating woven grid, the stitch sequence flips at Row 12, placing back-post stitches directly above front-post stitches and vice versa.
- Row 12 (Right Side Shift): Work as Row 3. Ch 2. Skip the first stitch. *Work 1 dcbp around each of the next 12 stitches. Work 1 dcfp around each of the next 12 stitches. Repeat from * across to the last 12 stitches. Work 1 dcbp around each of the last 12 stitches. Work 1 dc into the turning chain-2. Turn.
- Row 13 (Wrong Side Shift): Work as Row 2. Ch 2. Skip the first stitch. *Work 1 dcfp around each of the next 12 stitches. Work 1 dcbp around each of the next 12 stitches. Repeat from * across to the last 12 stitches. Work 1 dcfp around each of the last 12 stitches. Work 1 dc into the turning chain-2. Turn.
- Rows 14 to 21: Repeat Rows 12 and 13 four times. This completes the second tier of alternating blocks.
- Body Completion: Repeat Rows 2 through 21 two more times (for a total of six complete tiers of woven blocks). Do not fasten off.
The Double Crochet Framing Border & Corner Transitions

Because post stitches have varying elasticity compared to plain double crochet, adding a clean, continuous framing border stabilizes the perimeter and locks the outer edges flat.
Working the Border:
- Chain 1 without turning your work. Working along the top edge, work 1 dc into each stitch across to the corner.
- At each of the four corners, work 3 dc into the same corner space. This creates a neat ninety-degree turn that prevents the corners from curling inward.
- Along the vertical row ends, work 2 dc evenly into the side of each double crochet row post, taking care not to place stitches too close together (which causes ruffling) or too far apart (which causes bunching).
- Work 1 dc into each foundation chain along the bottom edge, 3 dc into the final corner, and join with a slip stitch into your first double crochet stitch. Fasten off, leaving an 8-inch tail.
- Weave in all tails securely using a large bent-tip tapestry needle, splitting yarn plies on the wrong side to prevent silky chenille ends from working loose during wash cycles.
DISCOVER MORE TESTED HOME PATTERNS: If you enjoy rhythmic blanket projects, check out our masterclass on how to crochet a waffle stitch baby blanket or our guide to the best stitches for chunky crochet blankets.
Maker Workshop Q&A: Sizing Multiples, Preventing Edge Flare & Washing Chenille
How can I adjust the size to make a smaller baby blanket or larger bed throw?
The stitch multiple for this giant basketweave pattern is 24 plus 16 (plus 3 for your turning chain). To make a wider bed throw, add 24 chains to your foundation for every additional block pair you wish to add (e.g., chain 88 for 5 blocks across, or chain 112 for 7 blocks across). To adjust the length, simply add or subtract 20-row tier repeats.
Why are the side edges of my throw flaring outward wider than the center?
Edge flare occurs when the outer post stitches are worked looser than the center body. Always ensure your hook is held parallel to the row when completing the final post stitch, and double-check that you are working your single edge double crochet into the turning chain-2 rather than into the gap space.
How should I wash and dry a super bulky chenille or velvet blanket?
Chenille and velvet fibers are sensitive to high heat. Machine wash on the gentle cycle with cold water in a large mesh laundry bag. Never use fabric softener, which coats chenille fibers and causes them to shed. Tumble dry on air-only (no heat) or lay flat over clean towels on a clothes airer away from direct sunlight.
Save This Chunky Basketweave Throw Pattern to Pinterest
Looking for your next relaxing weekend crochet project? Save this pin to your Crochet Blankets or Cozy Home Decor board on Pinterest so you have the stitch chart, yarn requirements, and border guide whenever you need it!
Hooked this waffle stitch blanket for my niece’s nursery! Once the repeating rows clicked after row 4, it was the most relaxing project to work on in the evenings. The texture is so squishy and thick without being stiff at all. Thank you Julian!
Hi Julian! How many yards of yarn should I budget if I want to upscale this to a generous adult throw?
For a full 50×60-inch adult throw in waffle stitch (which is a bit of a yarn eater due to the front-post double crochets), you’ll want to budget around 2,800 to 3,200 yards of DK or worsted weight yarn. The cozy, squishy result is worth every yard!