
A well-crafted accent pillow is the quickest way to bring warmth and tactile depth to a neutral armchair or sofa, but sewn envelope covers can stretch out of shape and concealed zippers are tedious to install. This tested pattern uses horizontal-bar half double crochet to produce crisp, knit-look vertical ribs, finished with five natural wooden buttons that create a functional, removable closure with timeless maker appeal.
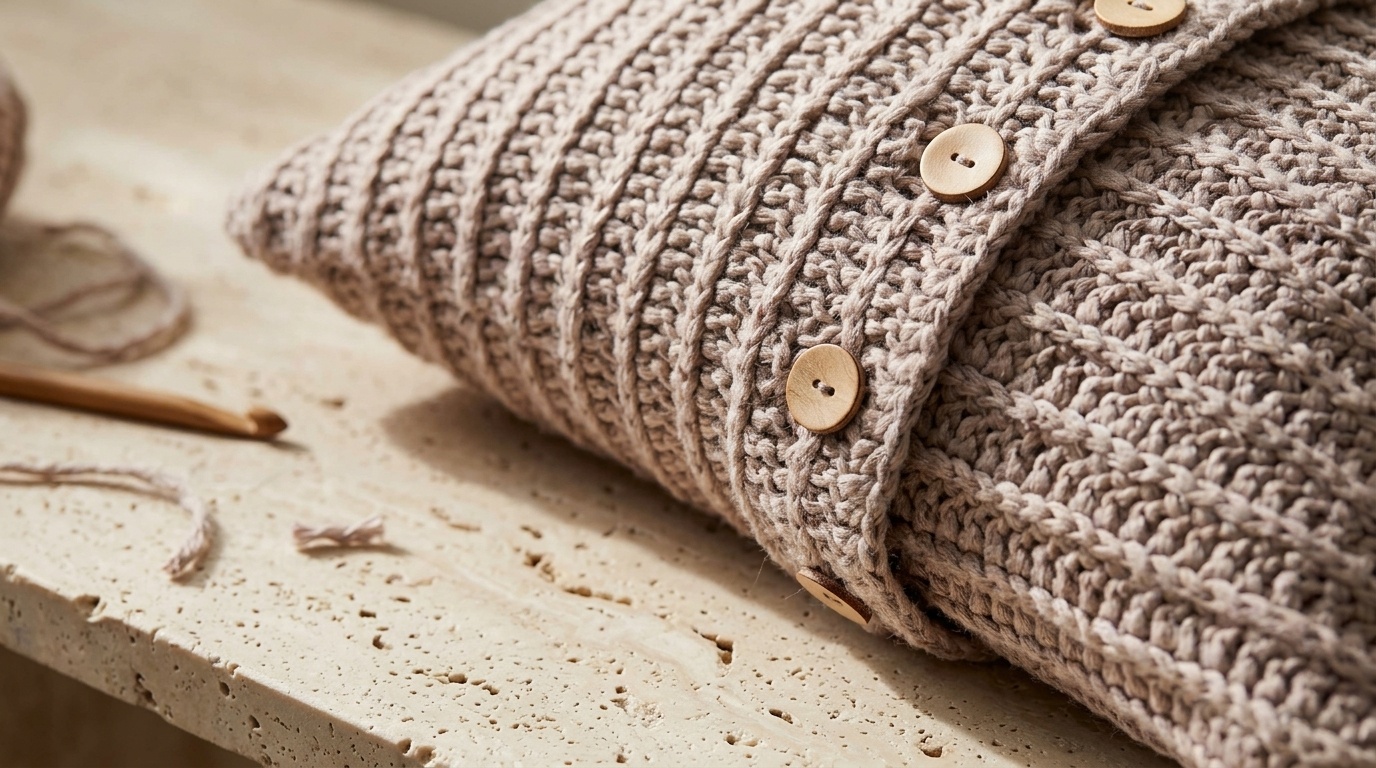
Unlike standard back-loop-only stitches that produce stretchy, elastic accordions prone to sagging under body weight, the third-loop camel stitch creates a denser, more stable fabric. When paired with a tailored buttonhole placket, the cover holds its crisp 18-inch square proportions over a plump insert without gaping between fastenings or bunching at the corners.
COZY LIVING ROOM COORDINATE: Complete your seating ensemble with our tested masterclass on how to crochet a chunky basketweave throw blanket featuring oversized post-stitch blocks.
The Knit-Look Secret: How the Third Loop Reorients Your Stitches
Every half double crochet (hdc) stitch has three distinct loops: the familiar front and back loops that form the top “V,” plus a third horizontal bar running across the body of the stitch created by the initial yarn-over. In standard crochet, you insert your hook under both strands of the top V. When you intentionally bypass that top V and work exclusively into the third horizontal bar, something transformative happens to the stitch anatomy.
Because your hook enters below the top edge, the entire top V is pushed forward and rotated onto the right side of the fabric. As you work row after row, these forced-forward V-stitches align vertically, creating clean braided columns that look virtually indistinguishable from traditional knit-and-purl columns. Better yet, because the stitch base remains anchored firmly, the fabric resists the excessive lengthwise stretching that causes loose cushion covers to look sloppy after a few weeks of lounging.
STORAGE COORDINATE: Looking to pair your handmade cushions with cozy living room storage? Explore our step-by-step masterclass on how to crochet sturdy round baskets with handles in three nesting sizes for throws and craft supplies.
Materials & Gauge Check: Bulky Yarn and Wooden Accent Buttons

Choosing the right yarn fiber determines both the crispness of the stitch definition and how comfortably the pillow rests against your skin. For this project, a category 5 bulky wool-blend or soft suede-finish acrylic yarn provides the ideal balance of thickness and stitch clarity.
| Project Element | Specification | Notes & Tested Substitutions |
|---|---|---|
| Finished Size | 18 inches x 18 inches (45.5 x 45.5 cm) | Sized for a plump 18″ or 20″ square insert |
| Yarn Weight | Category 5 Bulky (approx. 430 yds / 395 m) | Bernat Suede-ish (1 ball, 7.9 oz / 225 g) or 2 strands worsted |
| Crochet Hook | Size U.S. J/10 (6.0 mm) | Ergonomic handle recommended for steady third-loop work |
| Accent Buttons | 5 natural circular wooden buttons (1.25″) | Unfinished or lightly oiled birch / olive wood |
| Tension Gauge | 14 sts and 9 rows = 4 inches (10 cm) | Worked in third-loop hdc pattern unblocked |
- Notions: Locking stitch markers to count row repeats, a blunt steel tapestry needle, sewing needle and matching thread for button attachment, and an 18-inch feather-down or polyfill pillow insert.
- Gauge Rule: Work a 15-stitch swatch over 10 rows in pattern. If your swatch is wider than 4.25 inches across 14 stitches, switch down to a 5.5mm (US I/9) hook to prevent a floppy, oversized cover.
Crocheting the Buttonhole Flap: Clean Gaps Without Weak Edges
The cover is constructed in two matching rectangular pieces: the Buttonhole Side (which incorporates five built-in gaps along its border) and the Button Underlap Side (which provides a solid anchor strip beneath the closure). Beginning with the buttonhole side establishes your exact stitch tension early.
Foundation and Setup:
Chain 61 loosely.
Row 1 (Right Side): Work 1 hdc in the 3rd chain from your hook (the skipped 2 chains do not count as a stitch here or throughout). Work 1 hdc in each remaining chain to the end of your foundation chain. Turn. (59 hdc total)
Row 2: Ch 2. Working exclusively into the horizontal bar (third loop) created by the hdc on the front face of your work, work 1 hdc in each stitch across to the end of the row. Turn. (59 hdc)
Row 3 (Buttonhole Row): Ch 2. Working in the horizontal third loop, work 1 hdc in each of the first 6 stitches. *Chain 2 loosely, skip the next 2 stitches (creating the buttonhole gap), then work 1 hdc in each of the next 7 stitches. Repeat from * 3 more times across the row. Chain 2, skip 2 stitches, then work 1 hdc in each of the last 6 stitches. Turn. (Exactly 5 buttonholes formed across 59 stitches)
Row 4 (Locking the Gaps): Ch 2. Working in the horizontal third loop of body stitches and working 2 hdc directly into each chain-2 space, work 1 hdc in each stitch across to the end. Turn. (59 hdc restored)
Row 5: As Row 2. Work 1 hdc in each third loop across. Turn. (59 hdc)
Working the Textured Body Rows for an 18-Inch Cushion Form

With the buttonhole border secured, the main body of the cushion develops into a soothing, rhythmic repeat of Row 2. By continuing to work into the front horizontal bar on both right-side and wrong-side rows, the fabric produces reversible, alternating ribbed channels with rich tactile depth.
- Pattern Repeat: Repeat Row 2 continuously until your fabric measures exactly 16.5 inches (42 cm) from the foundation edge, making sure to end on a Wrong Side row.
- Reinforced Top Placket Rows: Work the next 2 rows as Row 3 and Row 4 (working a matching set of buttonholes if crafting a double-sided opening, or simply repeat Row 2 for a clean solid back). Work 1 final row as Row 2 to seal the top edge. Fasten off, leaving a 12-inch tail.
Crocheting the Solid Underlap & Aligning the Five Button Anchors
To prevent the white fabric of your pillow form from peeking through between buttonholes, the underlap piece must extend a full 2 inches beneath the buttonhole placket.
The Button Side: Work exactly as given for the Buttonhole Side through Row 2, omitting all buttonhole skips in Row 3 (simply work Row 2 across every single row). Continue the third-loop hdc pattern until the piece matches the full finished length of the buttonhole piece. Fasten off.
Aligning and Securing the Buttons:
Lay the solid underlap piece completely flat on your worktable with the right side facing up. Lay the buttonhole side directly on top, overlapping the buttonhole flap by 2 inches so that both pieces together form an exact 18-inch square.
- Insert locking stitch markers through each of the five buttonholes directly into the underlap fabric below to mark the exact center point for each button.
- Using doubled upholstery thread or matching yarn split to two plies, sew each 1.25-inch wooden button securely in place. Make 8 to 10 passes through the button holes, then wind the thread 4 times around the base of the button beneath the wood to create a small “shank.” This shank allows the thick ribbed flap to fasten smoothly without puckering the fabric around the button.
Assembly, Side Seaming & Inserting the Pillow Form

With buttons securely sewn, fasten the five buttons through their corresponding buttonholes. Position the button placket either centered across the front of the cushion for a bold craftsman aesthetic, or shifted 2 inches from the top edge for a modern asymmetrical look.
- Side Seaming: Turn the fastened cushion cover inside out so the wrong sides are facing you. Pin the side edges together with locking stitch markers to ensure the ribs align cleanly across the seams.
- Mattress Stitch Join: Thread your tapestry needle with an 18-inch length of working yarn. Join the side edges using a firm mattress stitch or slip-stitch seam, catching only the inner loops of the edge stitches to create a flat, unobtrusive seam that will not create uncomfortable lumps when leaned against. Repeat for the opposite side seam.
- Inserting the Form: Unfasten all five wooden buttons. Compress your 18-inch or 20-inch pillow form by folding it in half like a taco, slide it deep into the four corners of the crocheted cover, and gently release it so the insert expands into every seam. Fasten the buttons to seal the cover.
MORE COZY TEXTILE PROJECTS: Continue elevating your living room with our tested guide on how to crochet double-thick textured hot pads or explore our pattern for a chunky ribbed cushion cover.
Maker Q&A: Fixing Gap Between Buttons, Curling Flaps & Washing Care
Why is there a visible gap between my buttons when the pillow form is inserted?
Gaping occurs when the cushion cover is crocheted too small for the insert, putting excessive lateral strain on the closure. An 18-inch cover should have a relaxed, snug fit over an 18-inch form. If gaping persists, add two additional buttons between the existing spaces, or use a 1.25-inch button rather than a 1-inch size to provide wider fabric overlap coverage.
Why is the buttonhole edge curling upward instead of lying flat?
Curling along the button placket is almost always caused by crocheting the chain-2 buttonhole gaps too tightly. When working Row 3, make sure your chain 2 is relaxed and matches the width of the two skipped stitches below. A quick light steam with a garment steamer held 2 inches away from the wrong side of the flap will relax the fibers and lock the edge completely flat.
How should I wash and care for this buttoned cushion cover?
Always unfasten the buttons and remove the inner pillow form before cleaning. Hand wash the crocheted cover in cool water using gentle wool wash, press out excess water between clean dry bath towels, reshape square, and lay flat on a drying rack away from direct sun. Treat unfinished wooden buttons with a drop of food-safe mineral oil once a year to preserve their natural luster.
Save This Buttoned Crochet Pillow Pattern to Pinterest
Ready to upgrade your living room cushions? Save this pin to your Crochet Home Decor or DIY Living Room board on Pinterest so you have the stitch diagram, buttonhole math, and assembly guide ready whenever you need it!
Hooked this ribbed cushion cover over the weekend for our reading armchair! Working in the back loops created such rich, defined ridges that look like high-end store-bought knitwear. The envelope closure made slipping in the 18×18 pillow insert effortless.
Hi Julian! Did you use a wool blend or chunky acrylic for this pillow, and how does it hold up against pilling?
Hi there! I used a chunky wool-acrylic blend (80% acrylic, 20% wool). The acrylic gives it great structural memory and keeps it budget-friendly, while the wool adds that cozy warmth. For high-traffic couch use, it resists pilling wonderfully!